
Publish to Your Personal GitHub Repository
Prerequisites
1. Prepare Plugin Project
2. Initialize Local Plugin Repository
3. Connect Remote Repository
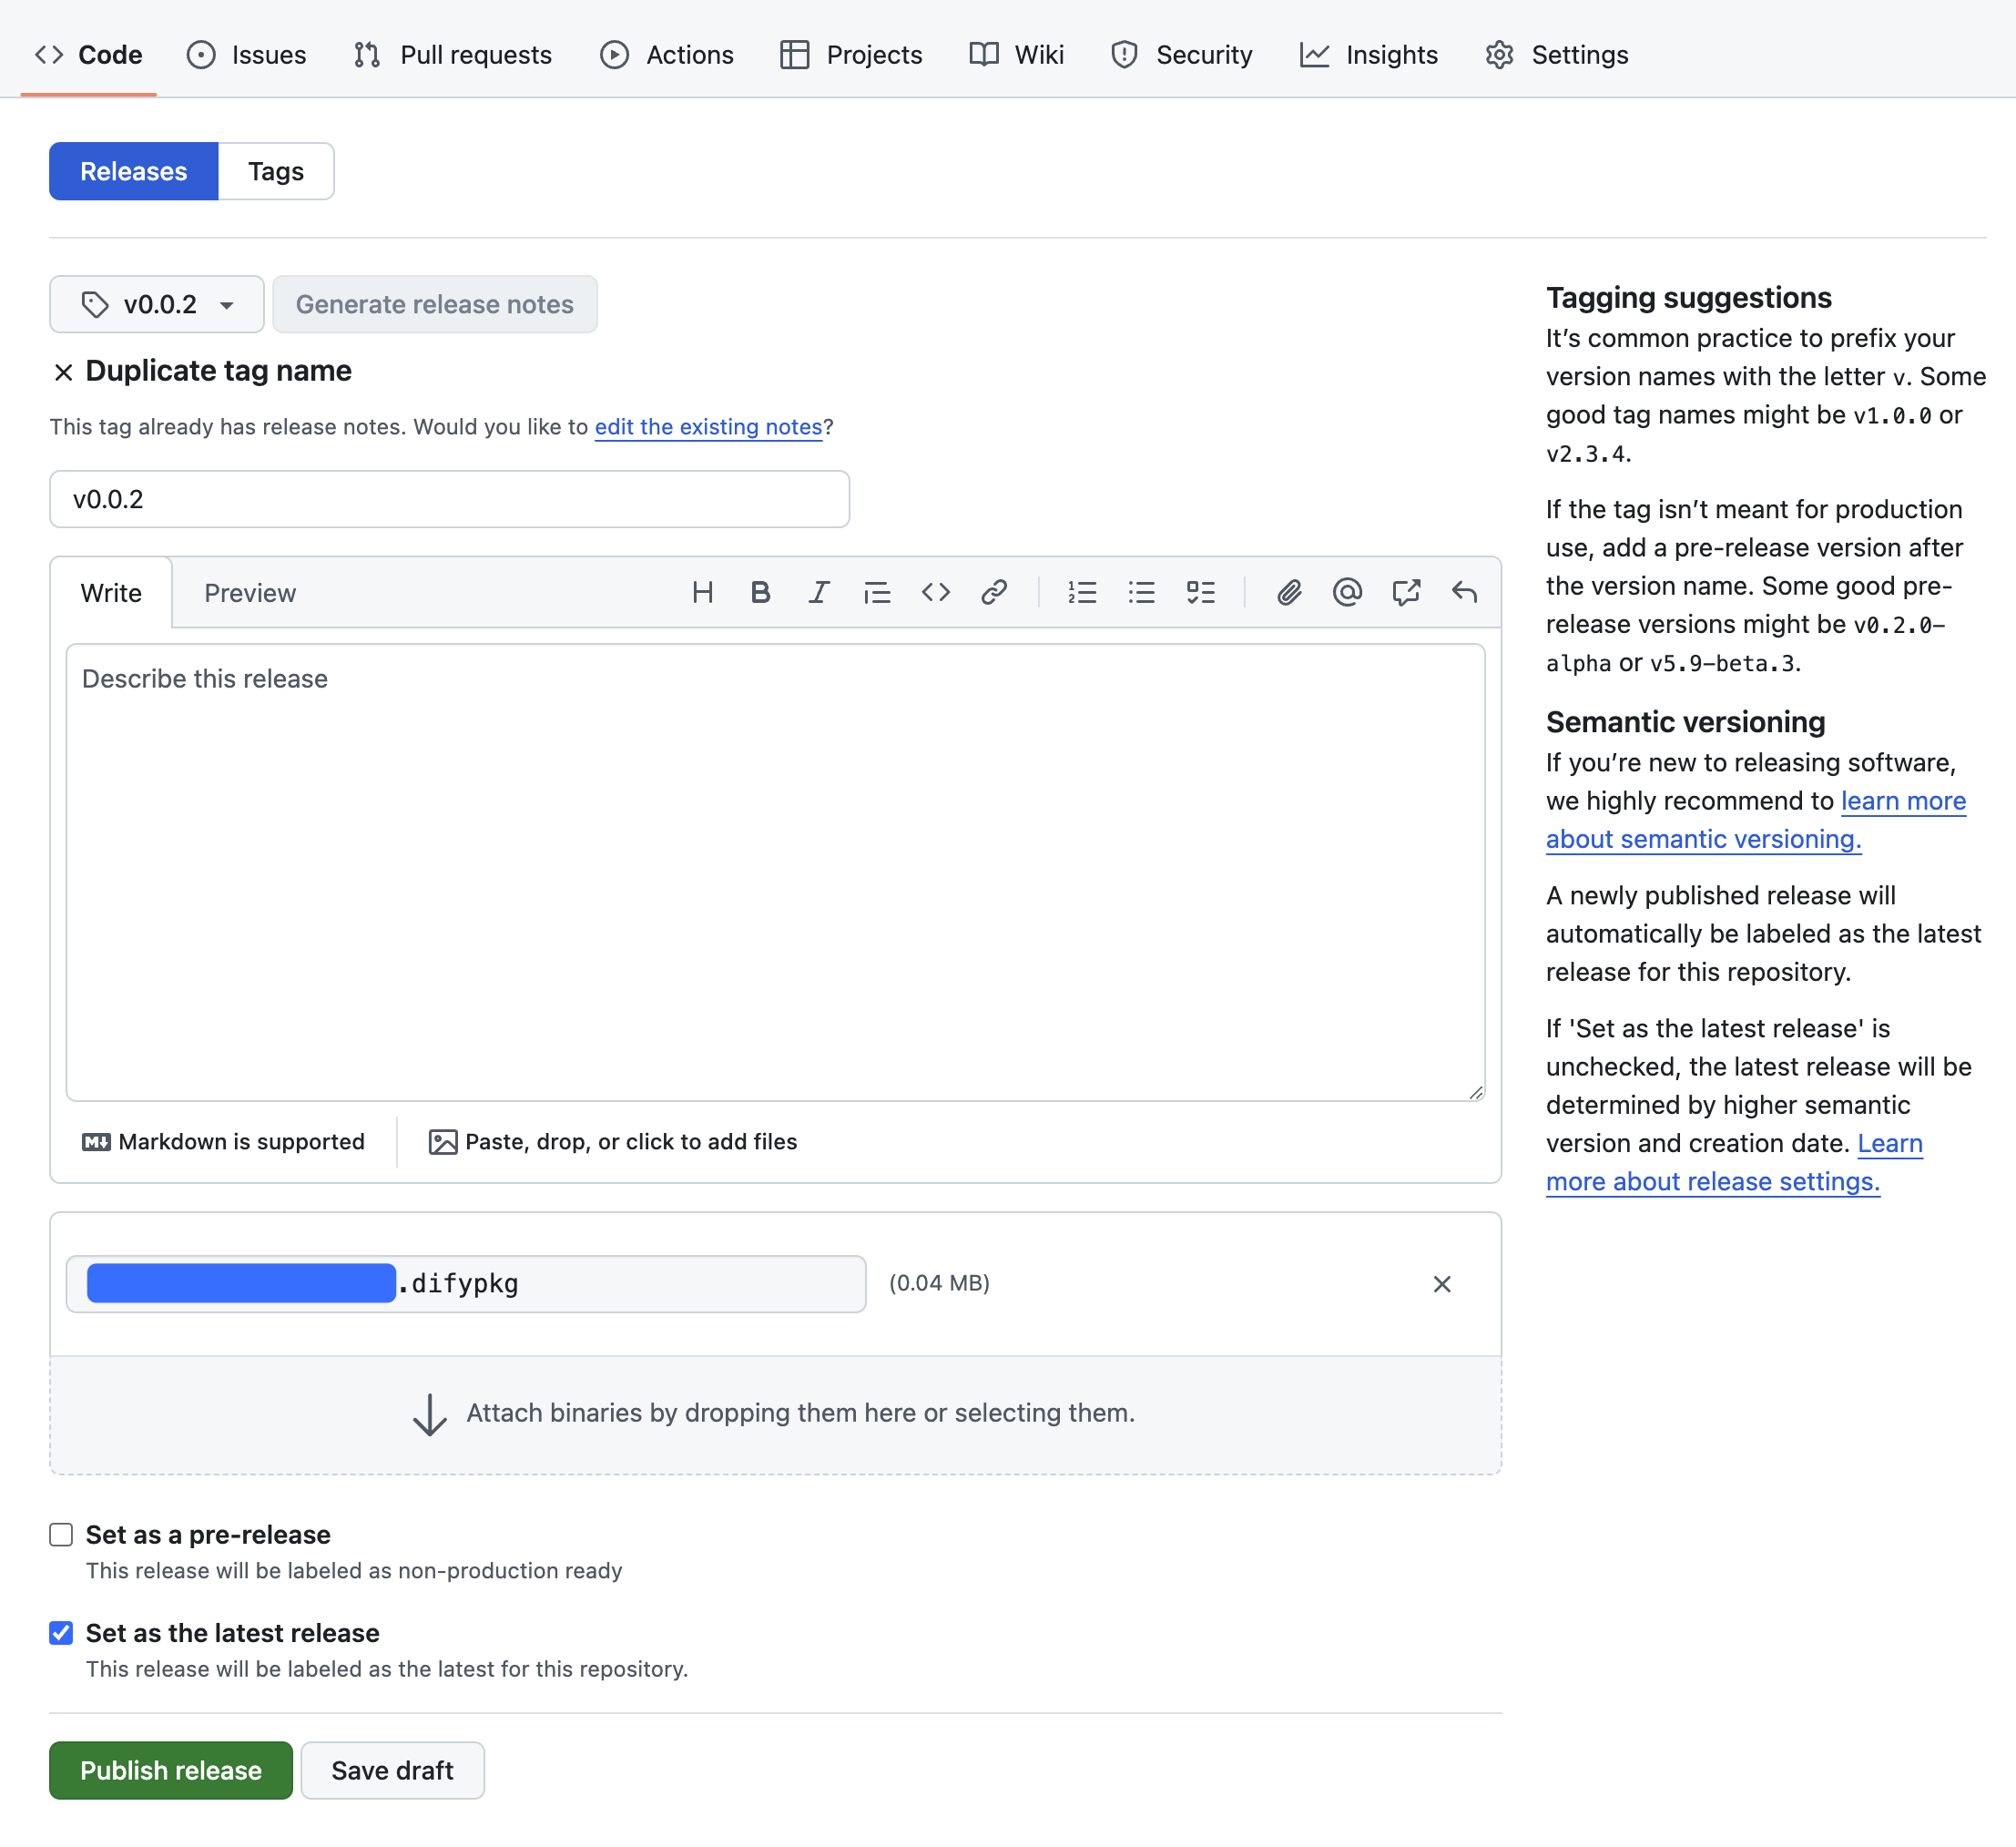
4. Upload Plugin Files
5. Package Plugin Code
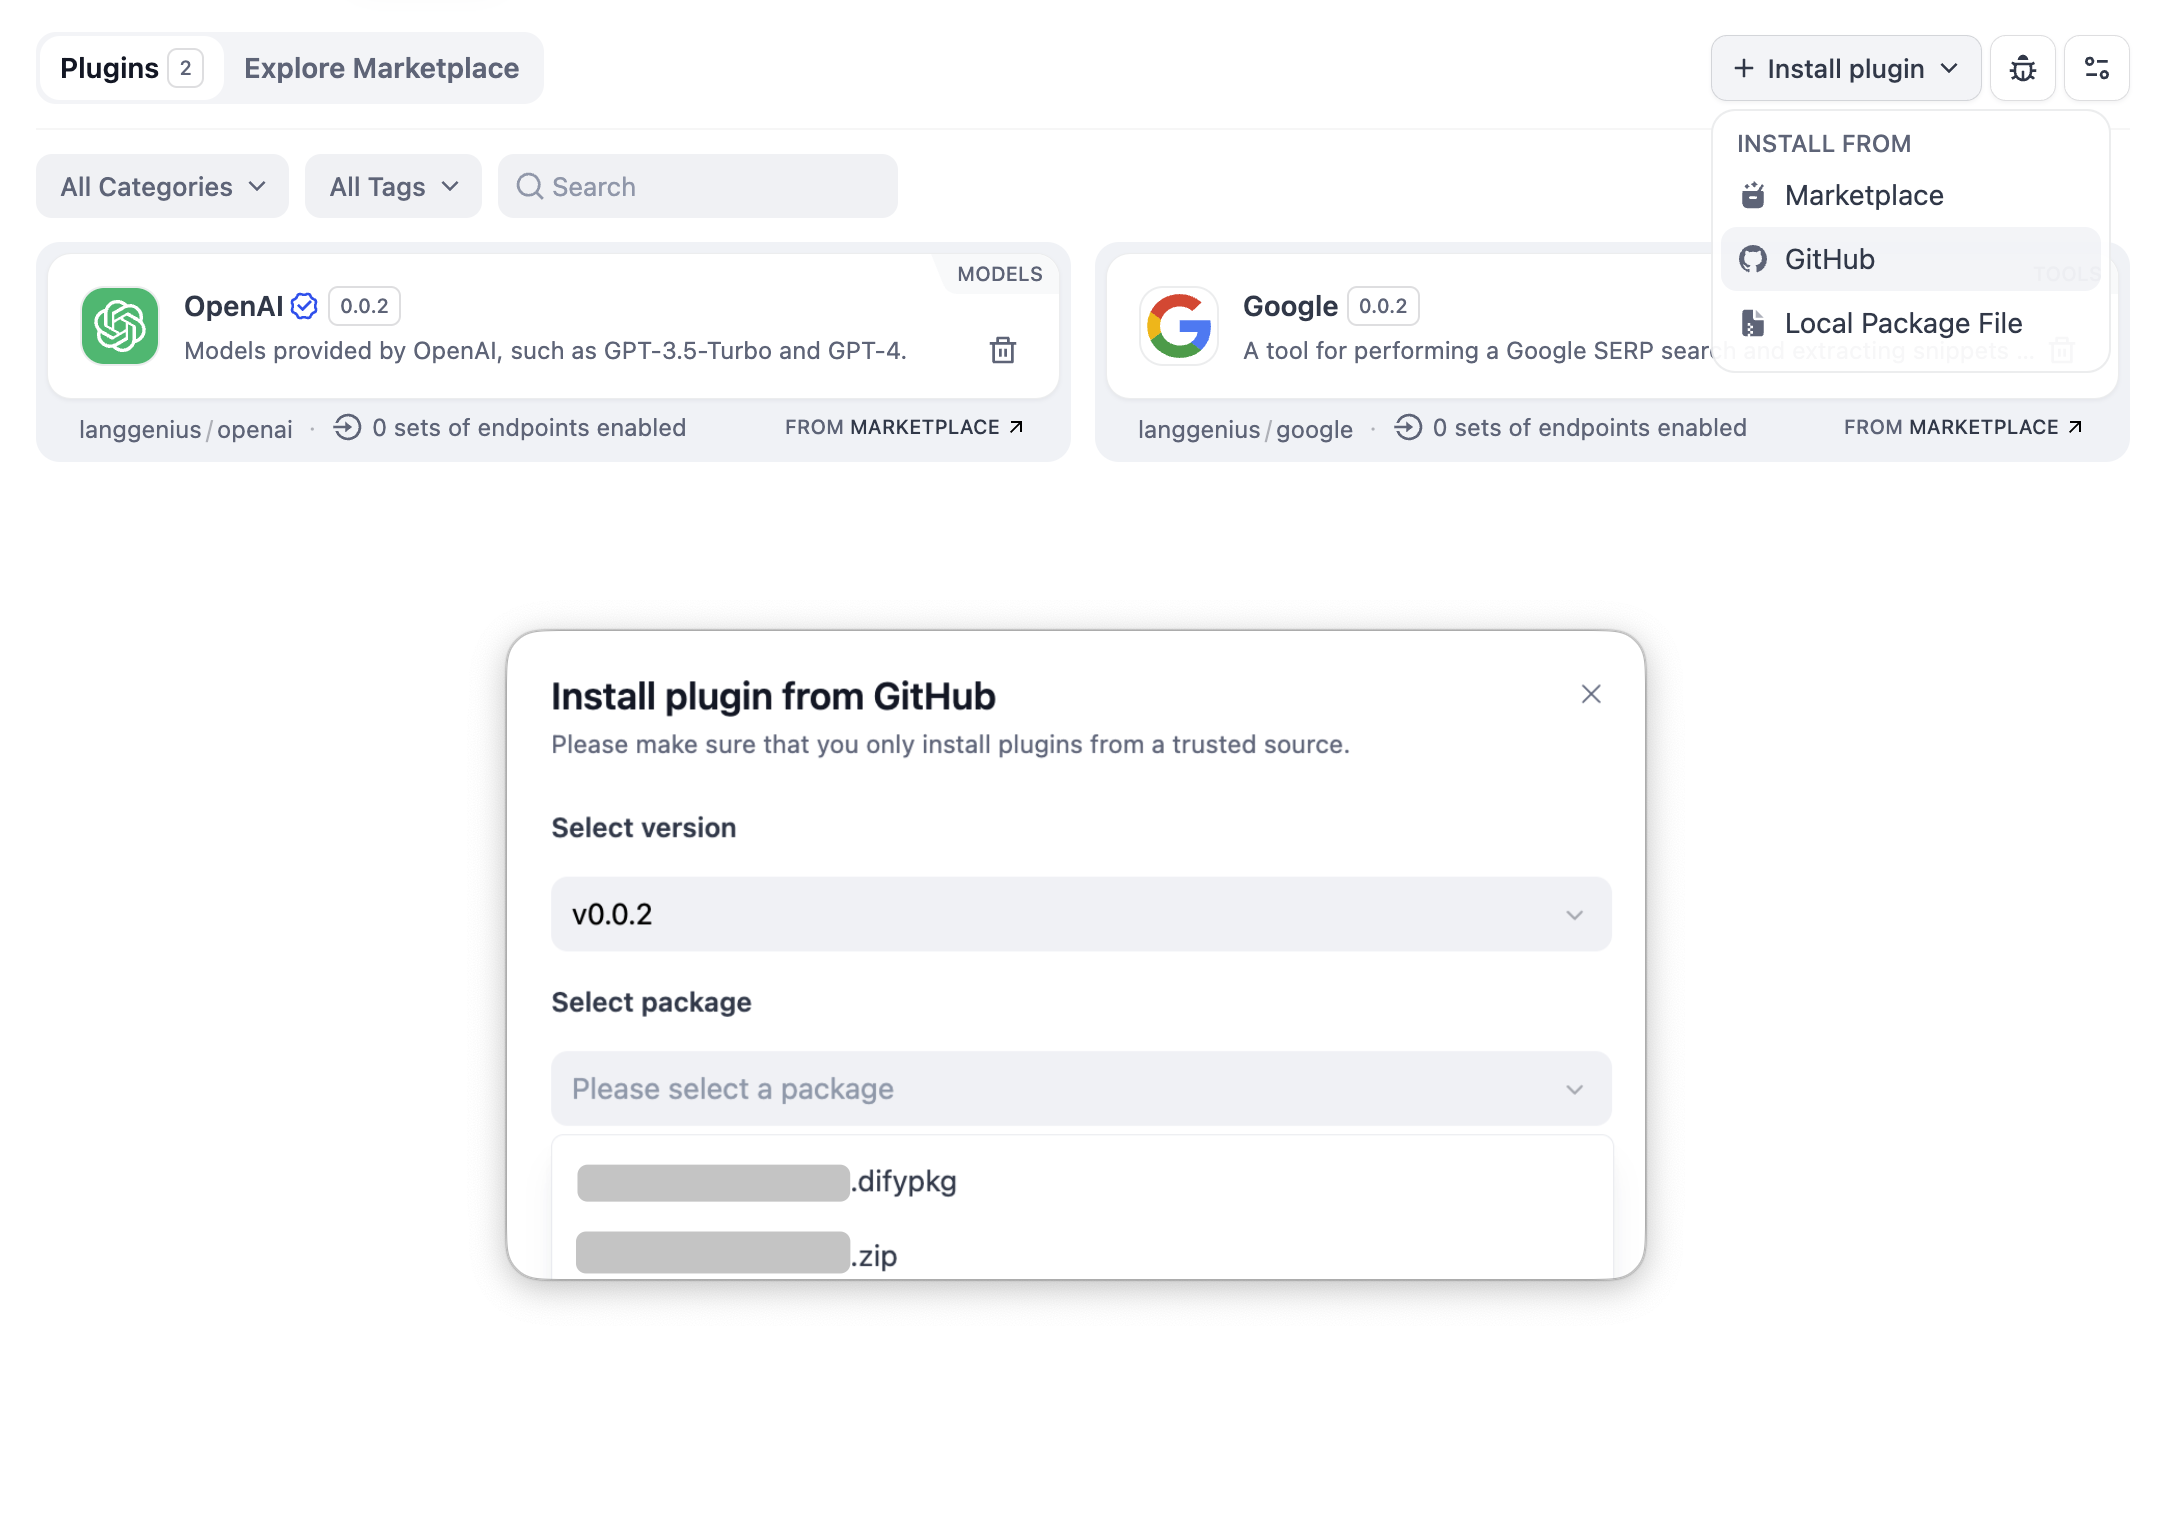
Installing Plugins via GitHub
Last updated