
Maintain Documents
Manage Documentations in the Knowledge Base
Adding Documentations
A knowledge base is a collection of documents. Documents can be uploaded by developers or operators, or synchronized from other data sources. Each document in the knowledge base corresponds to a file in its data source—for example, a Notion document or an online webpage.
To upload a new document to an existing knowledge base, go to Knowledge Base > Documents and click Add File.
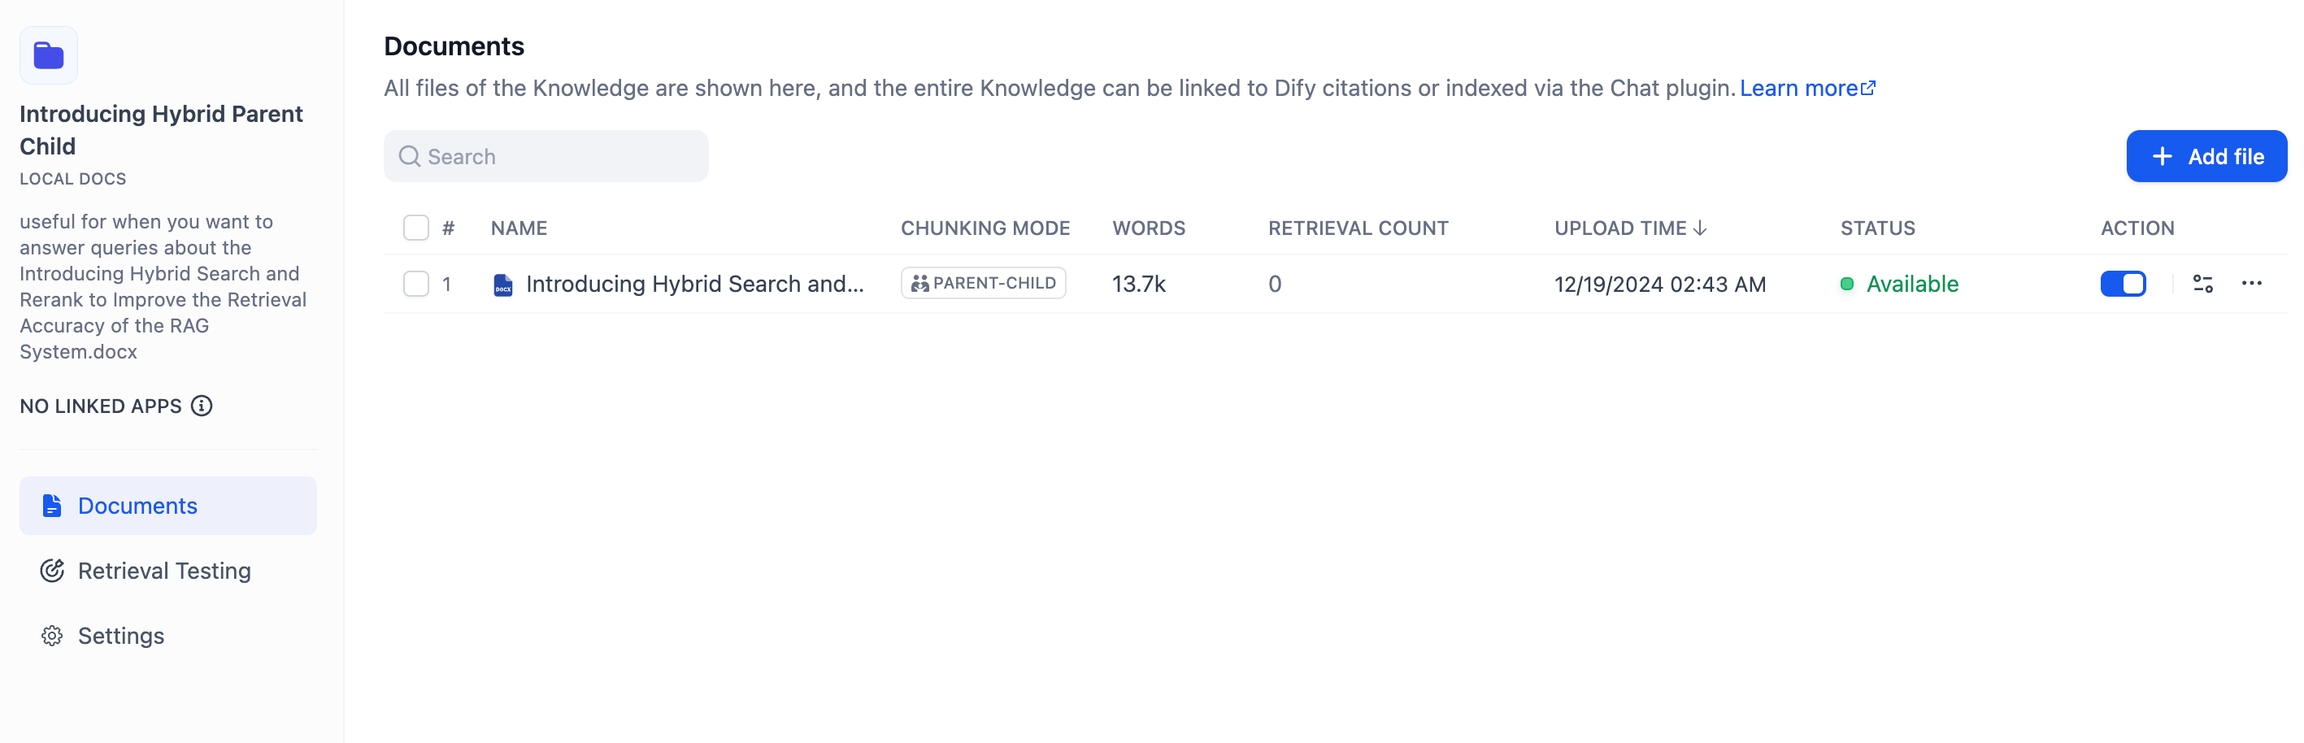
Disable / Archive / Delete document
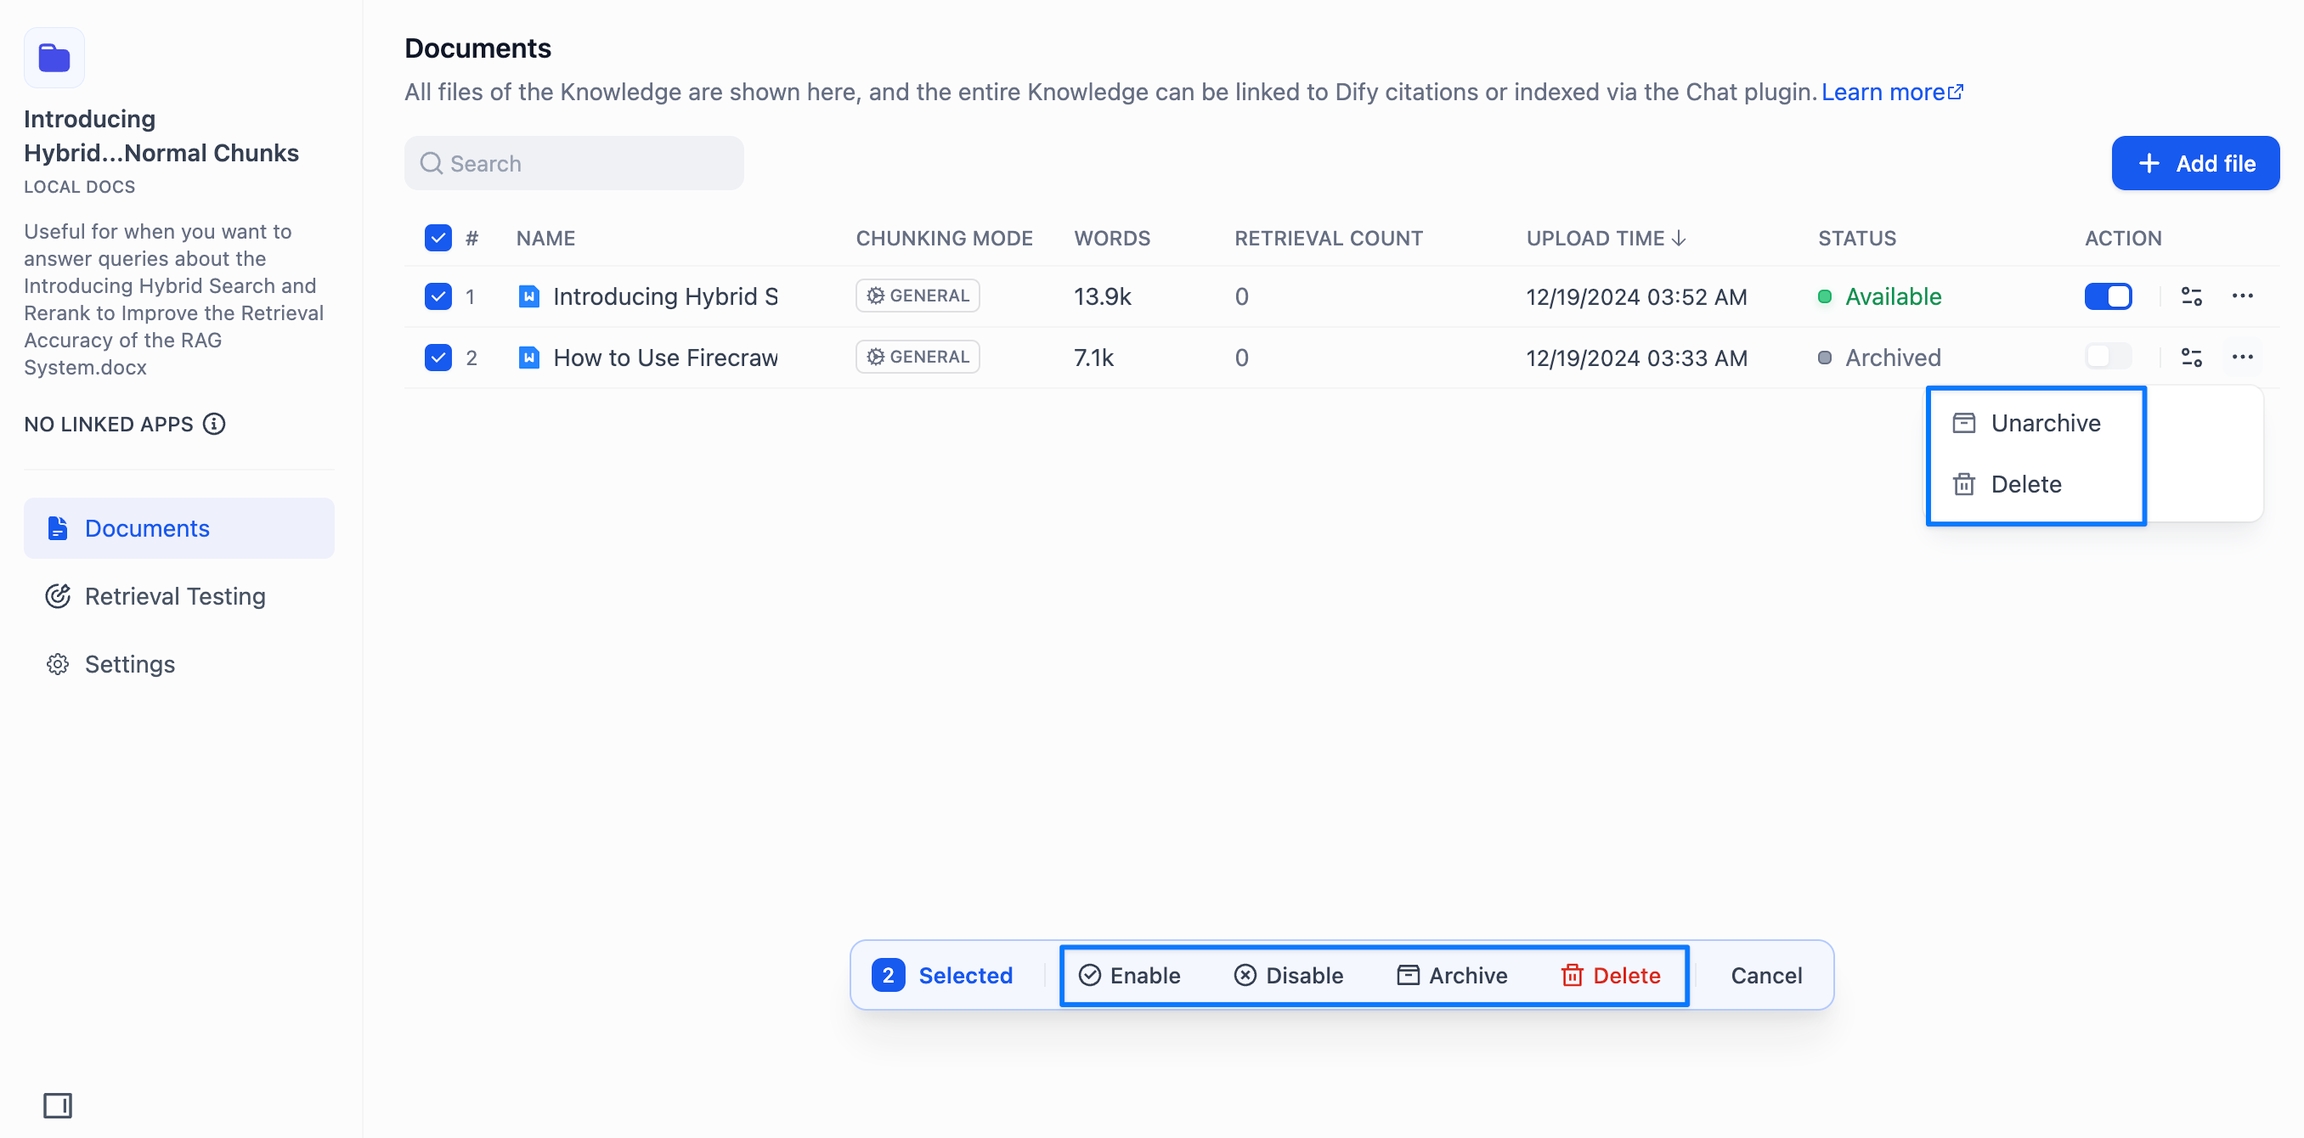
Enable: Documents that are currently in normal status can be edited and retrieved in the knowledge base. If a document has been disabled, you can re-enable it. For archived documents, you must first unarchive them before re-enabling.
Disable: If you don’t want a document to be indexed during use, toggle off the blue switch on the right side of the document to disable it. A disabled document can still be edited or modified.
Archive: For older documents that are no longer in use but you don’t want to delete, you can archive them. Archived documents can only be viewed or deleted and cannot be edited. You can archive a document from the Knowledge Base’s Document List by clicking the Archive button, or within the document’s details page. Archiving can be undone.
Delete: ⚠️ Dangerous Option. For incorrect documents or clearly ambiguous content, select Delete from the menu on the right side of the document. Deleted content cannot be restored, so proceed with caution.
The above options all support batch operations after multiple documents are selected.
Note:
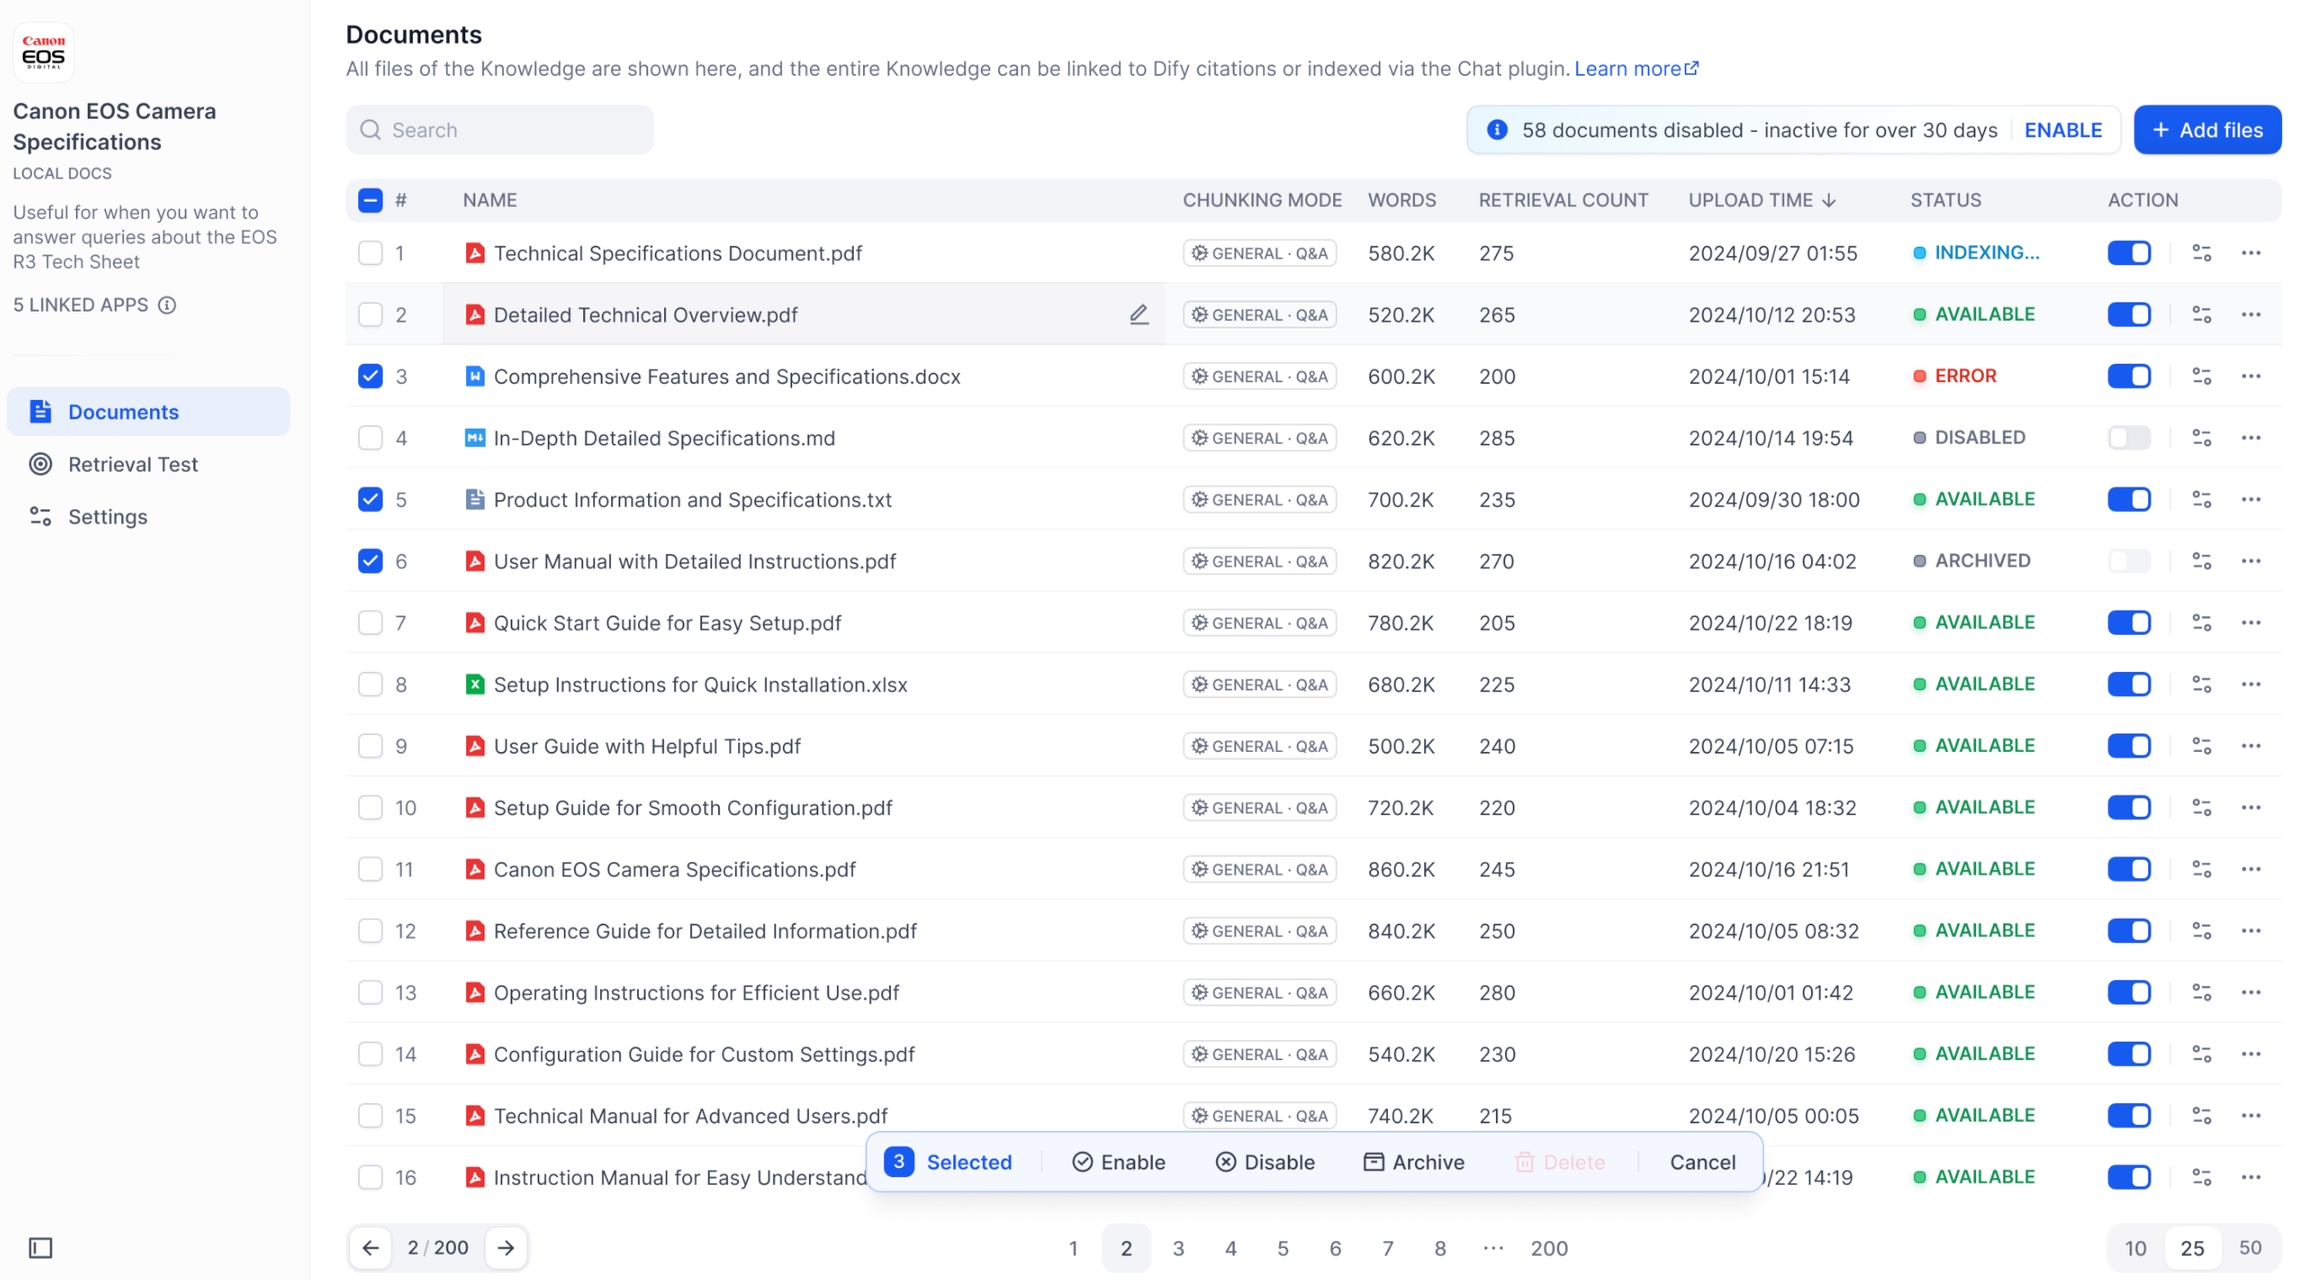
If there are some documents in your knowledge base that haven’t been updated or retrieved for a while, the system will disable inactive documents to ensure optimal performance.
For Sandbox users, the "inactive document disable period" is after 7 days.
For Professional and Team users, it is after 30 days. You can revert these documents and continue using them at any time by clicking the "Enable" button in the knowledge base.
You can revert these disable documents and continue using them at any time by clicking the "Enable" button in the knowledge base. Paid users are provided with one-click revert function.
Managing Text Chunks
Viewing Text Chunks
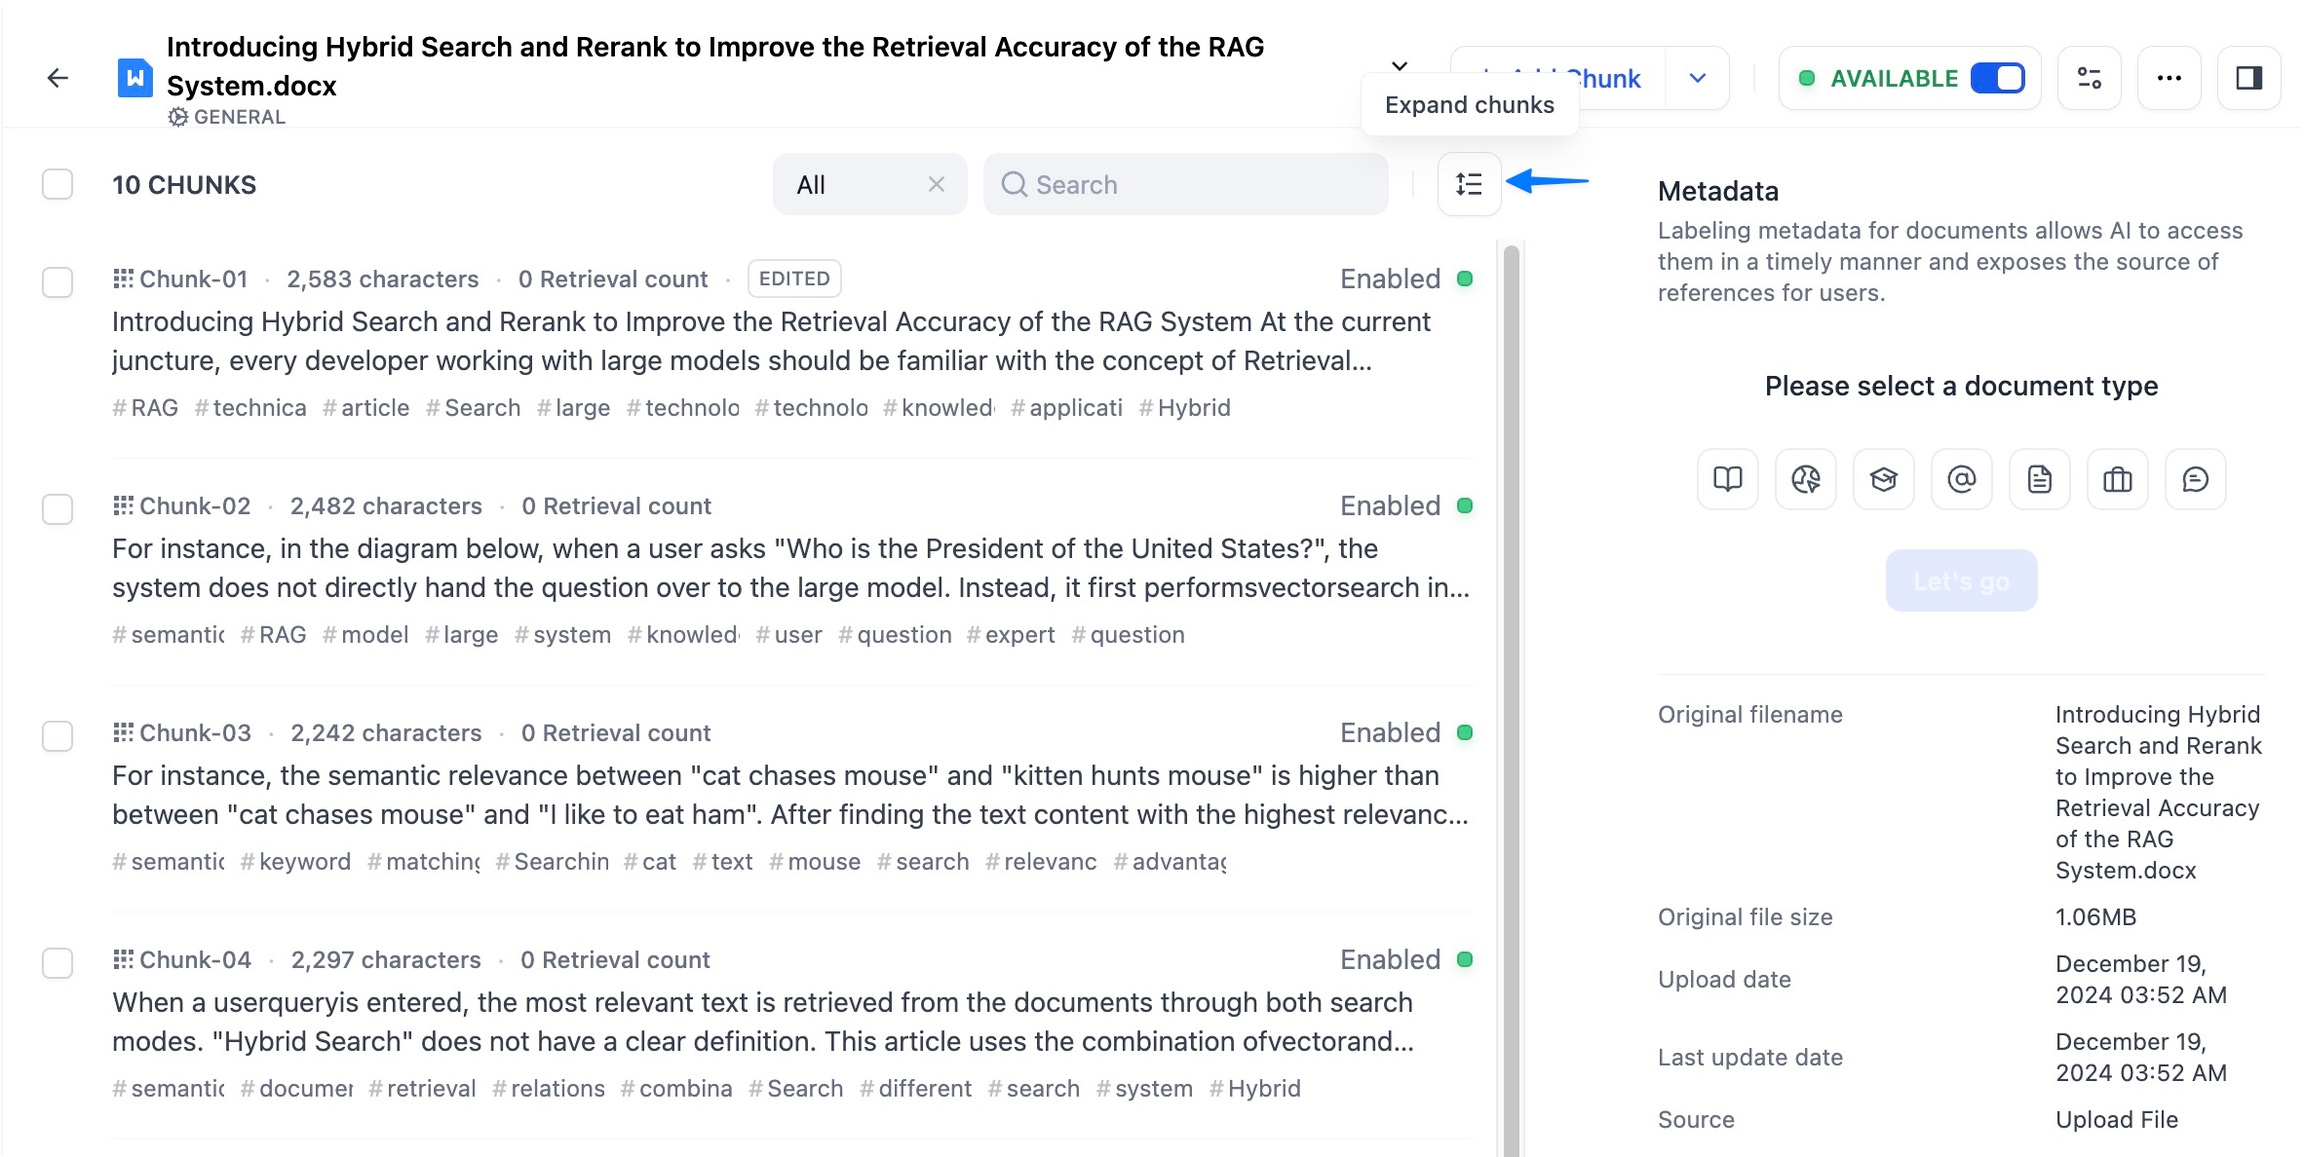
In the knowledge base, each uploaded document is stored as text chunks. By clicking on the document title, you can view the list of chunks and their specific text content on the details page. Each page displays 10 chunks by default, but you can change the number of chunks shown per page at the bottom of the web.
Only the first two lines of each content chunk are visible in the preview. If you need to see the full text within a chunk, click the “Expand Chunk” button for a complete view.
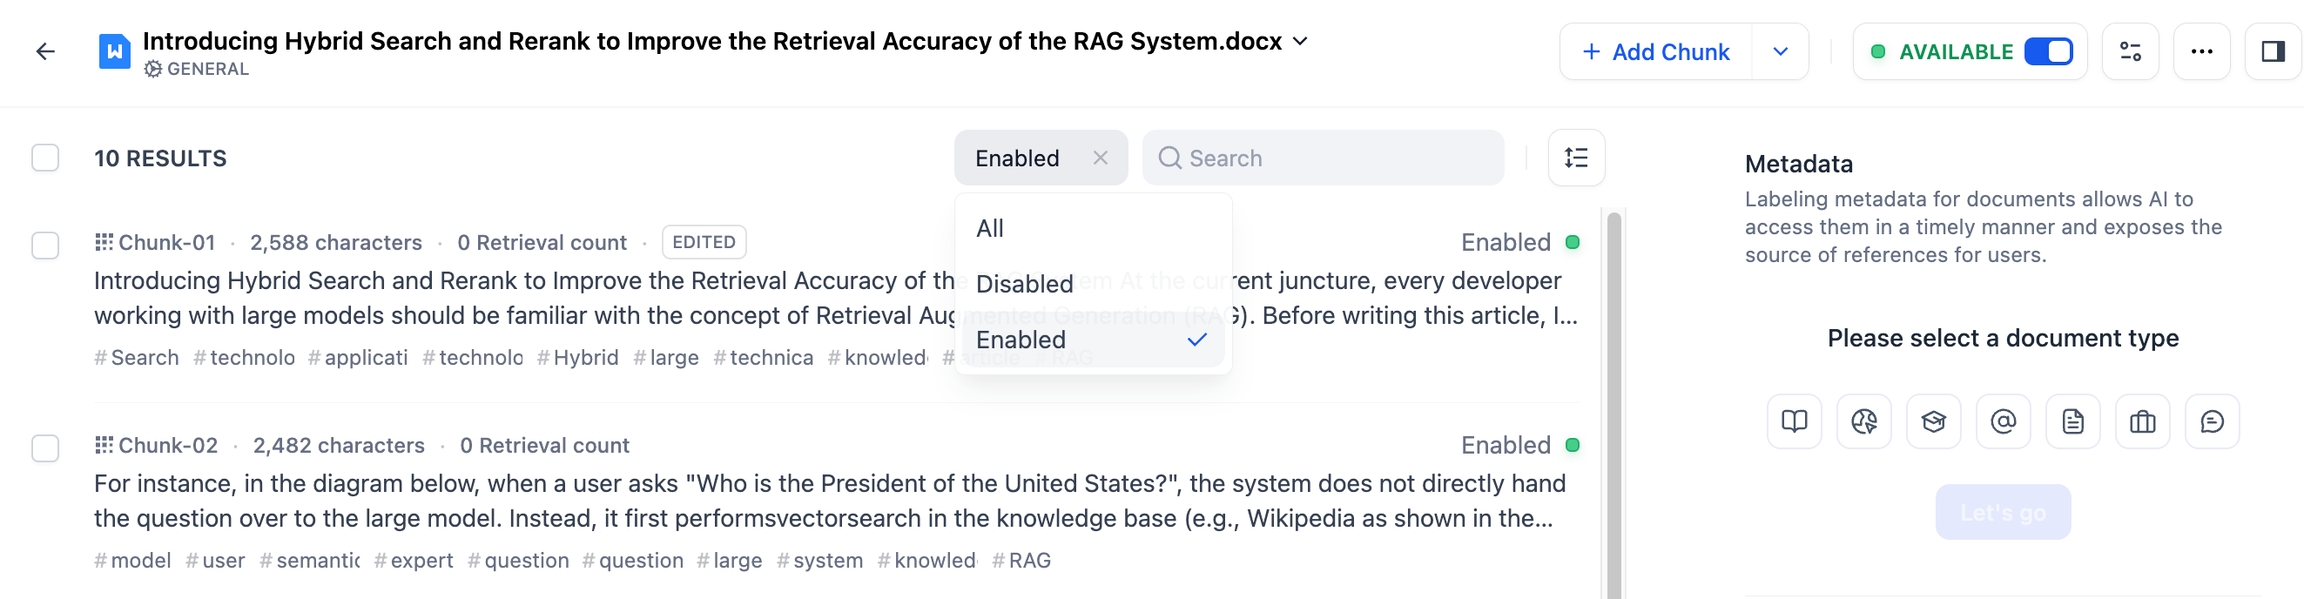
You can quickly view all enabled or disabled documents using the filter.
Different chunking modes correspond to different text chunking preview methods:
General Mode
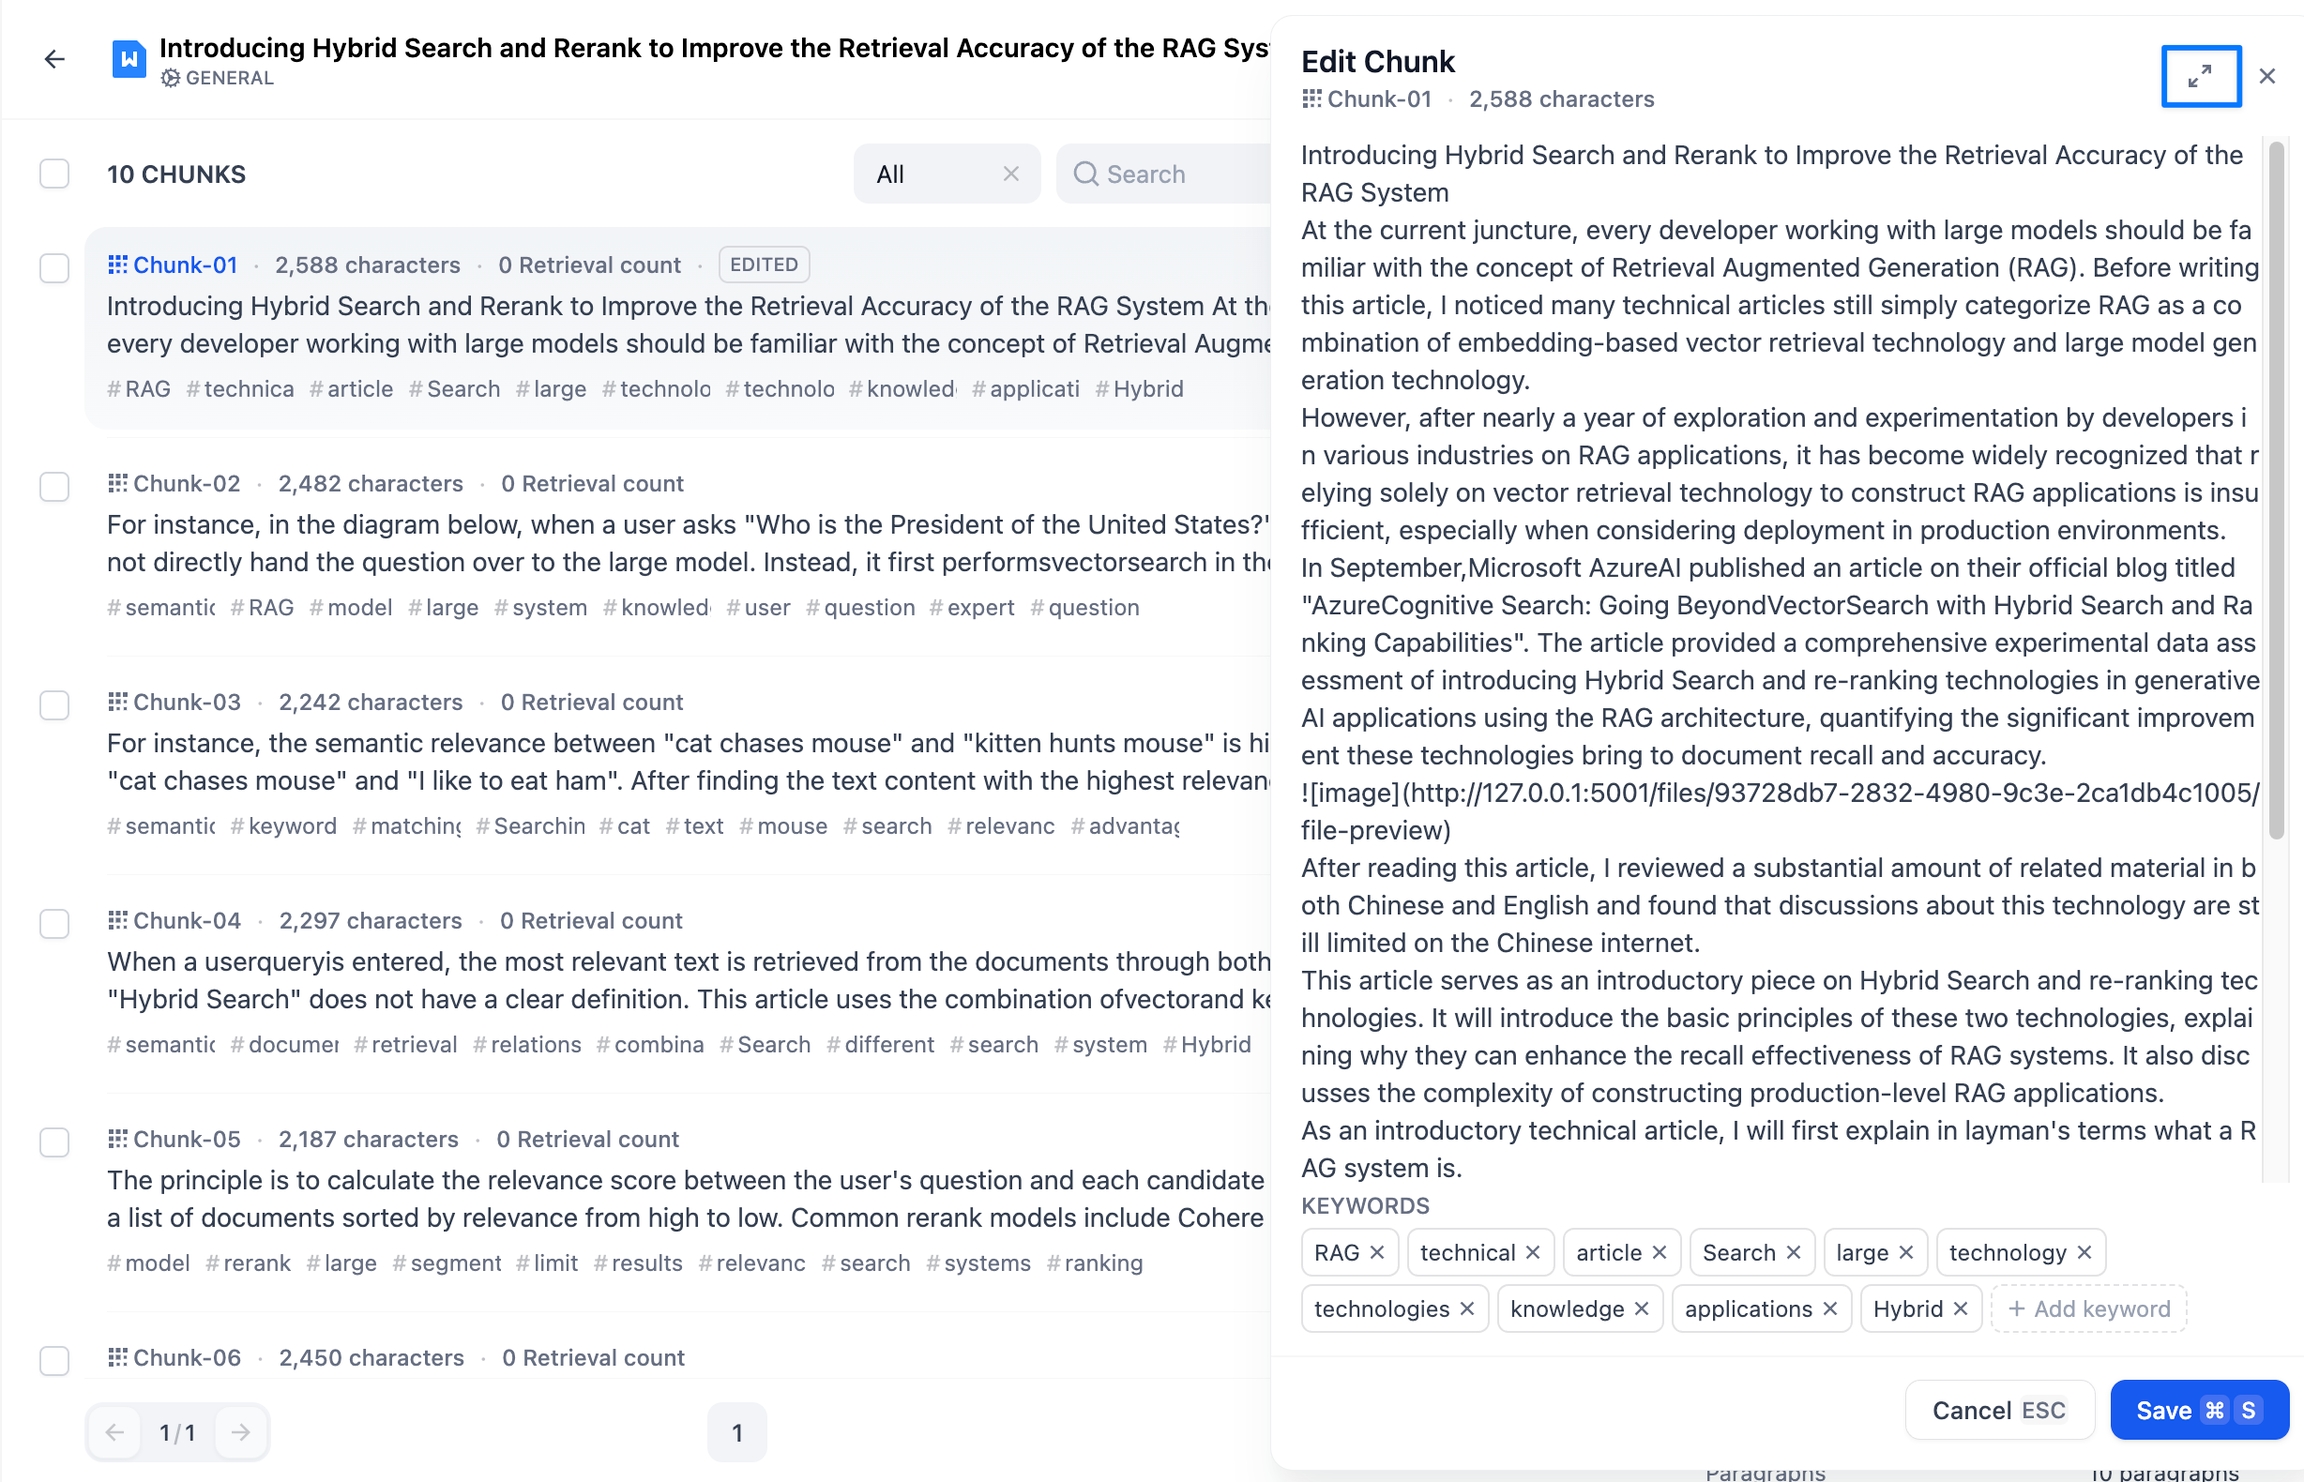
Chunks of text in General mode are independent blocks. If you want to view the complete content of a chunk, click the full-screen icon.
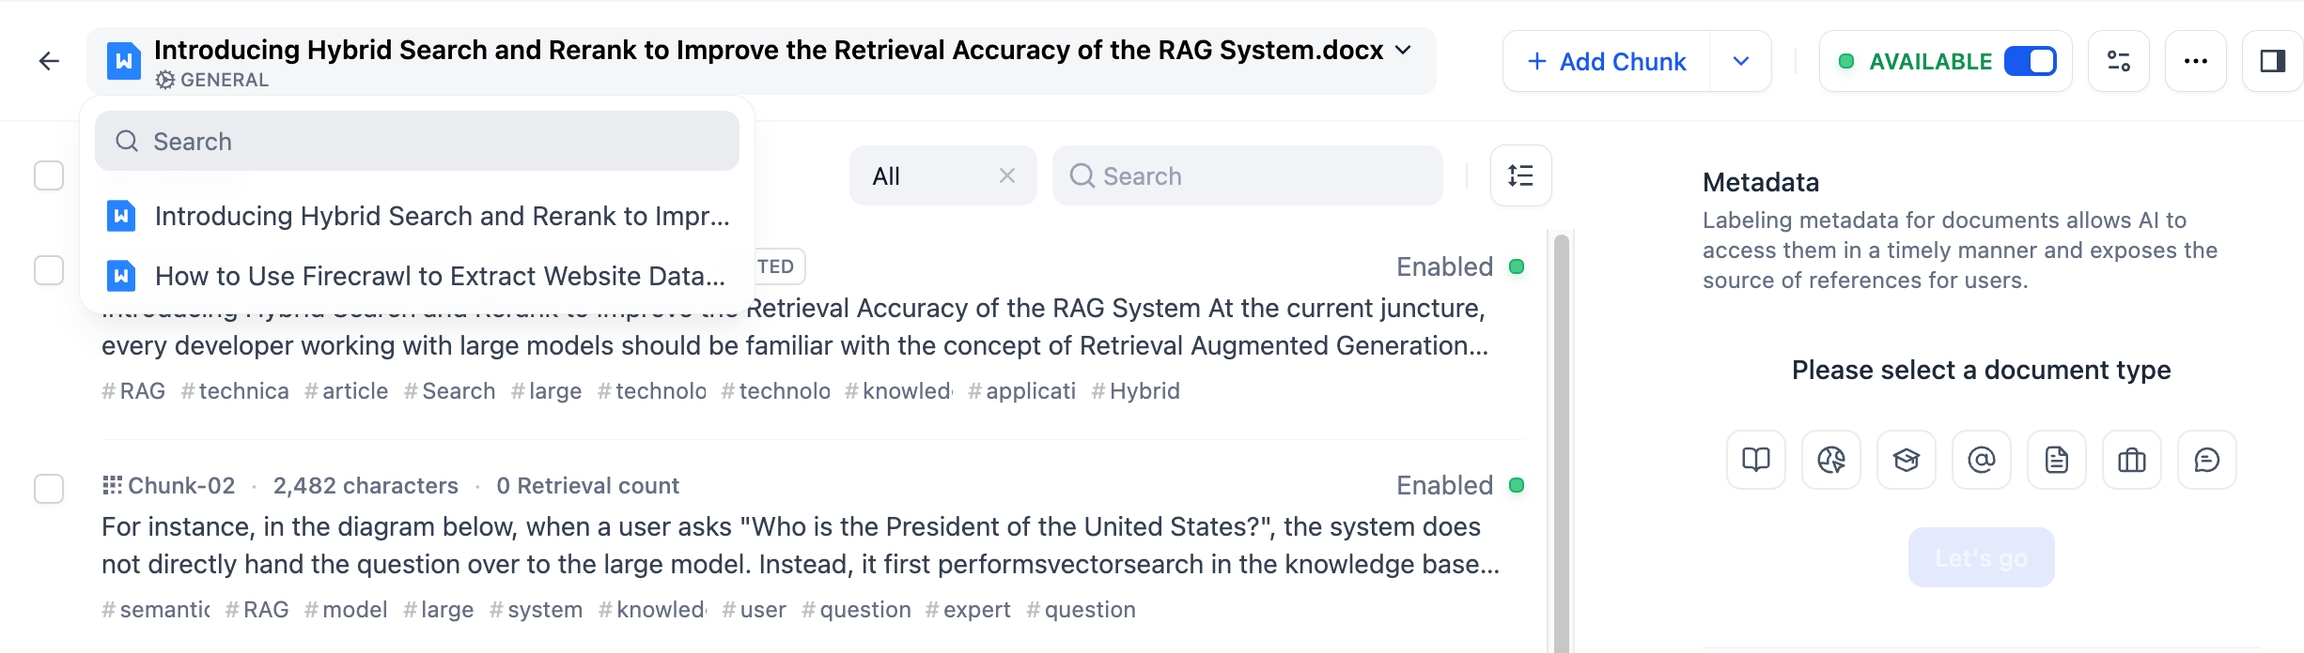
Tap the document title at the top to quickly switch to other documents in the knowledge base.
Parent-child Mode
In Parent-child mode, content is divided into parent chunks and child chunks.
Parent chunks
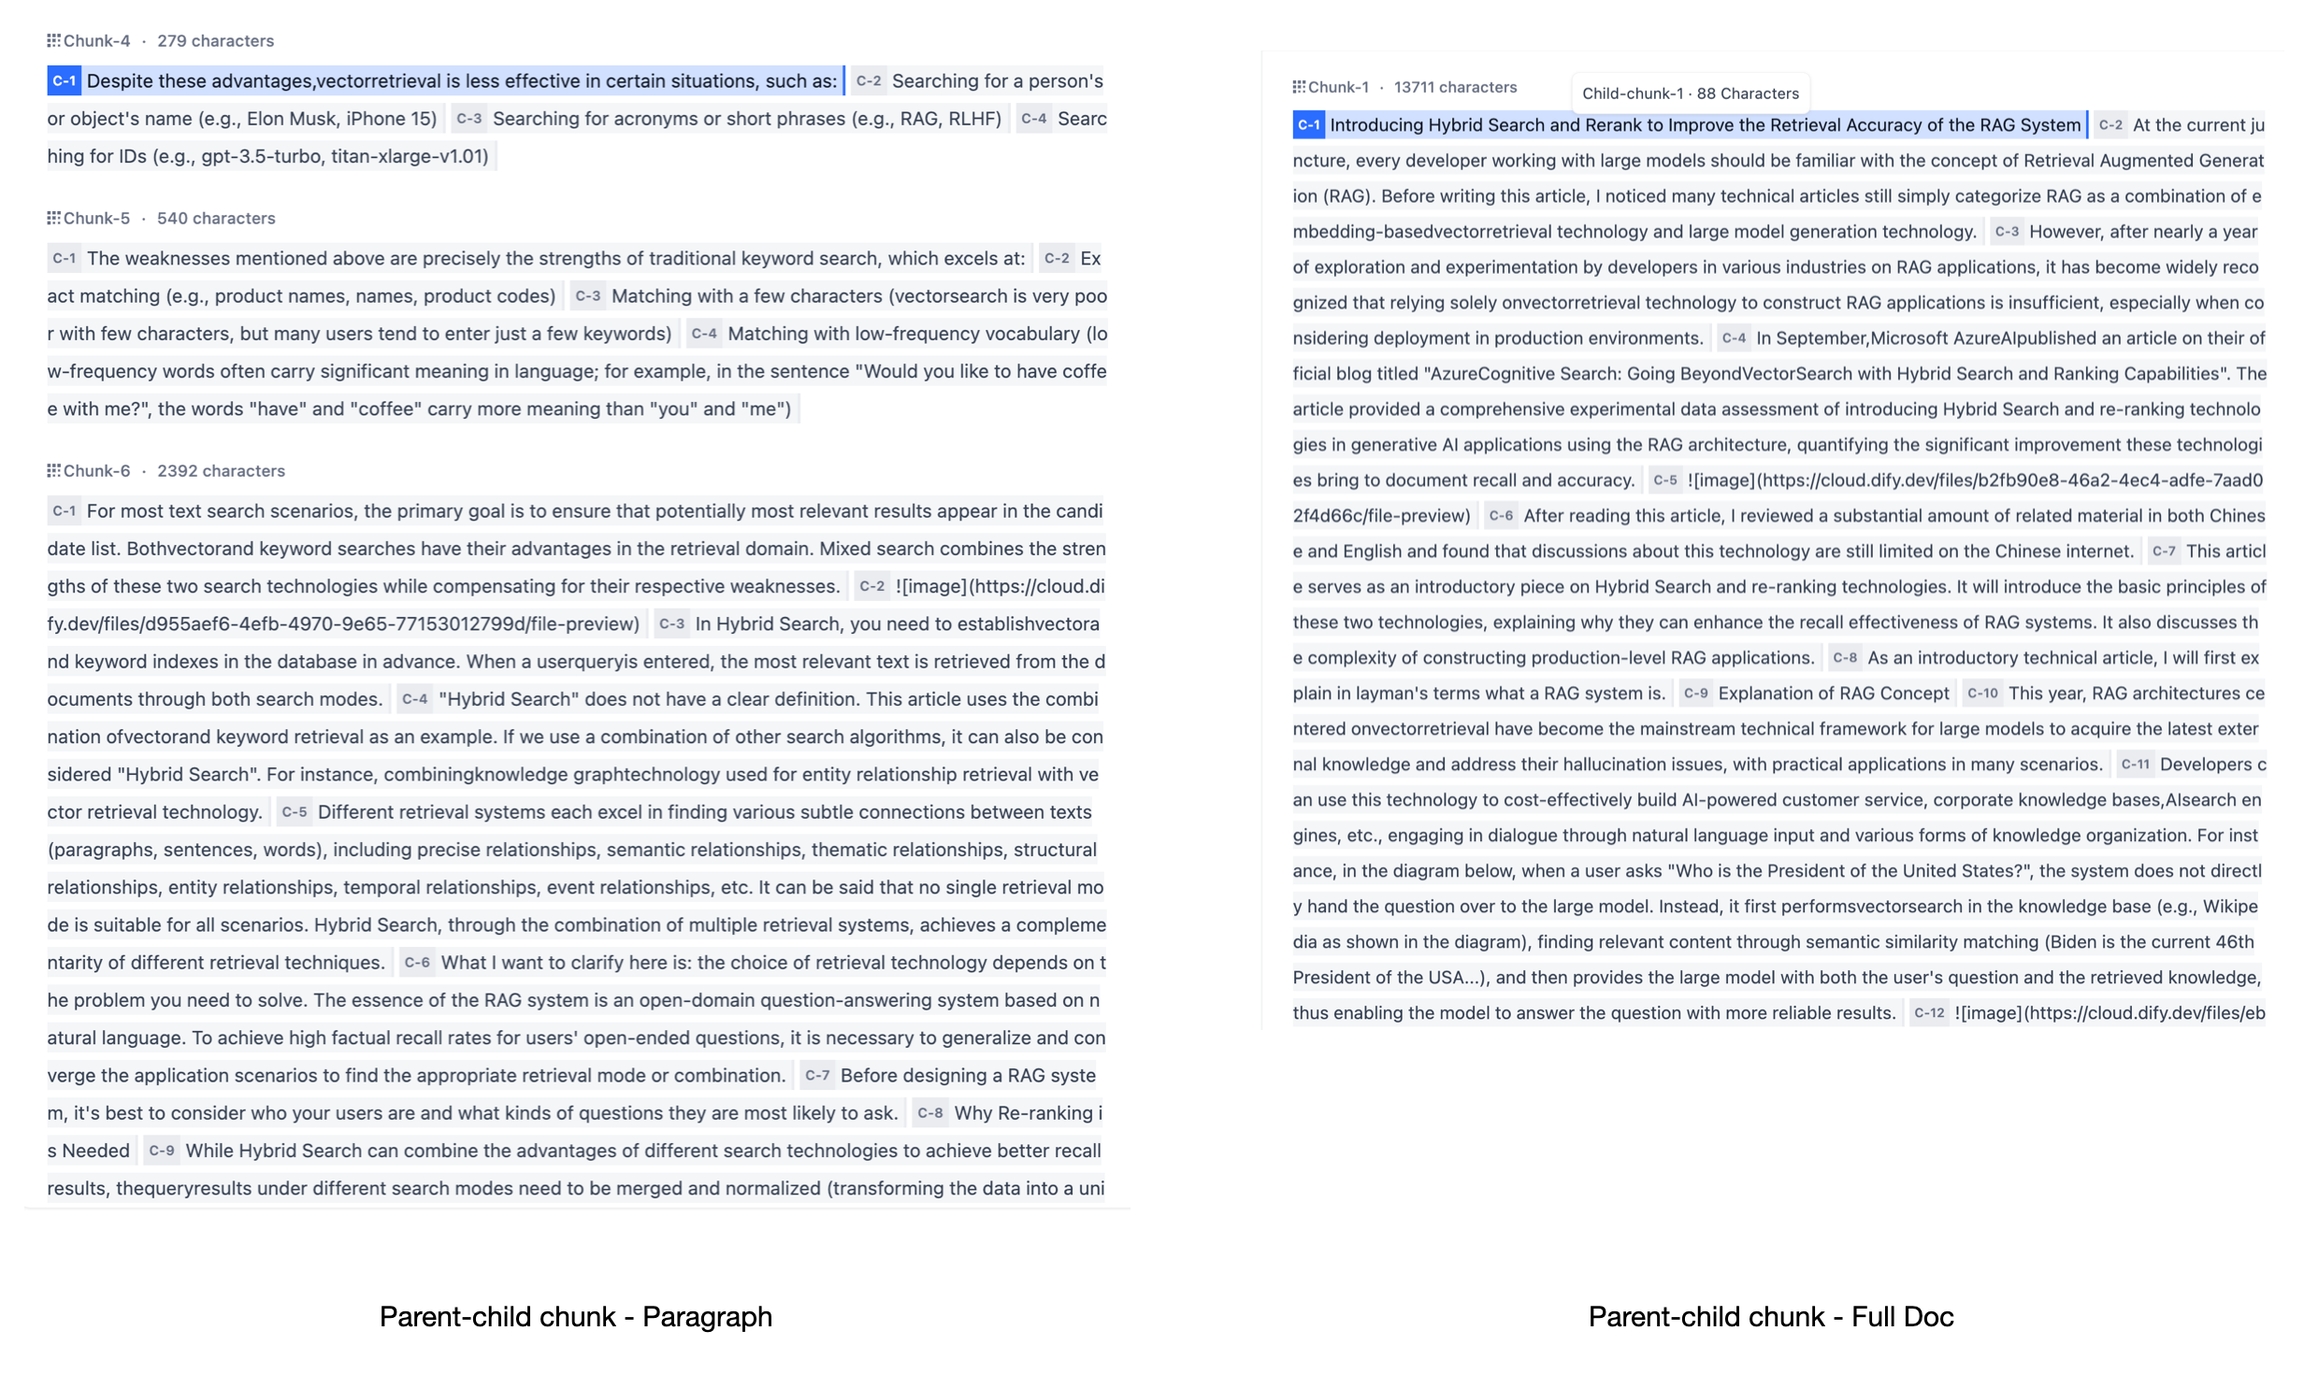
After selecting a document in the knowledge base, you’ll first see the parent chunk content. Parent chunks can be split by Paragraph or Full Doc, offering a more comprehensive context. The illustration below shows how the text preview differs between these split modes.
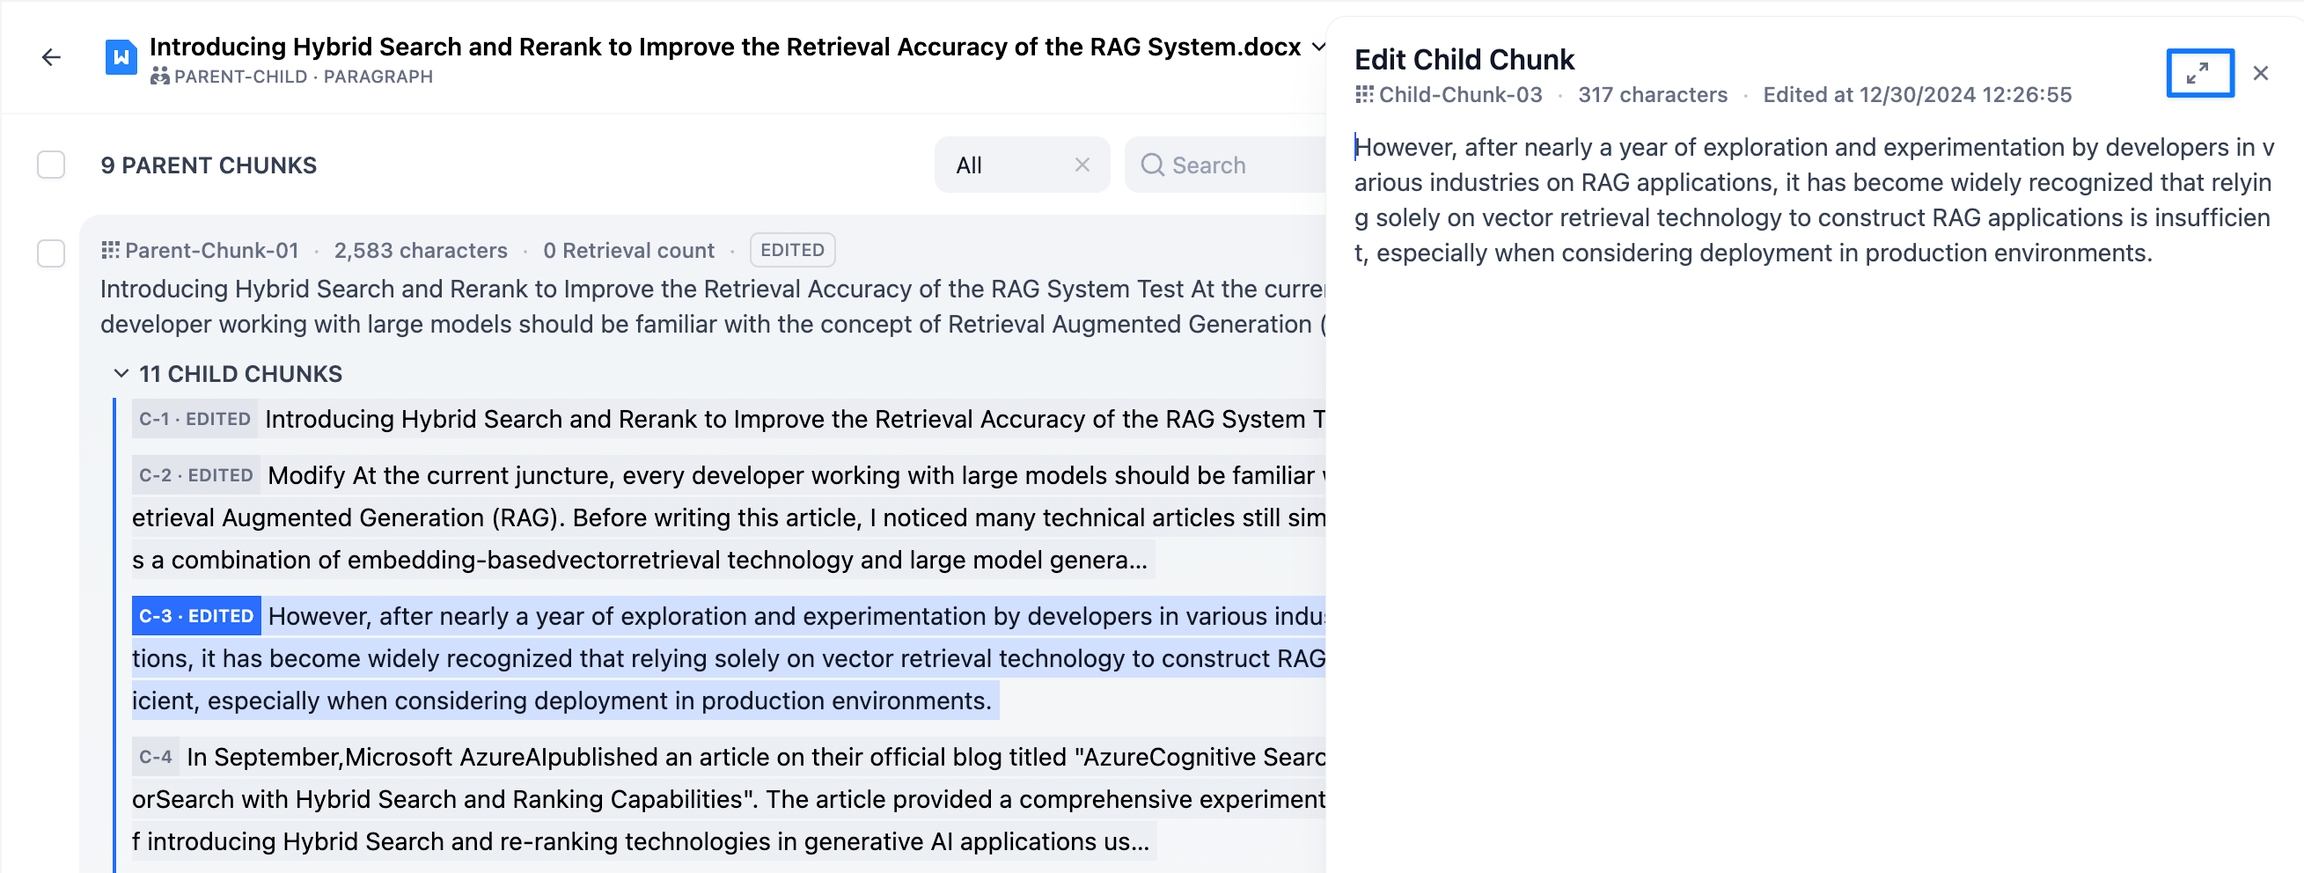
Child chunks
Child chunks are usually sentences (smaller text blocks) within a paragraph, containing more detailed information. Each chunk displays its character count and the number of times it has been retrieved. Tapping “Child Chunks” reveals more details. If you want to see the full content of a chunk, click the full-screen icon in the top-right corner of that chunk to enter full-screen reading mode.
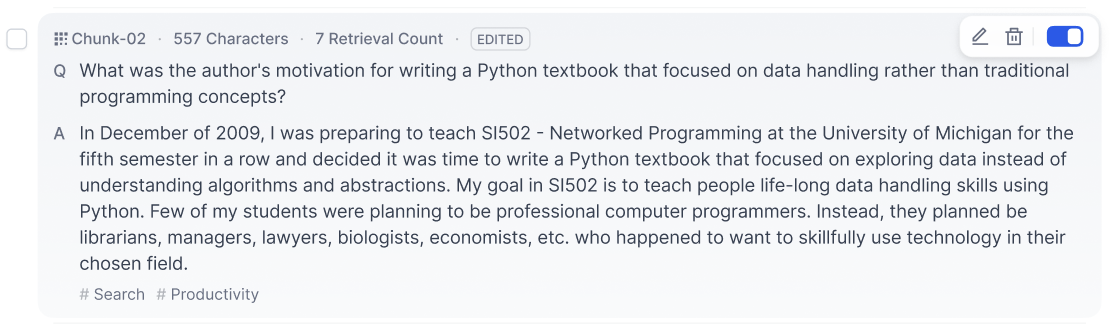
Q&A Mode
In Q&A Mode, a content chunk consists of a question and an answer. Click on any document title to view the text chunks.
Checking Chunk Quality
Document chunking significantly influences the Q&A performance of knowledge-base applications. It’s recommended to perform a manual review of chunking quality before integrating the knowledge base with your application.
Although automated chunk methods based on character length, identifiers, or NLP semantic system can significantly reduce the workload of large-scale text chunk, the quality of chunk is related to the text structure of different document formats and the semantic context. Manual checking and correction can effectively compensate for the shortcomings of machine chunk in semantic recognition.
When checking chunk quality, pay attention to the following situations:
Overly short text chunks, leading to semantic loss;

Overly long text chunks, leading to semantic noise affecting matching accuracy;
Obvious semantic truncation, which occurs when using maximum segment length limits, leading to forced semantic truncation and missing content during recall;

Adding Text Chunks
You can add text chunks individually to the knowledge base, and different chunking modes correspond to different ways of adding those chunks.
Adding text chunks is a paid feature. Please upgrade your account here to access this functionality.
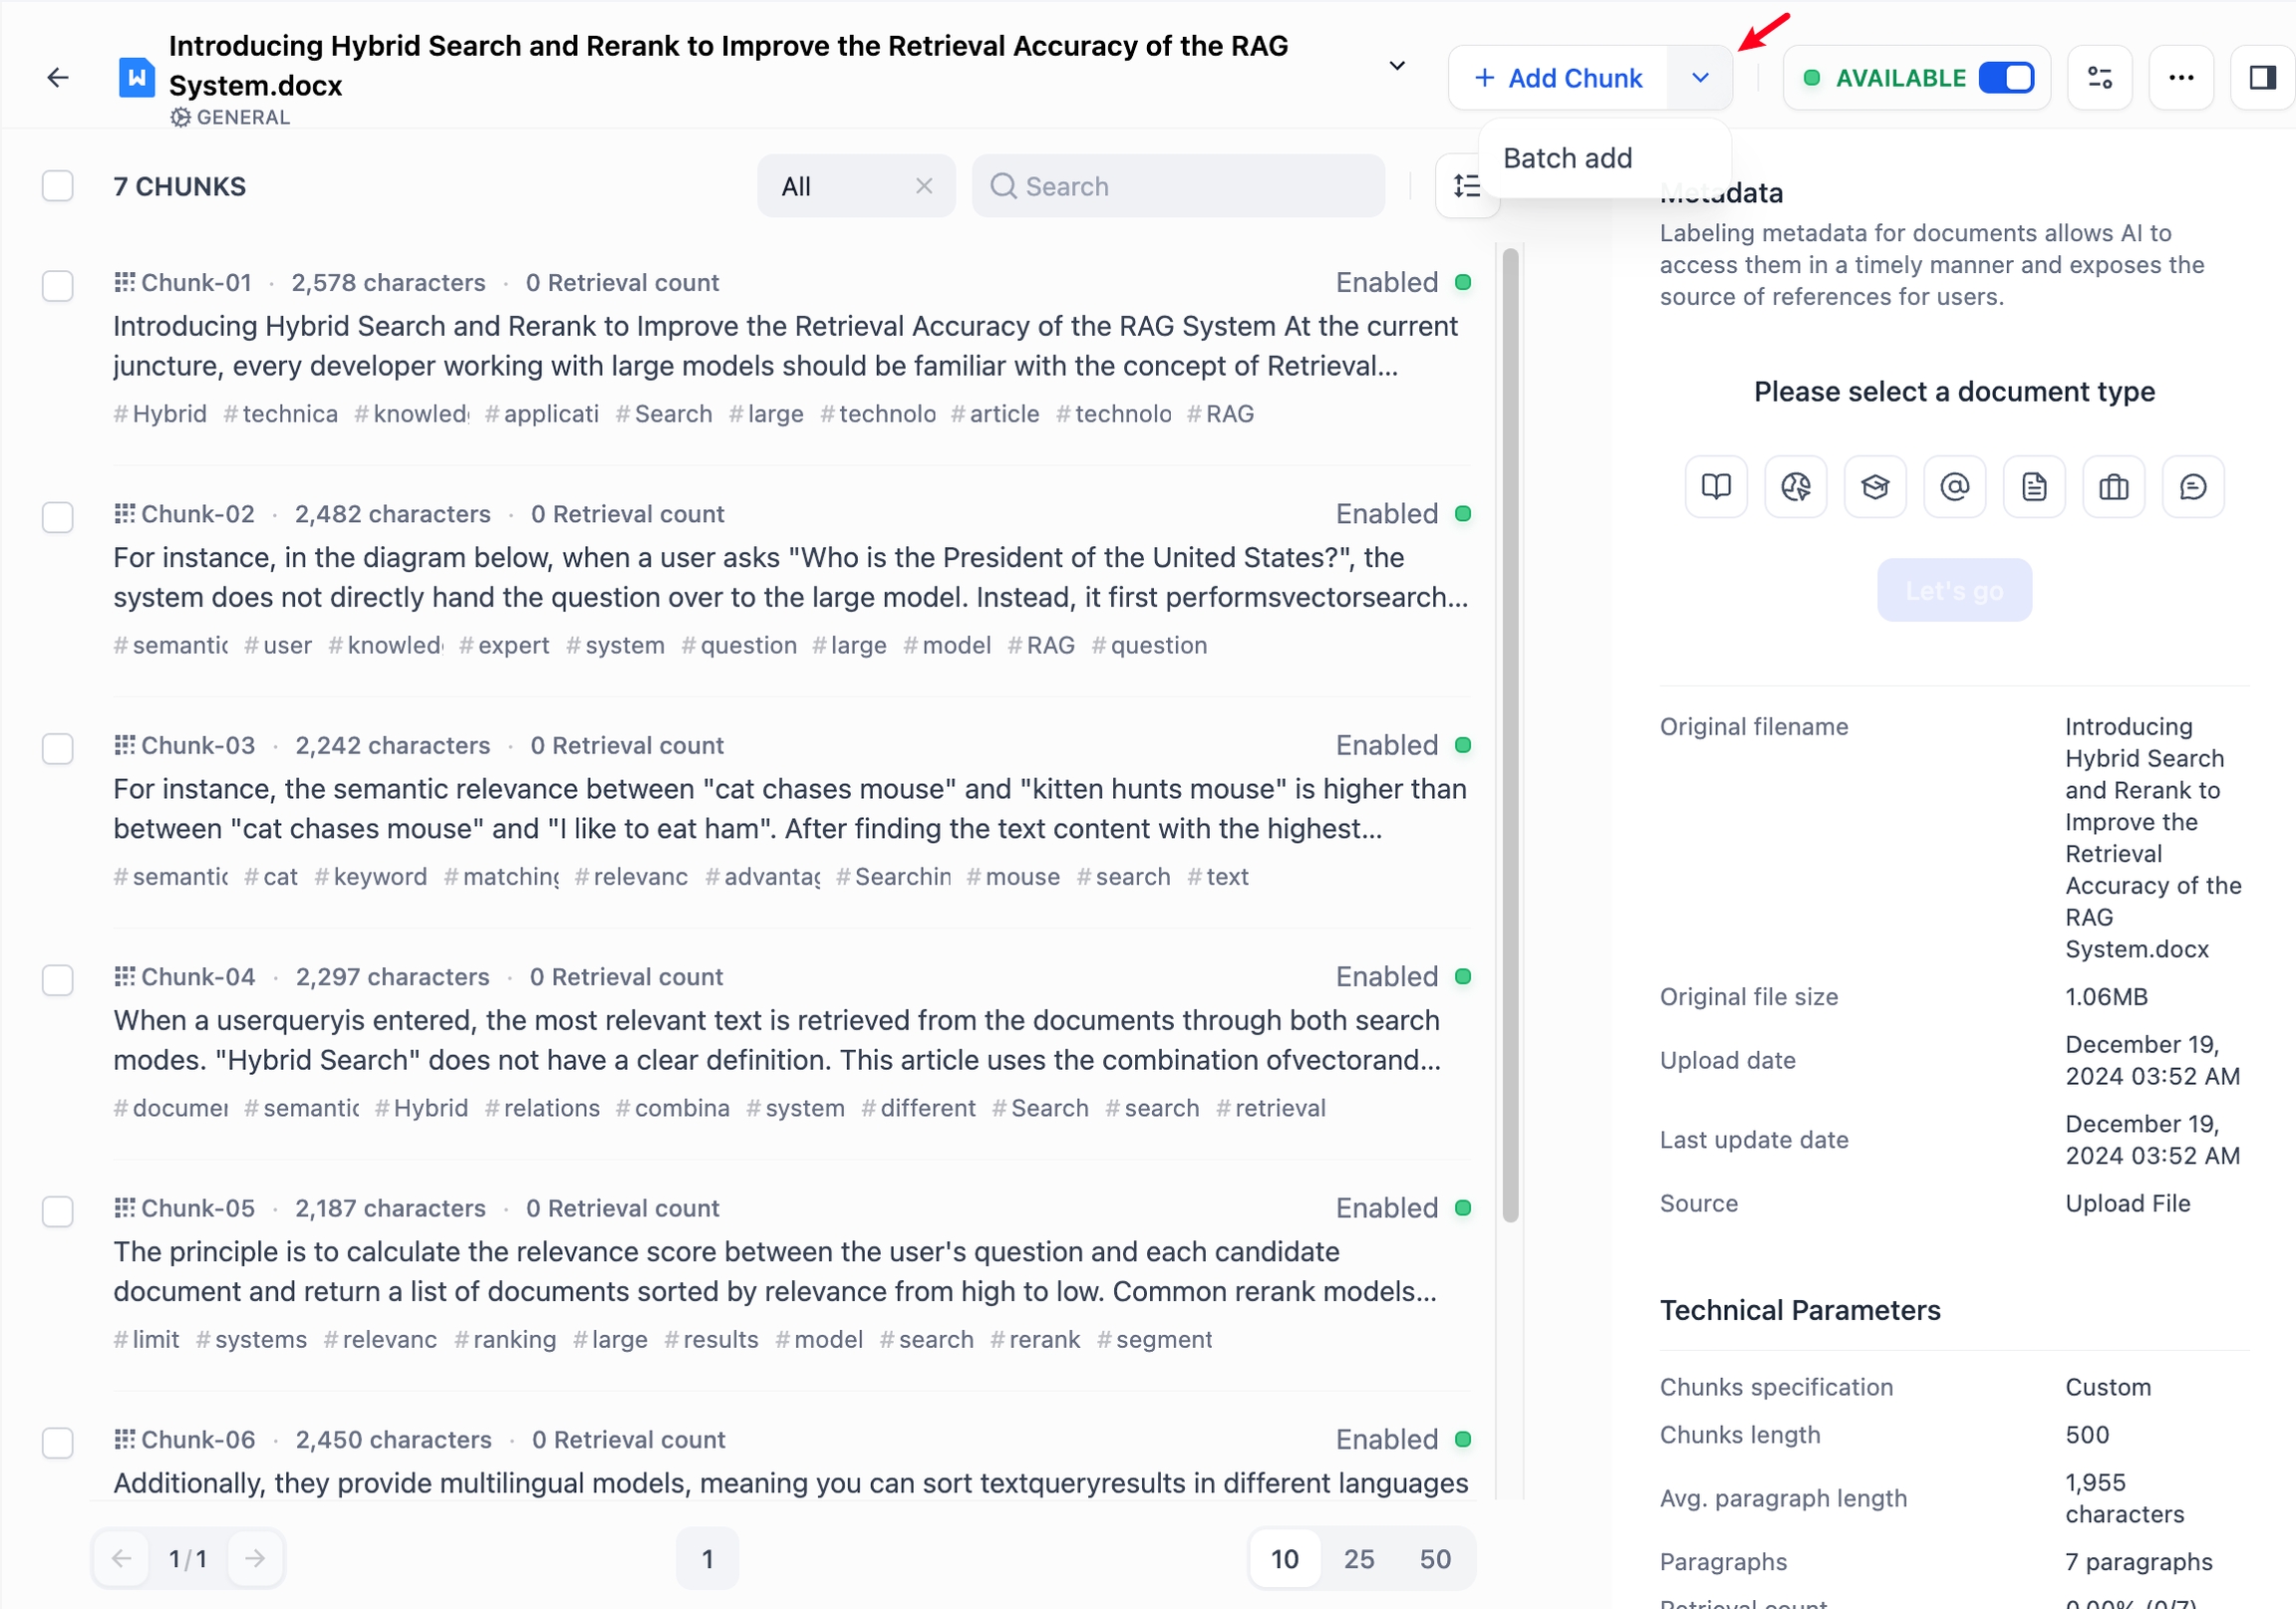
General Mode
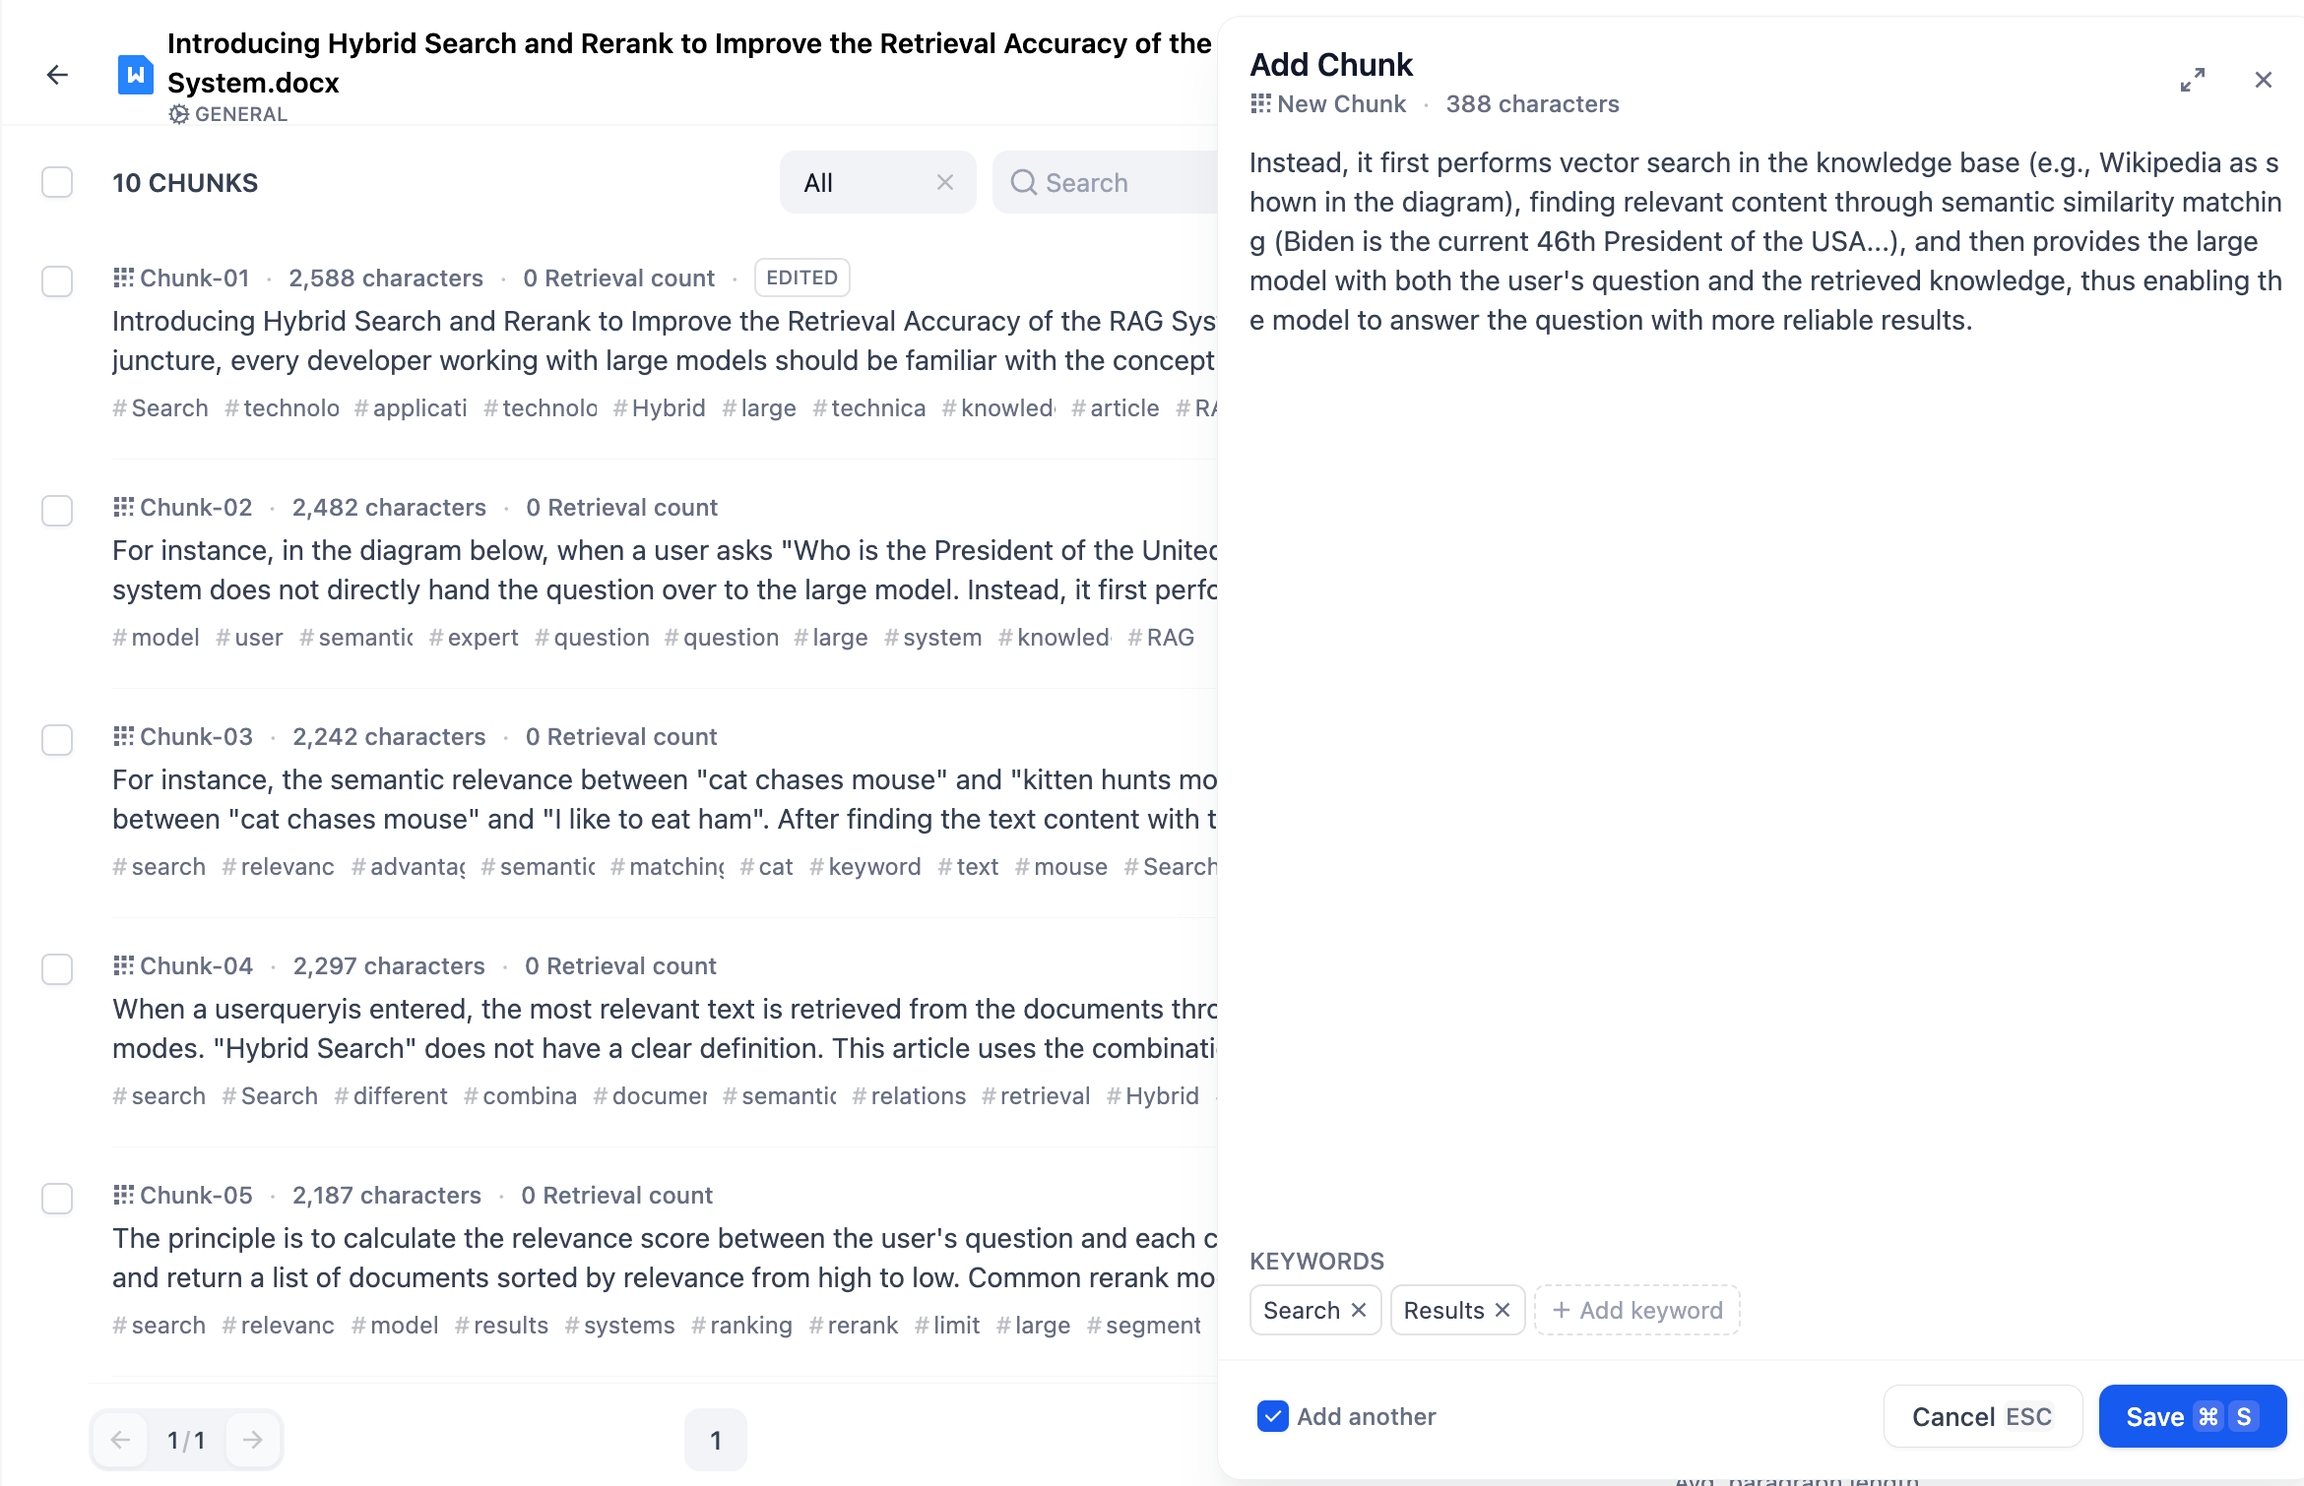
Click Add Chunks in the chunks list page to add one or multiple custom chunks to the document.
When manually adding text chunks, you can choose to add both the main content and keywords. After entering the content, select the “Add another” checkbox at the bottom to continue adding more text chunks seamlessly.
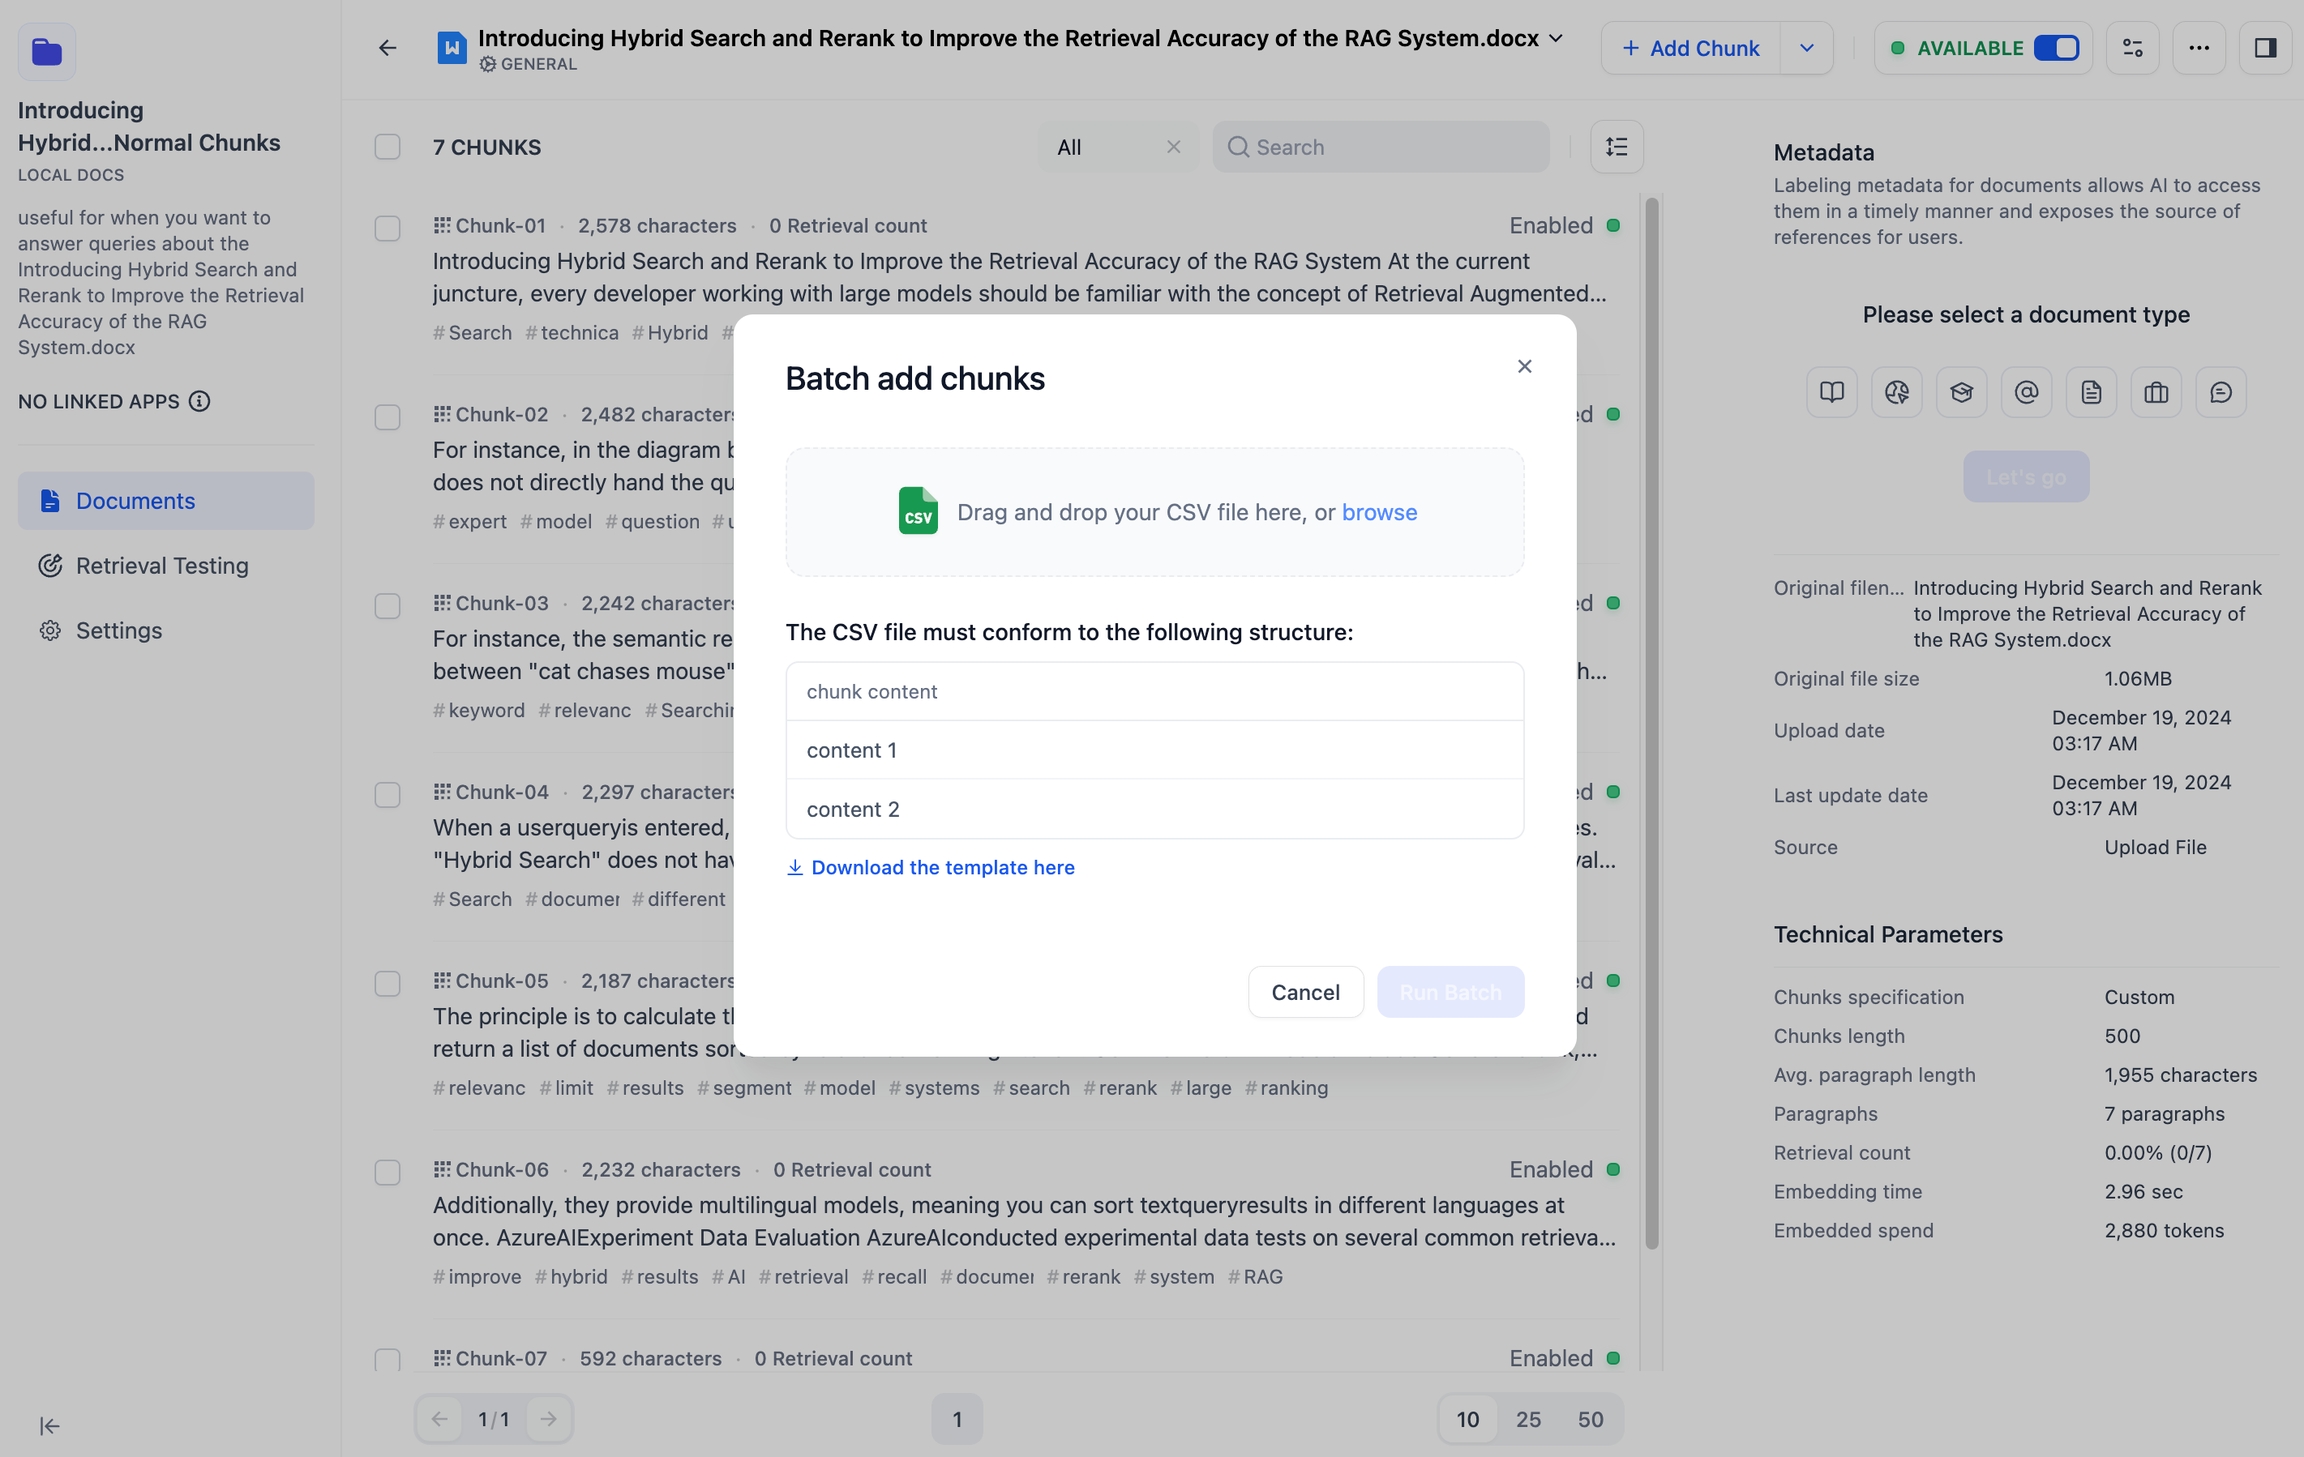
To add chunks in bulk, you need to download the upload template in CSV format first and edit all the chunk contents in Excel according to the template format, then save the CSV file and upload it.
Parent Child Chunks Mode
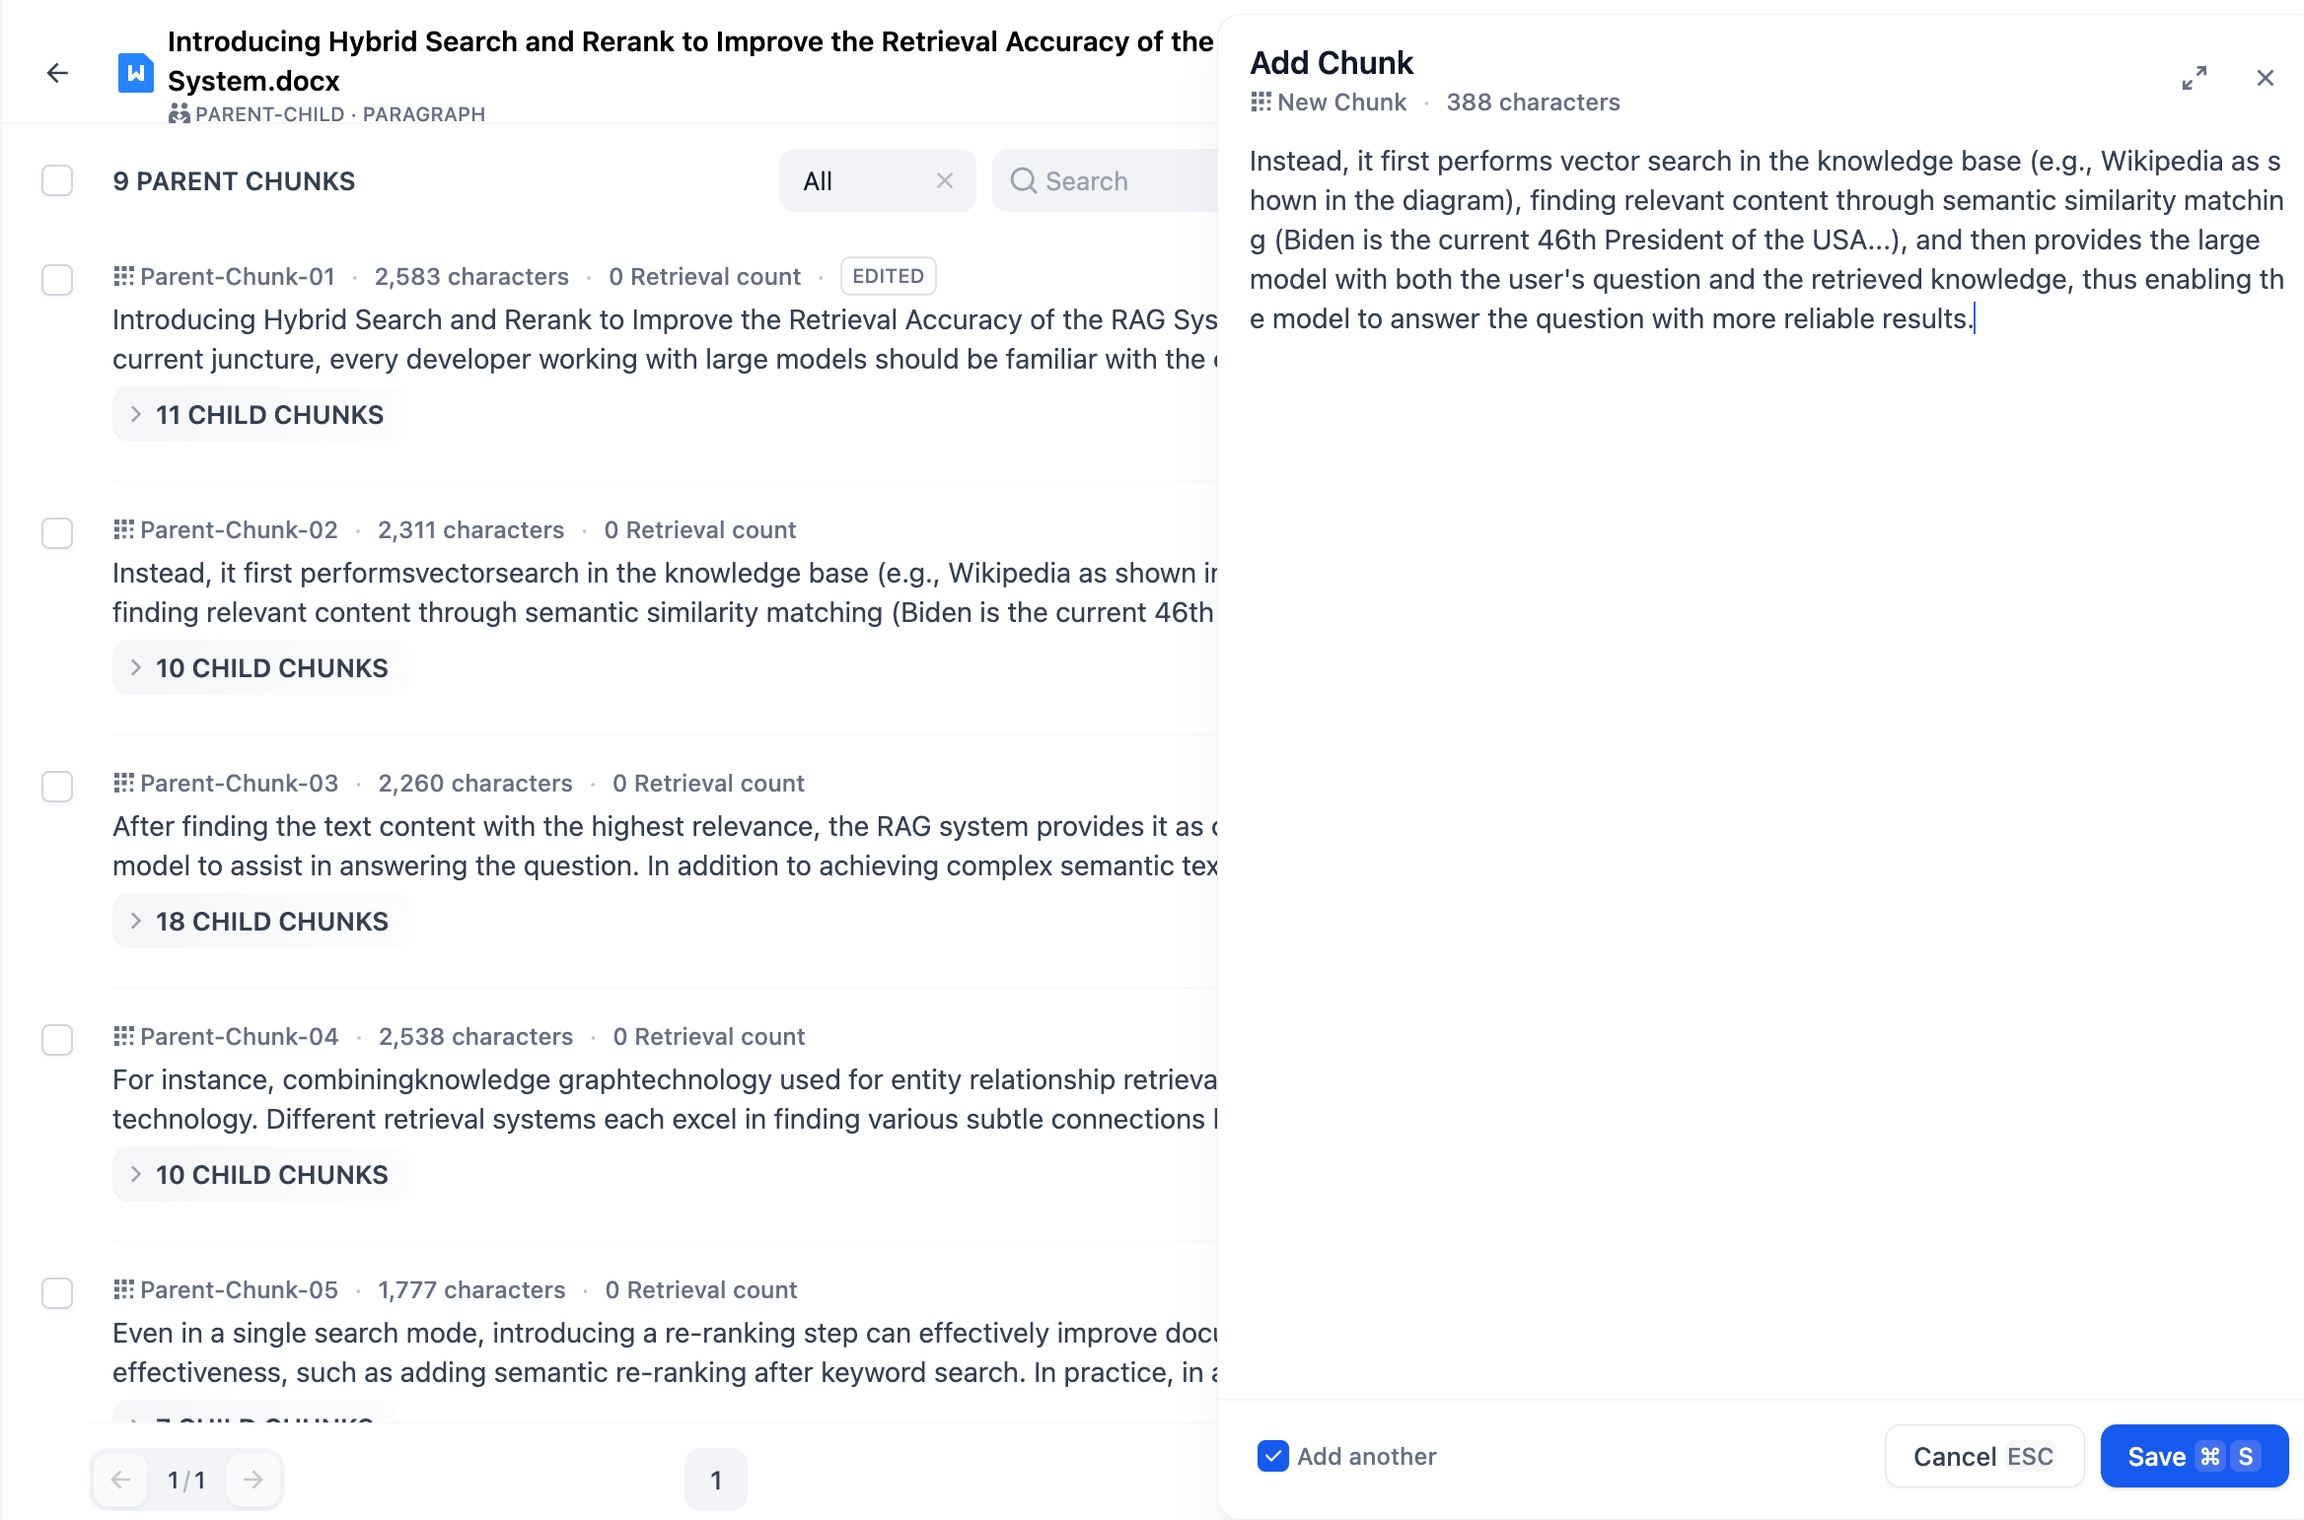
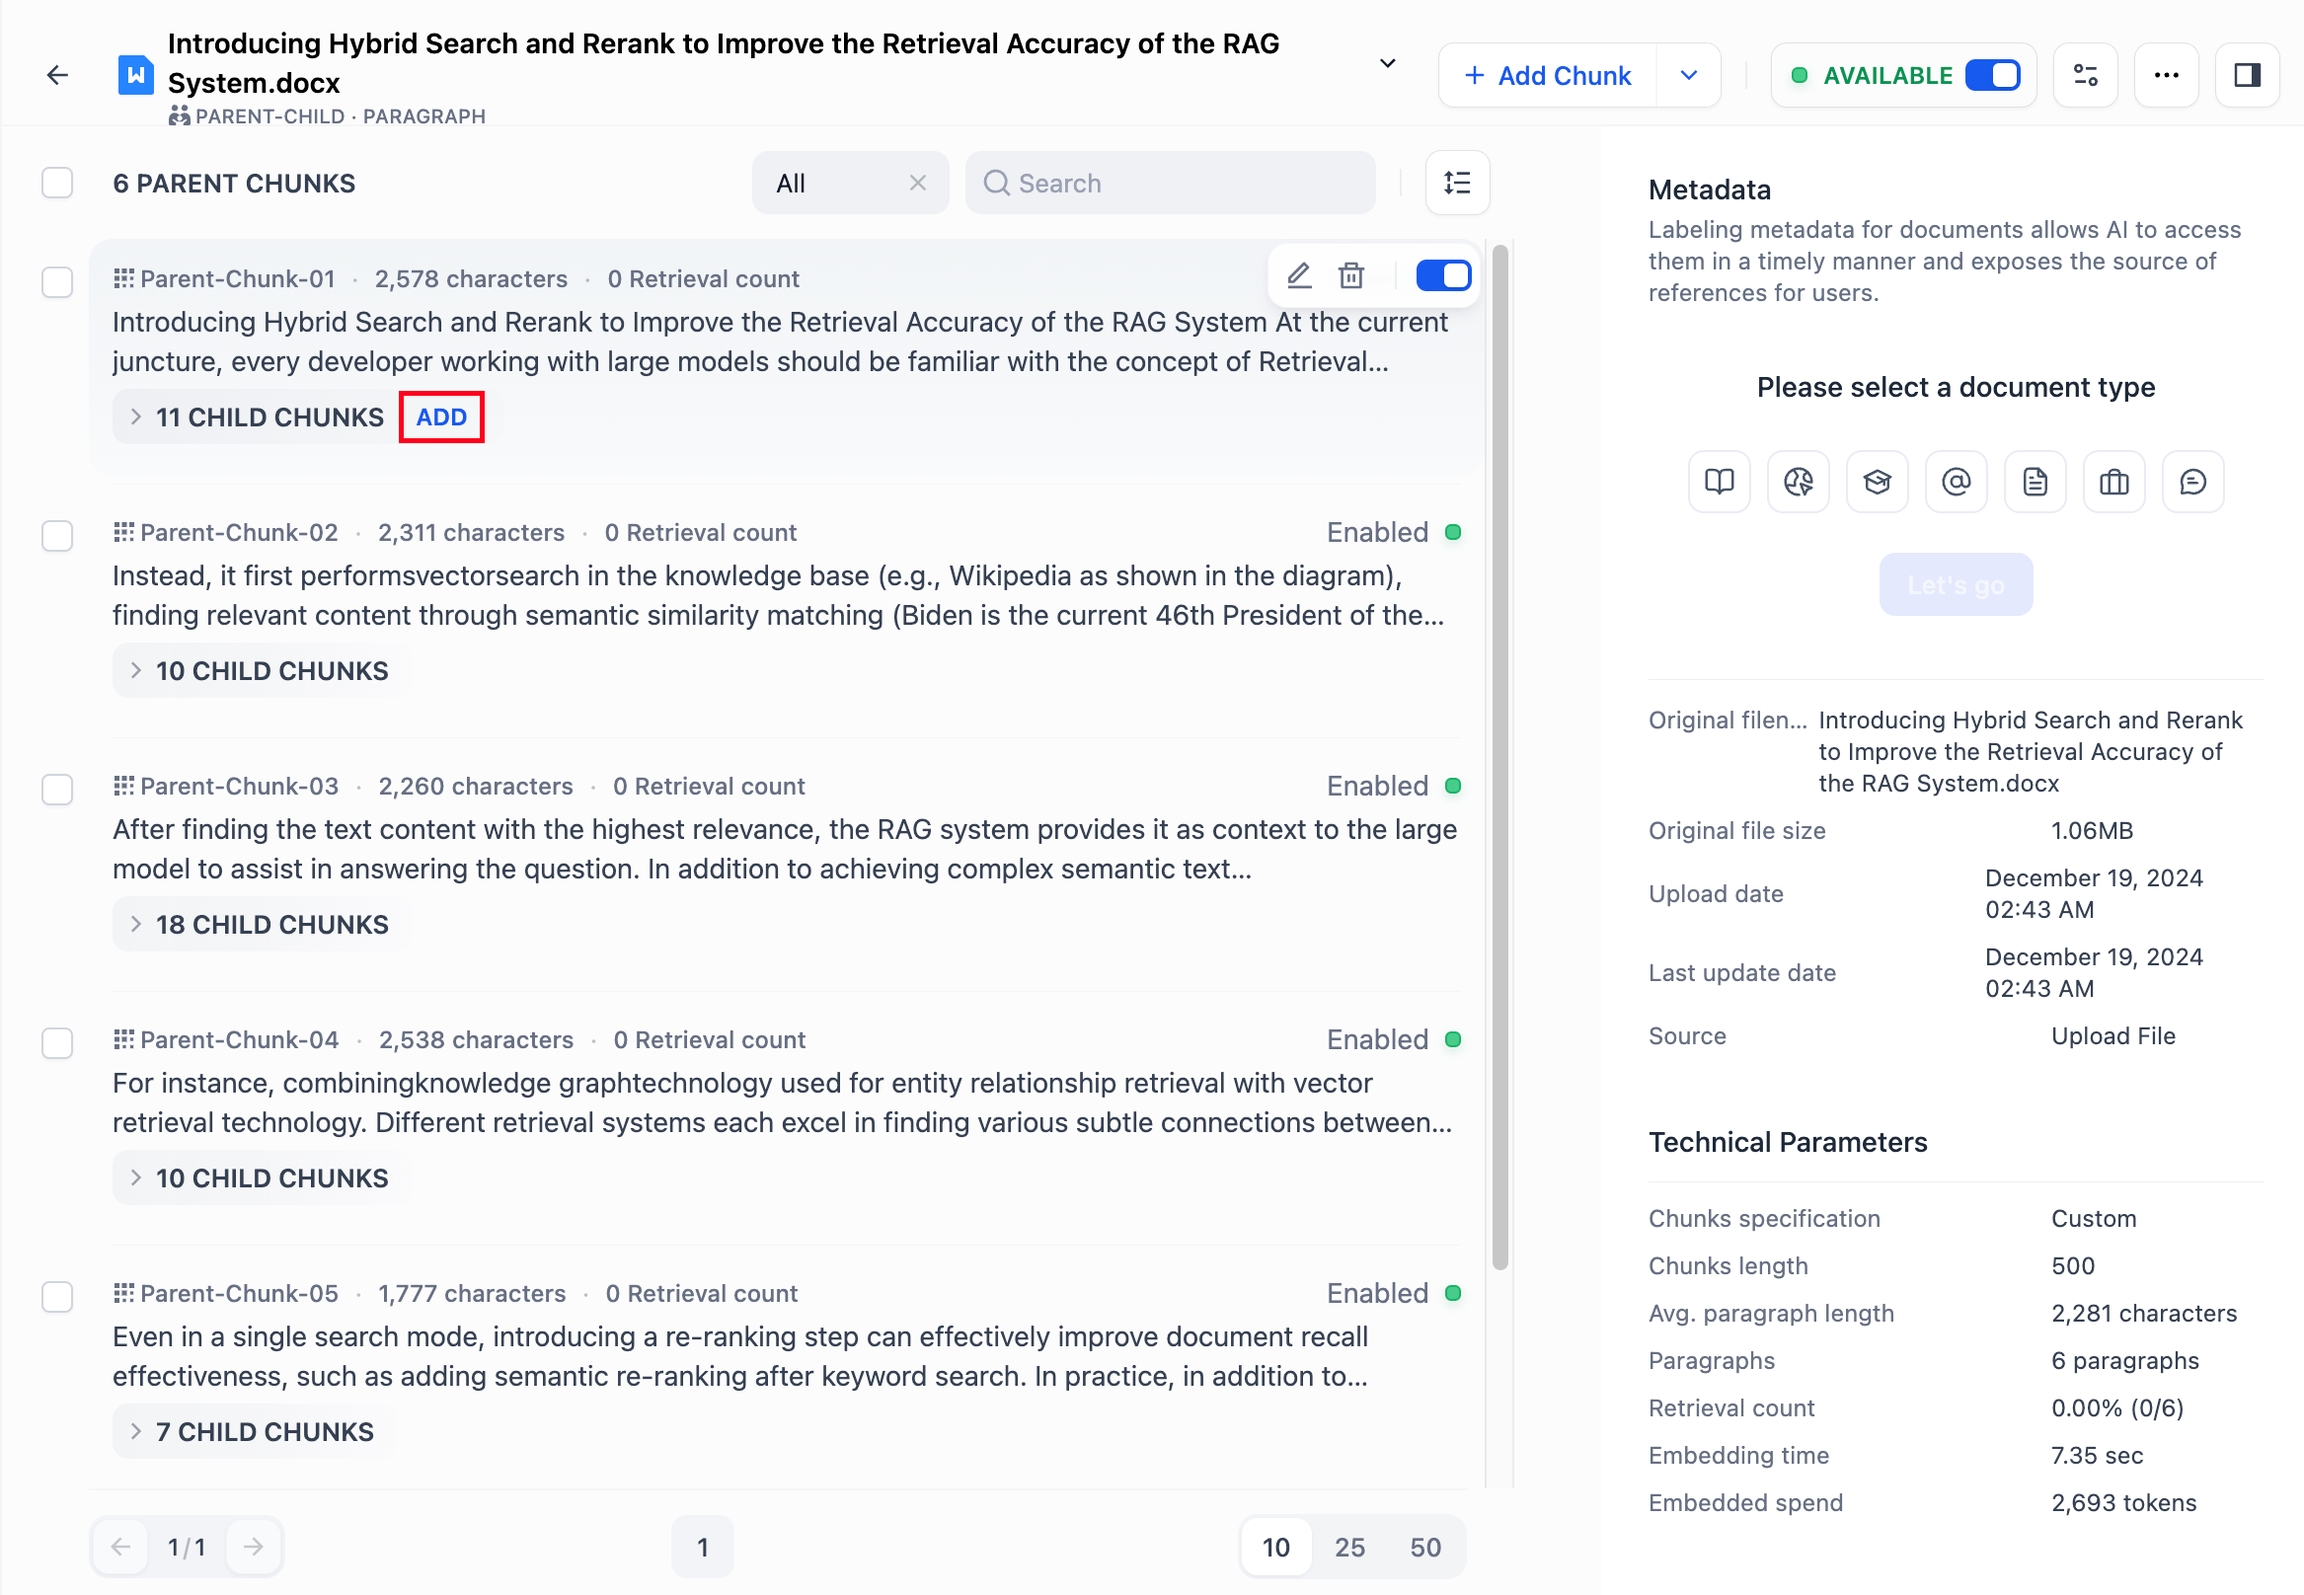
Click Add Chunks in the Chunk list to add one or multiple custom parent chunks to the document.
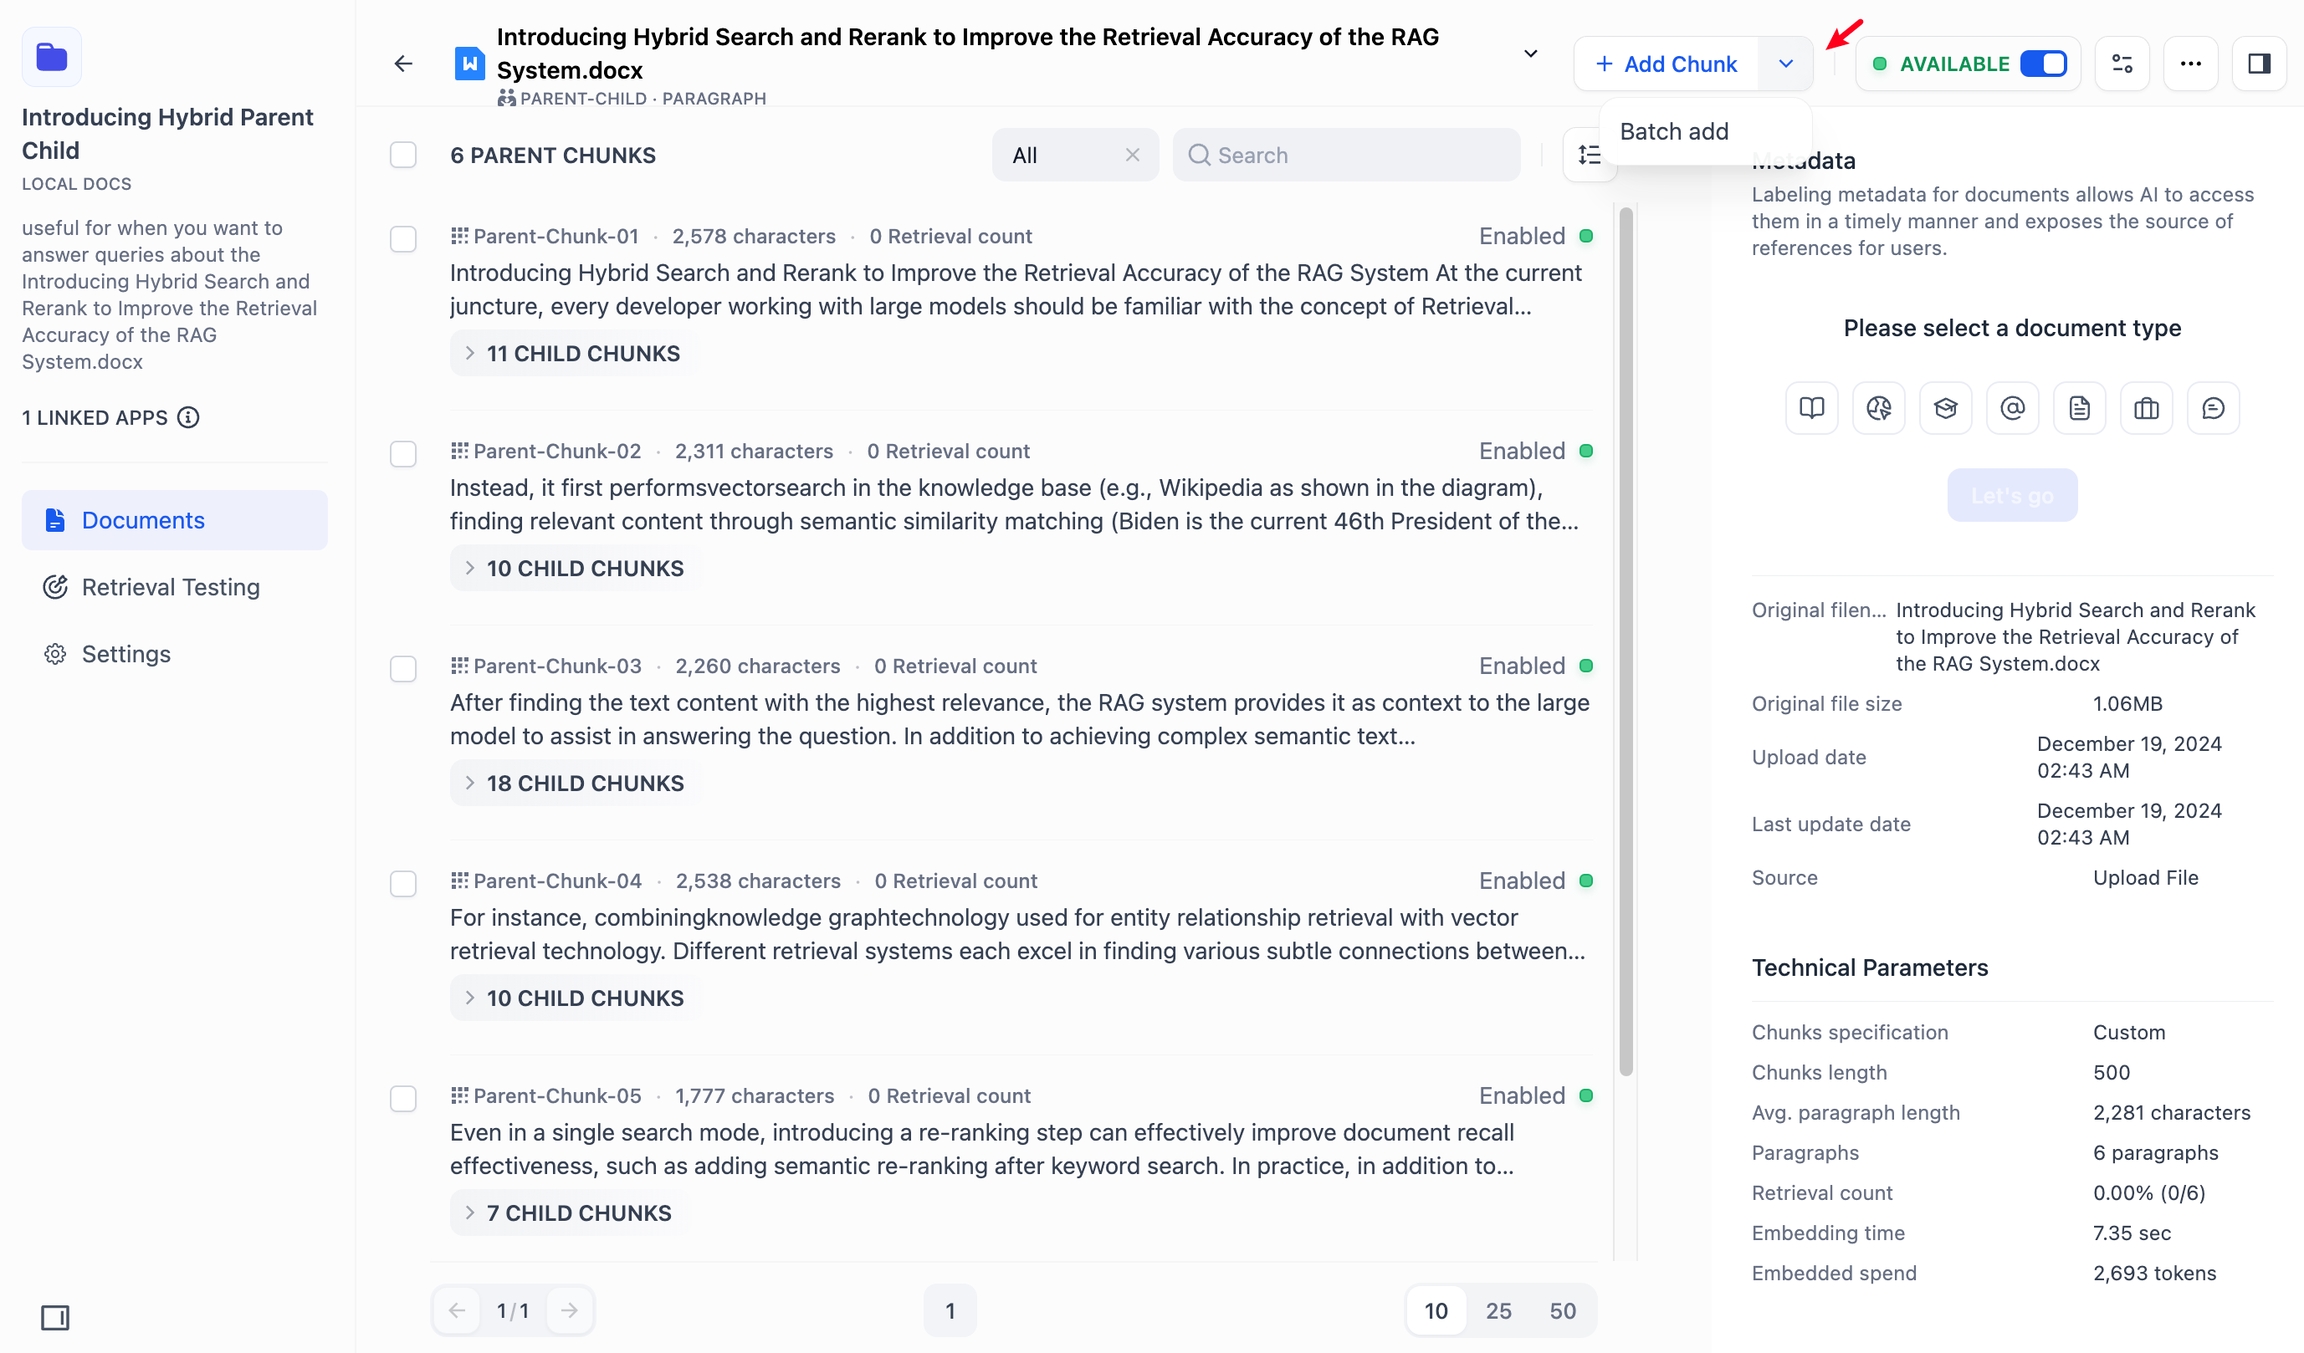
After entering the content, select the “Add another” checkbox at the bottom to keep adding more text chunks.
You can add child chunks individually under a parent chunk. Click “Add” on the right side of the child chunk within the parent chunk to add it.
Q&A Mode
Click the “Add Chunk” button at the top of the chunk list to manually add a single or multiple question-answer pairs chunk to the document.
Editing Text Chunks
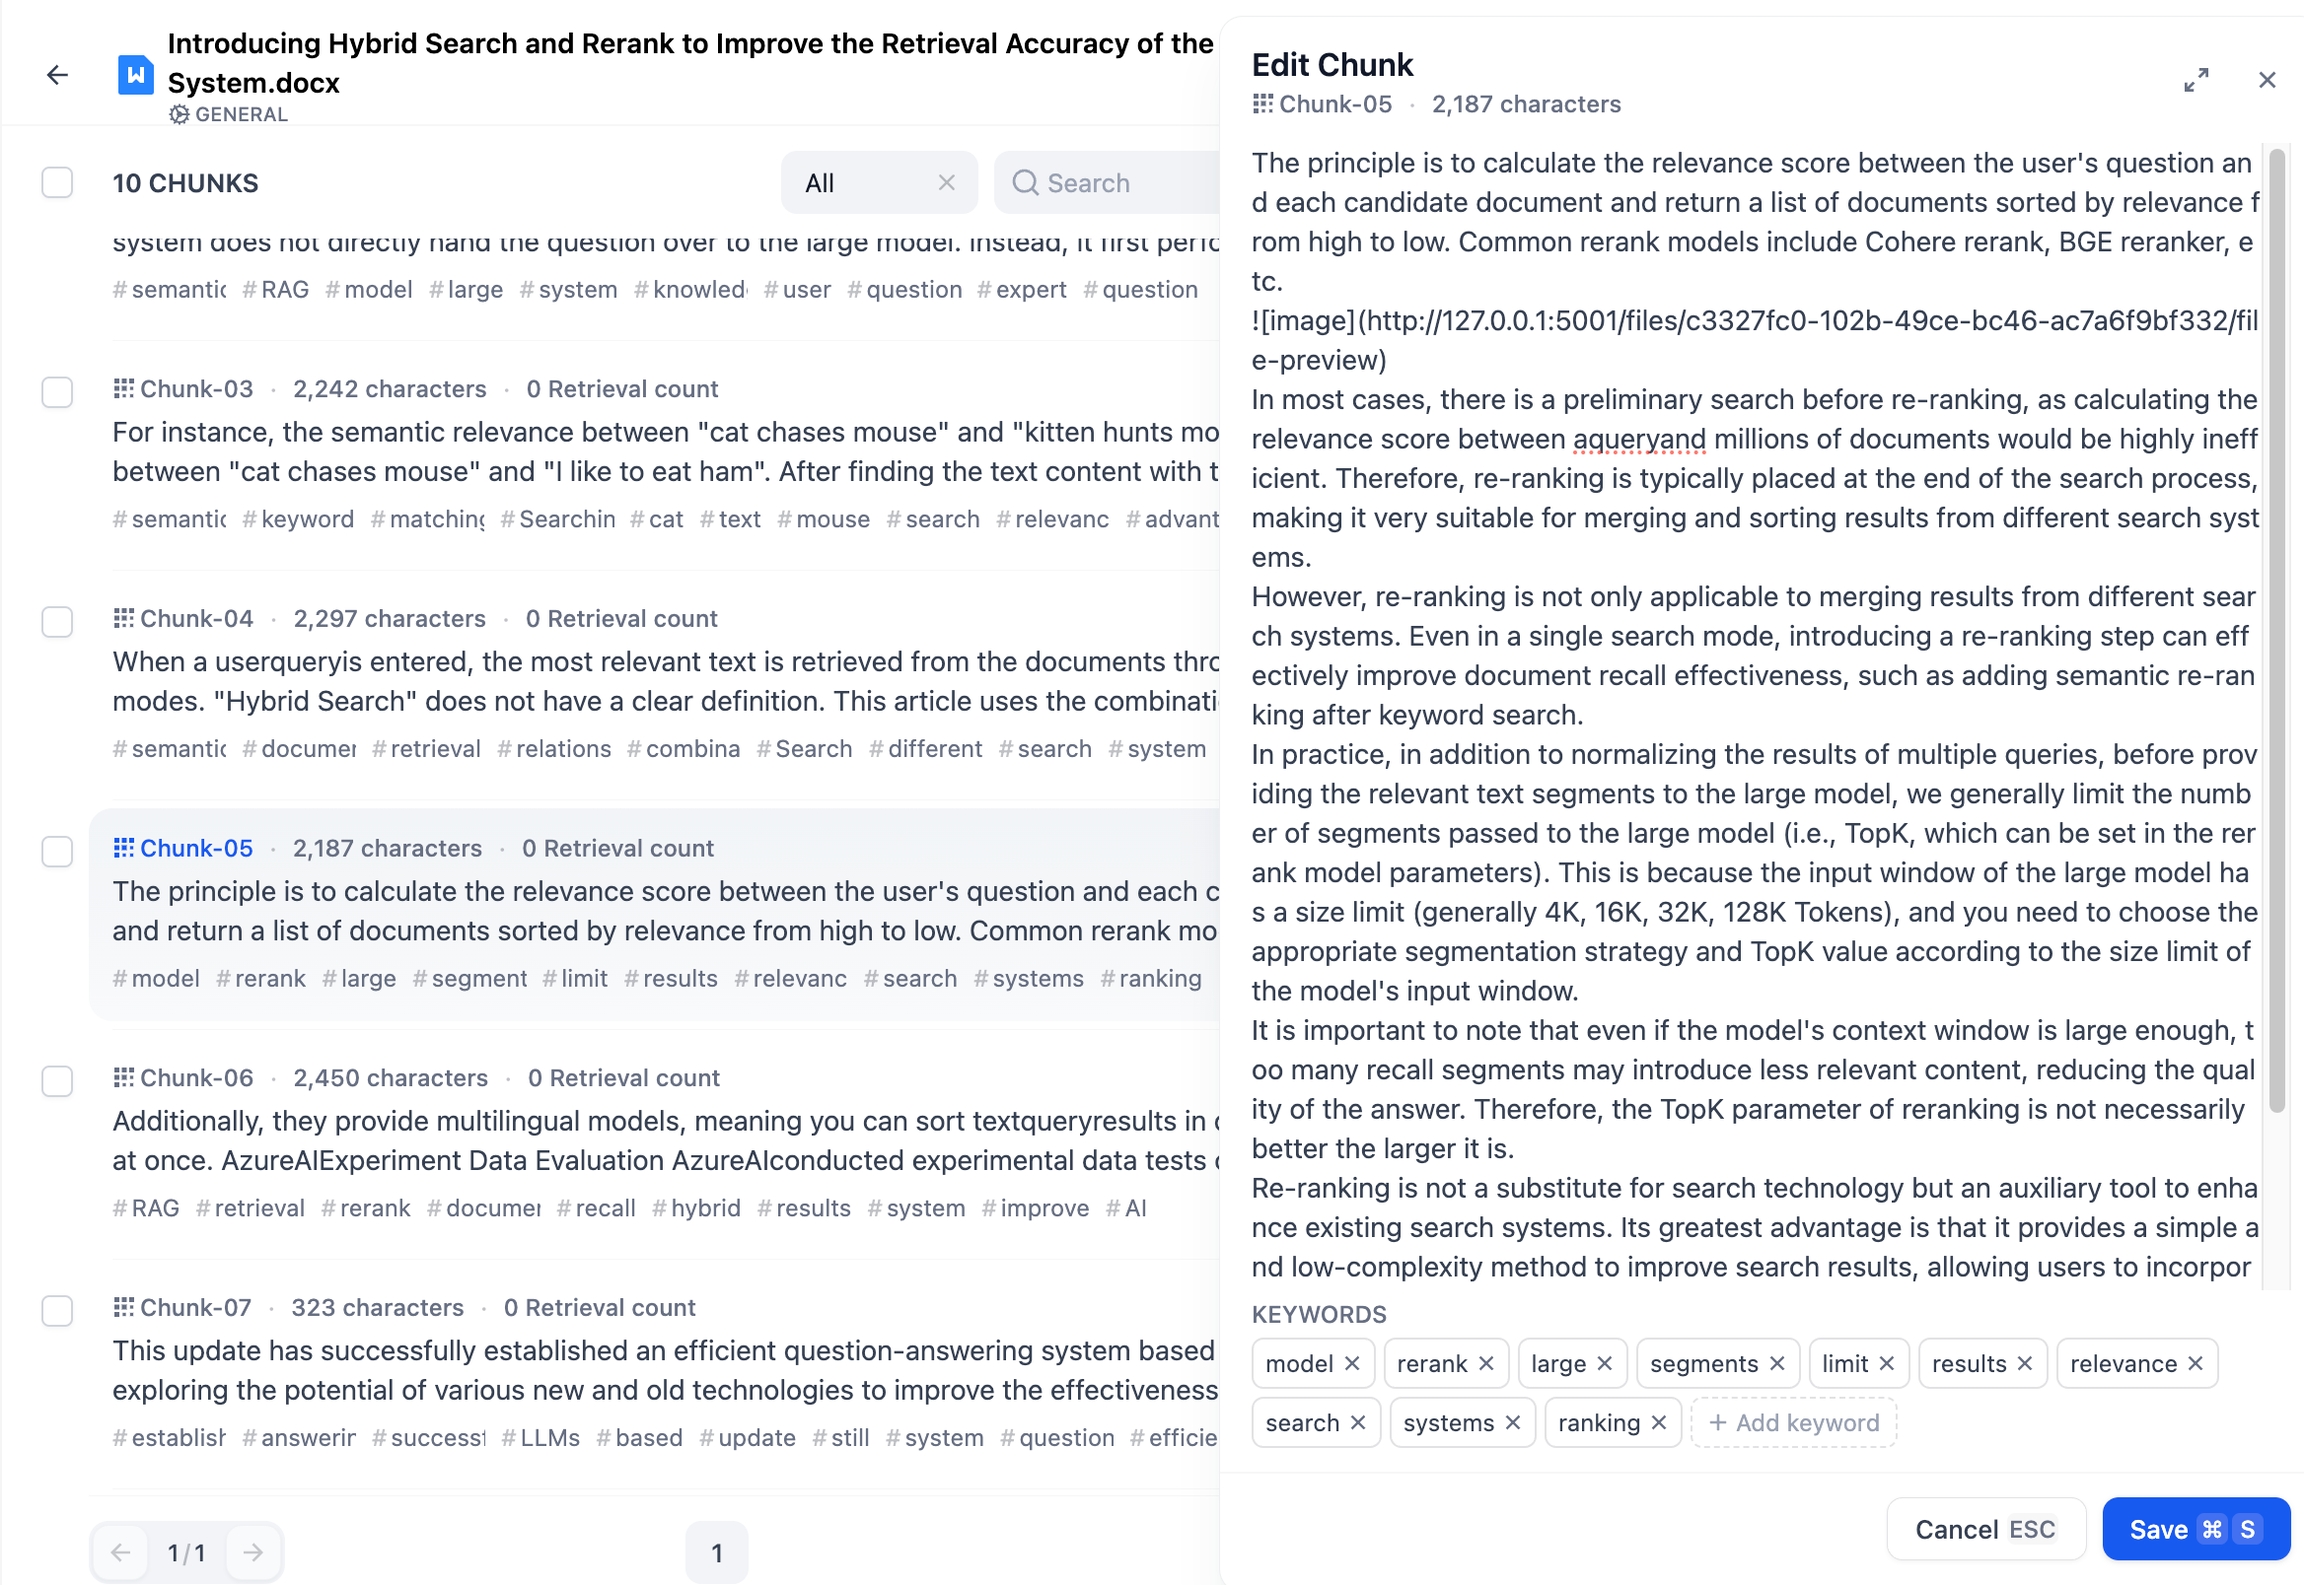
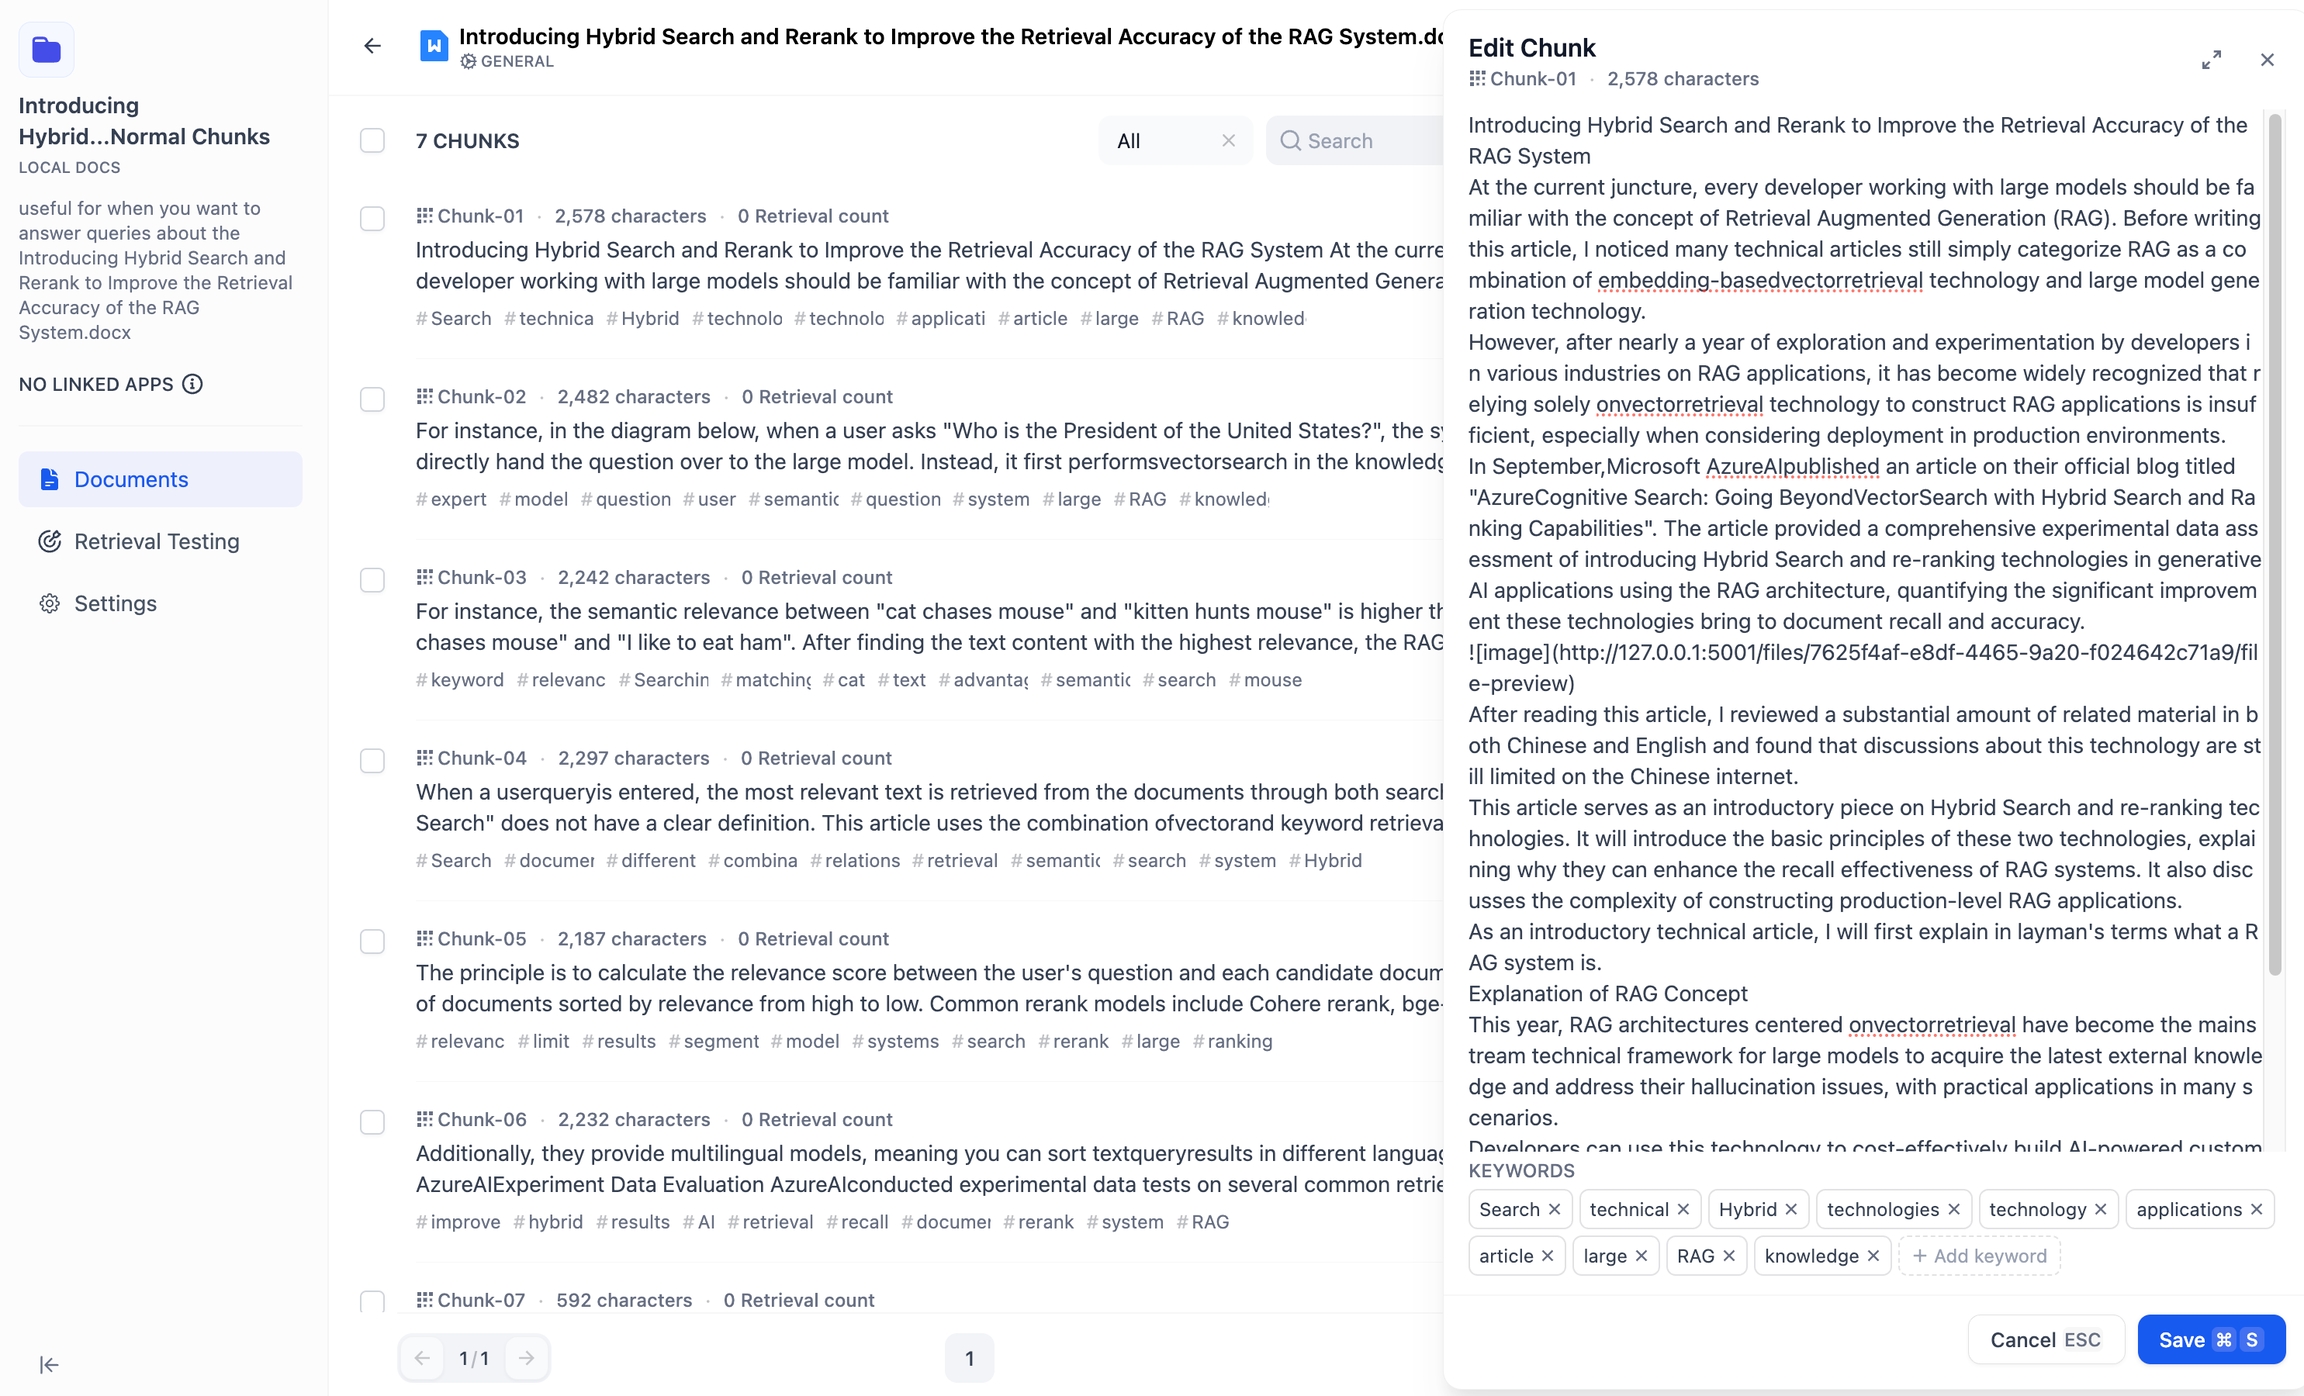
General Mode
You can directly edit or modify the added chunks content, including modifying the text content or keywords within the chunks.
To prevent duplicate edits, an “Edited” tag will appear on the content chunk after it has been modified.
Parent-child Mode
A parent chunk contains the content of its child chunks, but they remain independent. You can edit the parent chunk or child chunks separately. Below is a diagram explaining the process of modifying parent and child chunks:
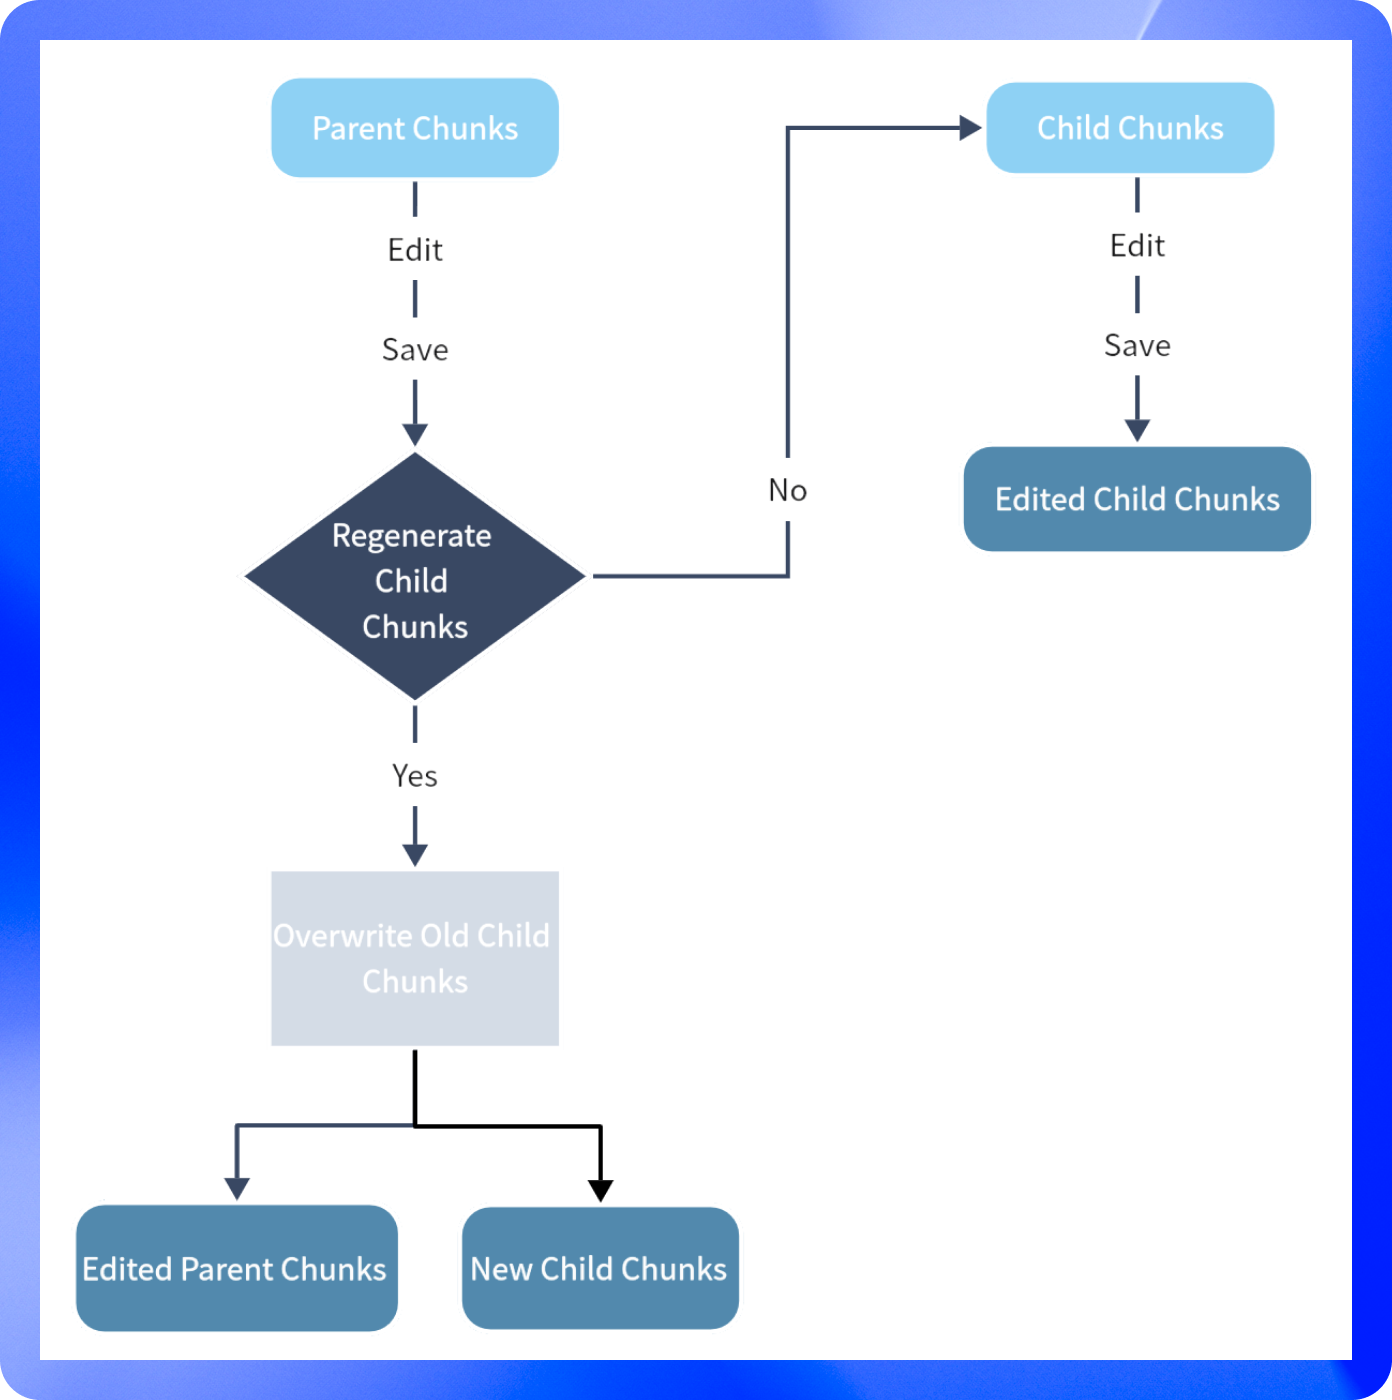
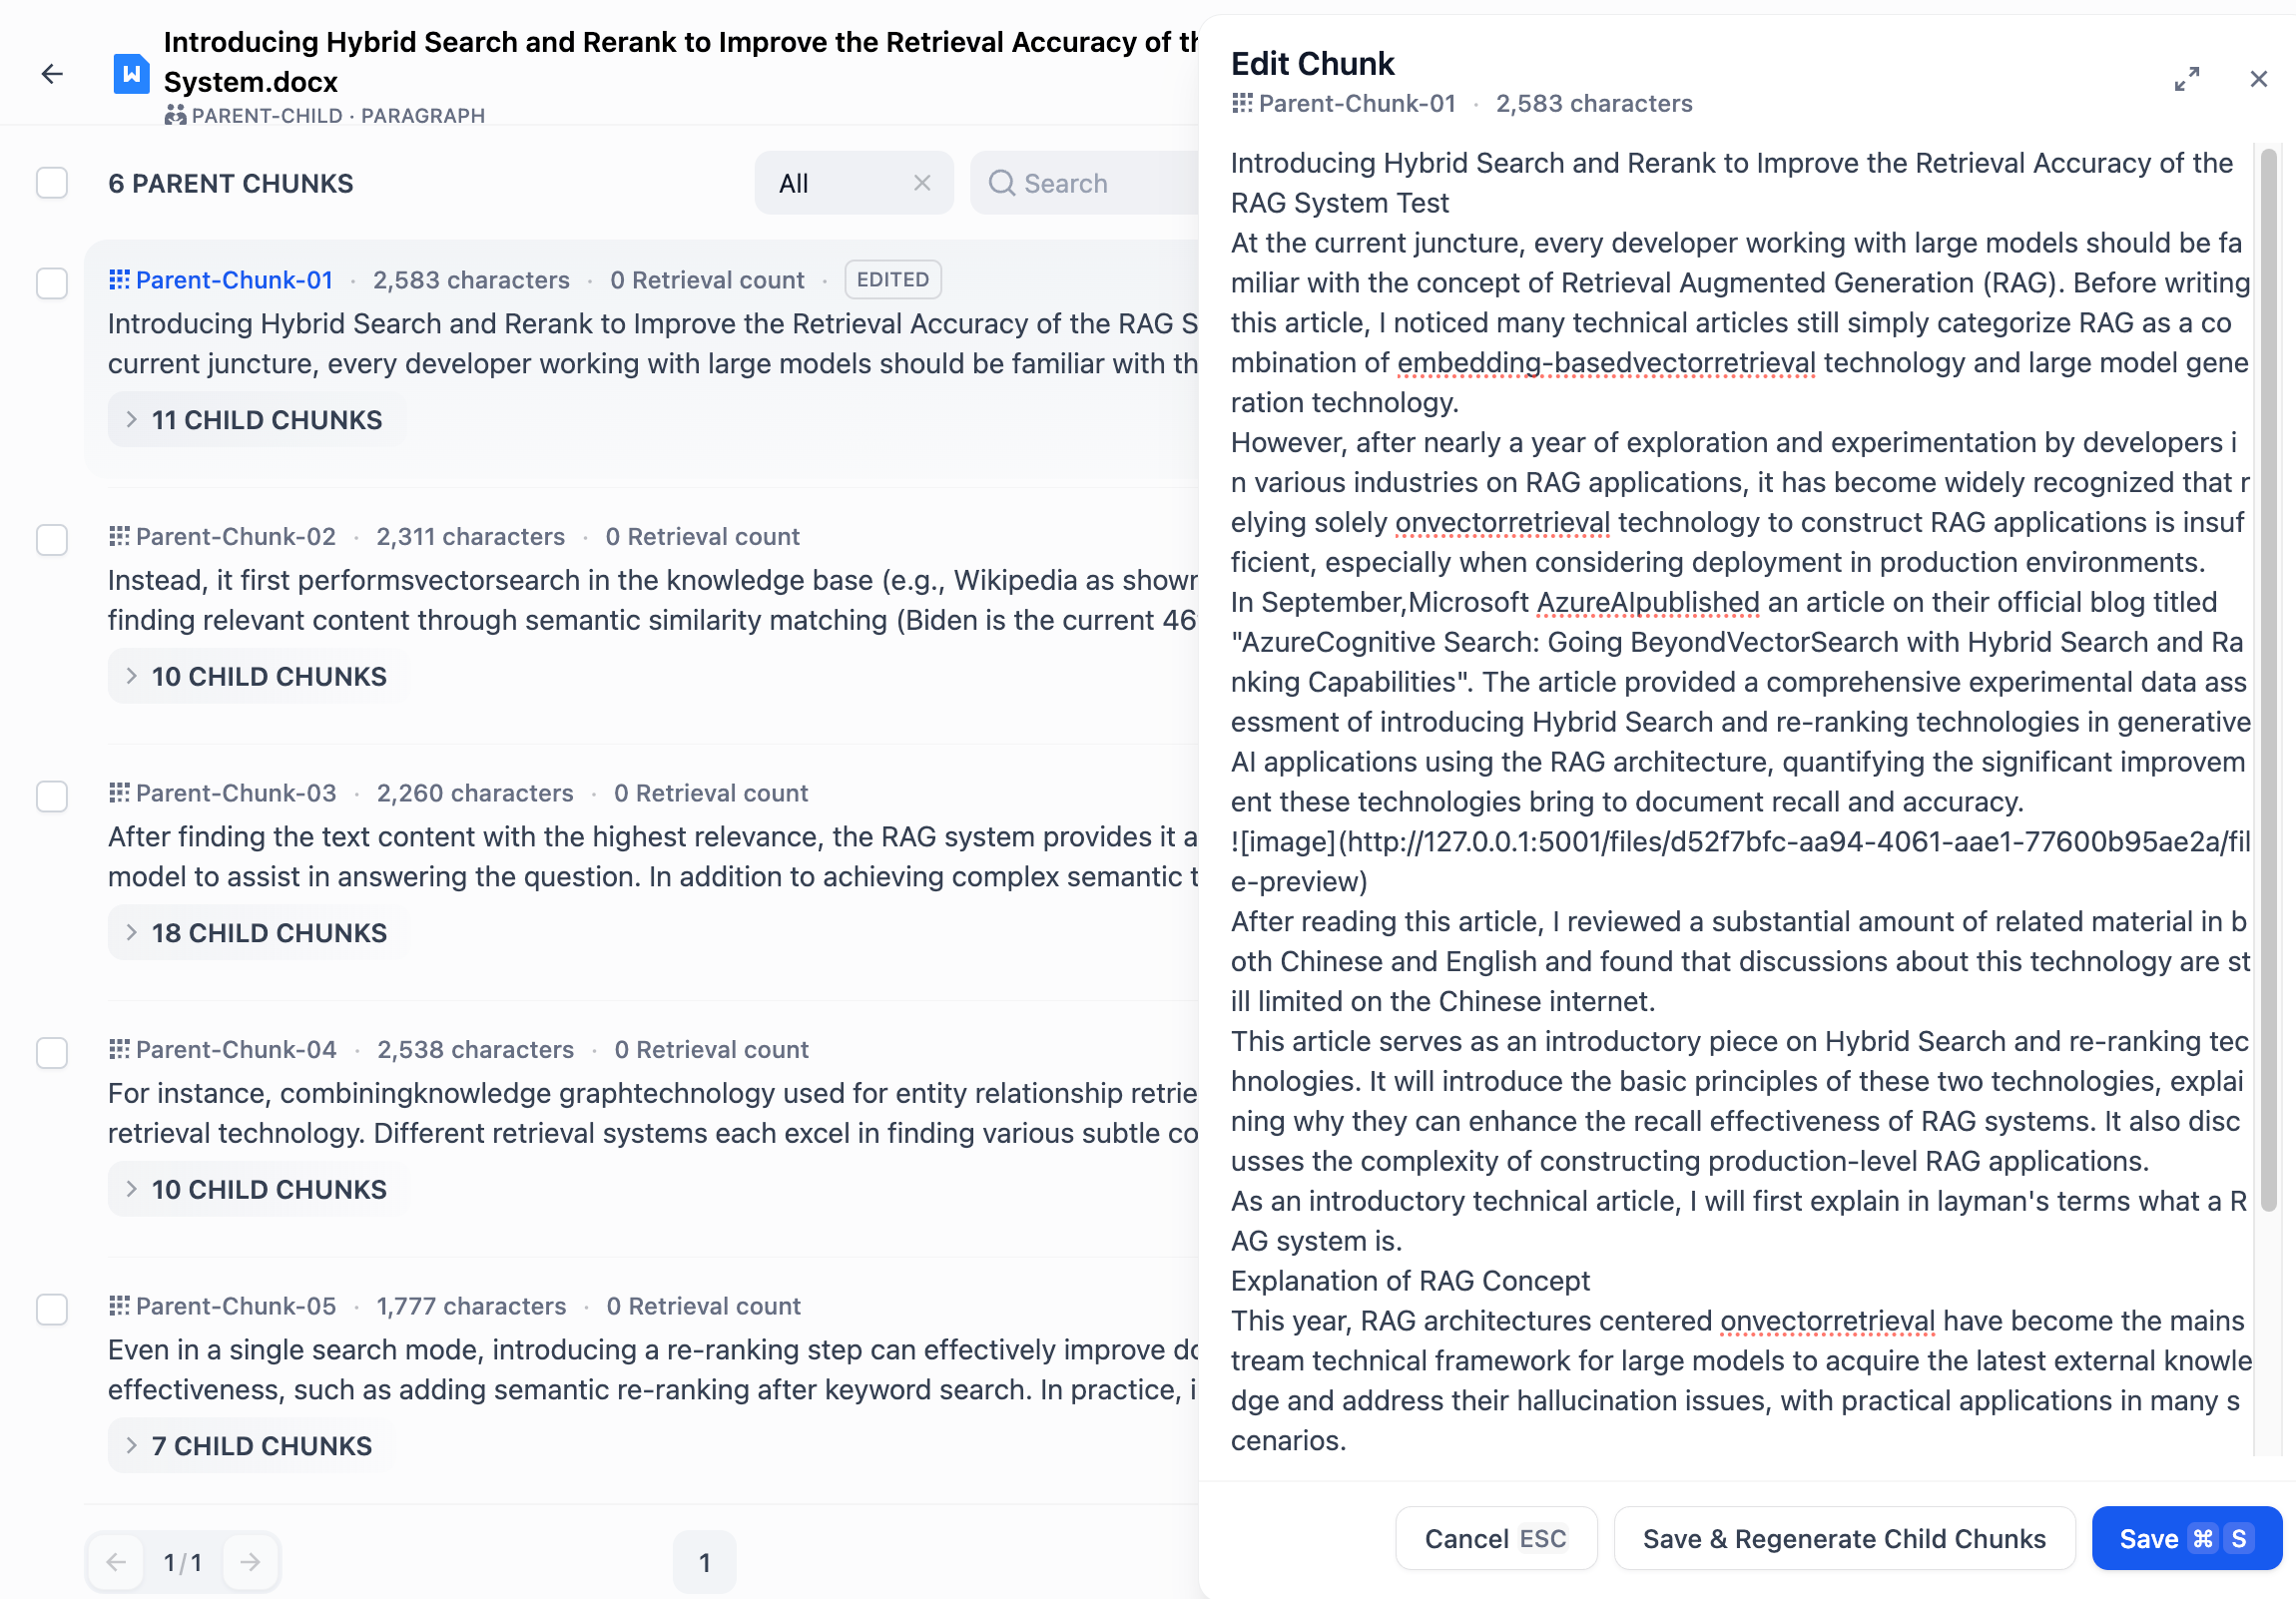
To edit a parent chunk:
1. Click the Edit button on the right side of the parent chunk.
2. Enter your changes and then click Save—this won’t affect the content of the child chunks.
3. If you want to regenerate the child chunks after editing, click Save and Re-generate Child Chunks.
To prevent duplicate edits, an “Edited” tag will appear on the content chunk after it has been modified.
Modify child chunks: select any child chunks and enter edit mode and save it after modification. The modification will not affect the contents of the parent chunks. Child chunks that have been edited or newly added will be marked with a deep blue label, C-NUMBER-EDITED.
You can also treat child chunks as tags for the current parent text block.

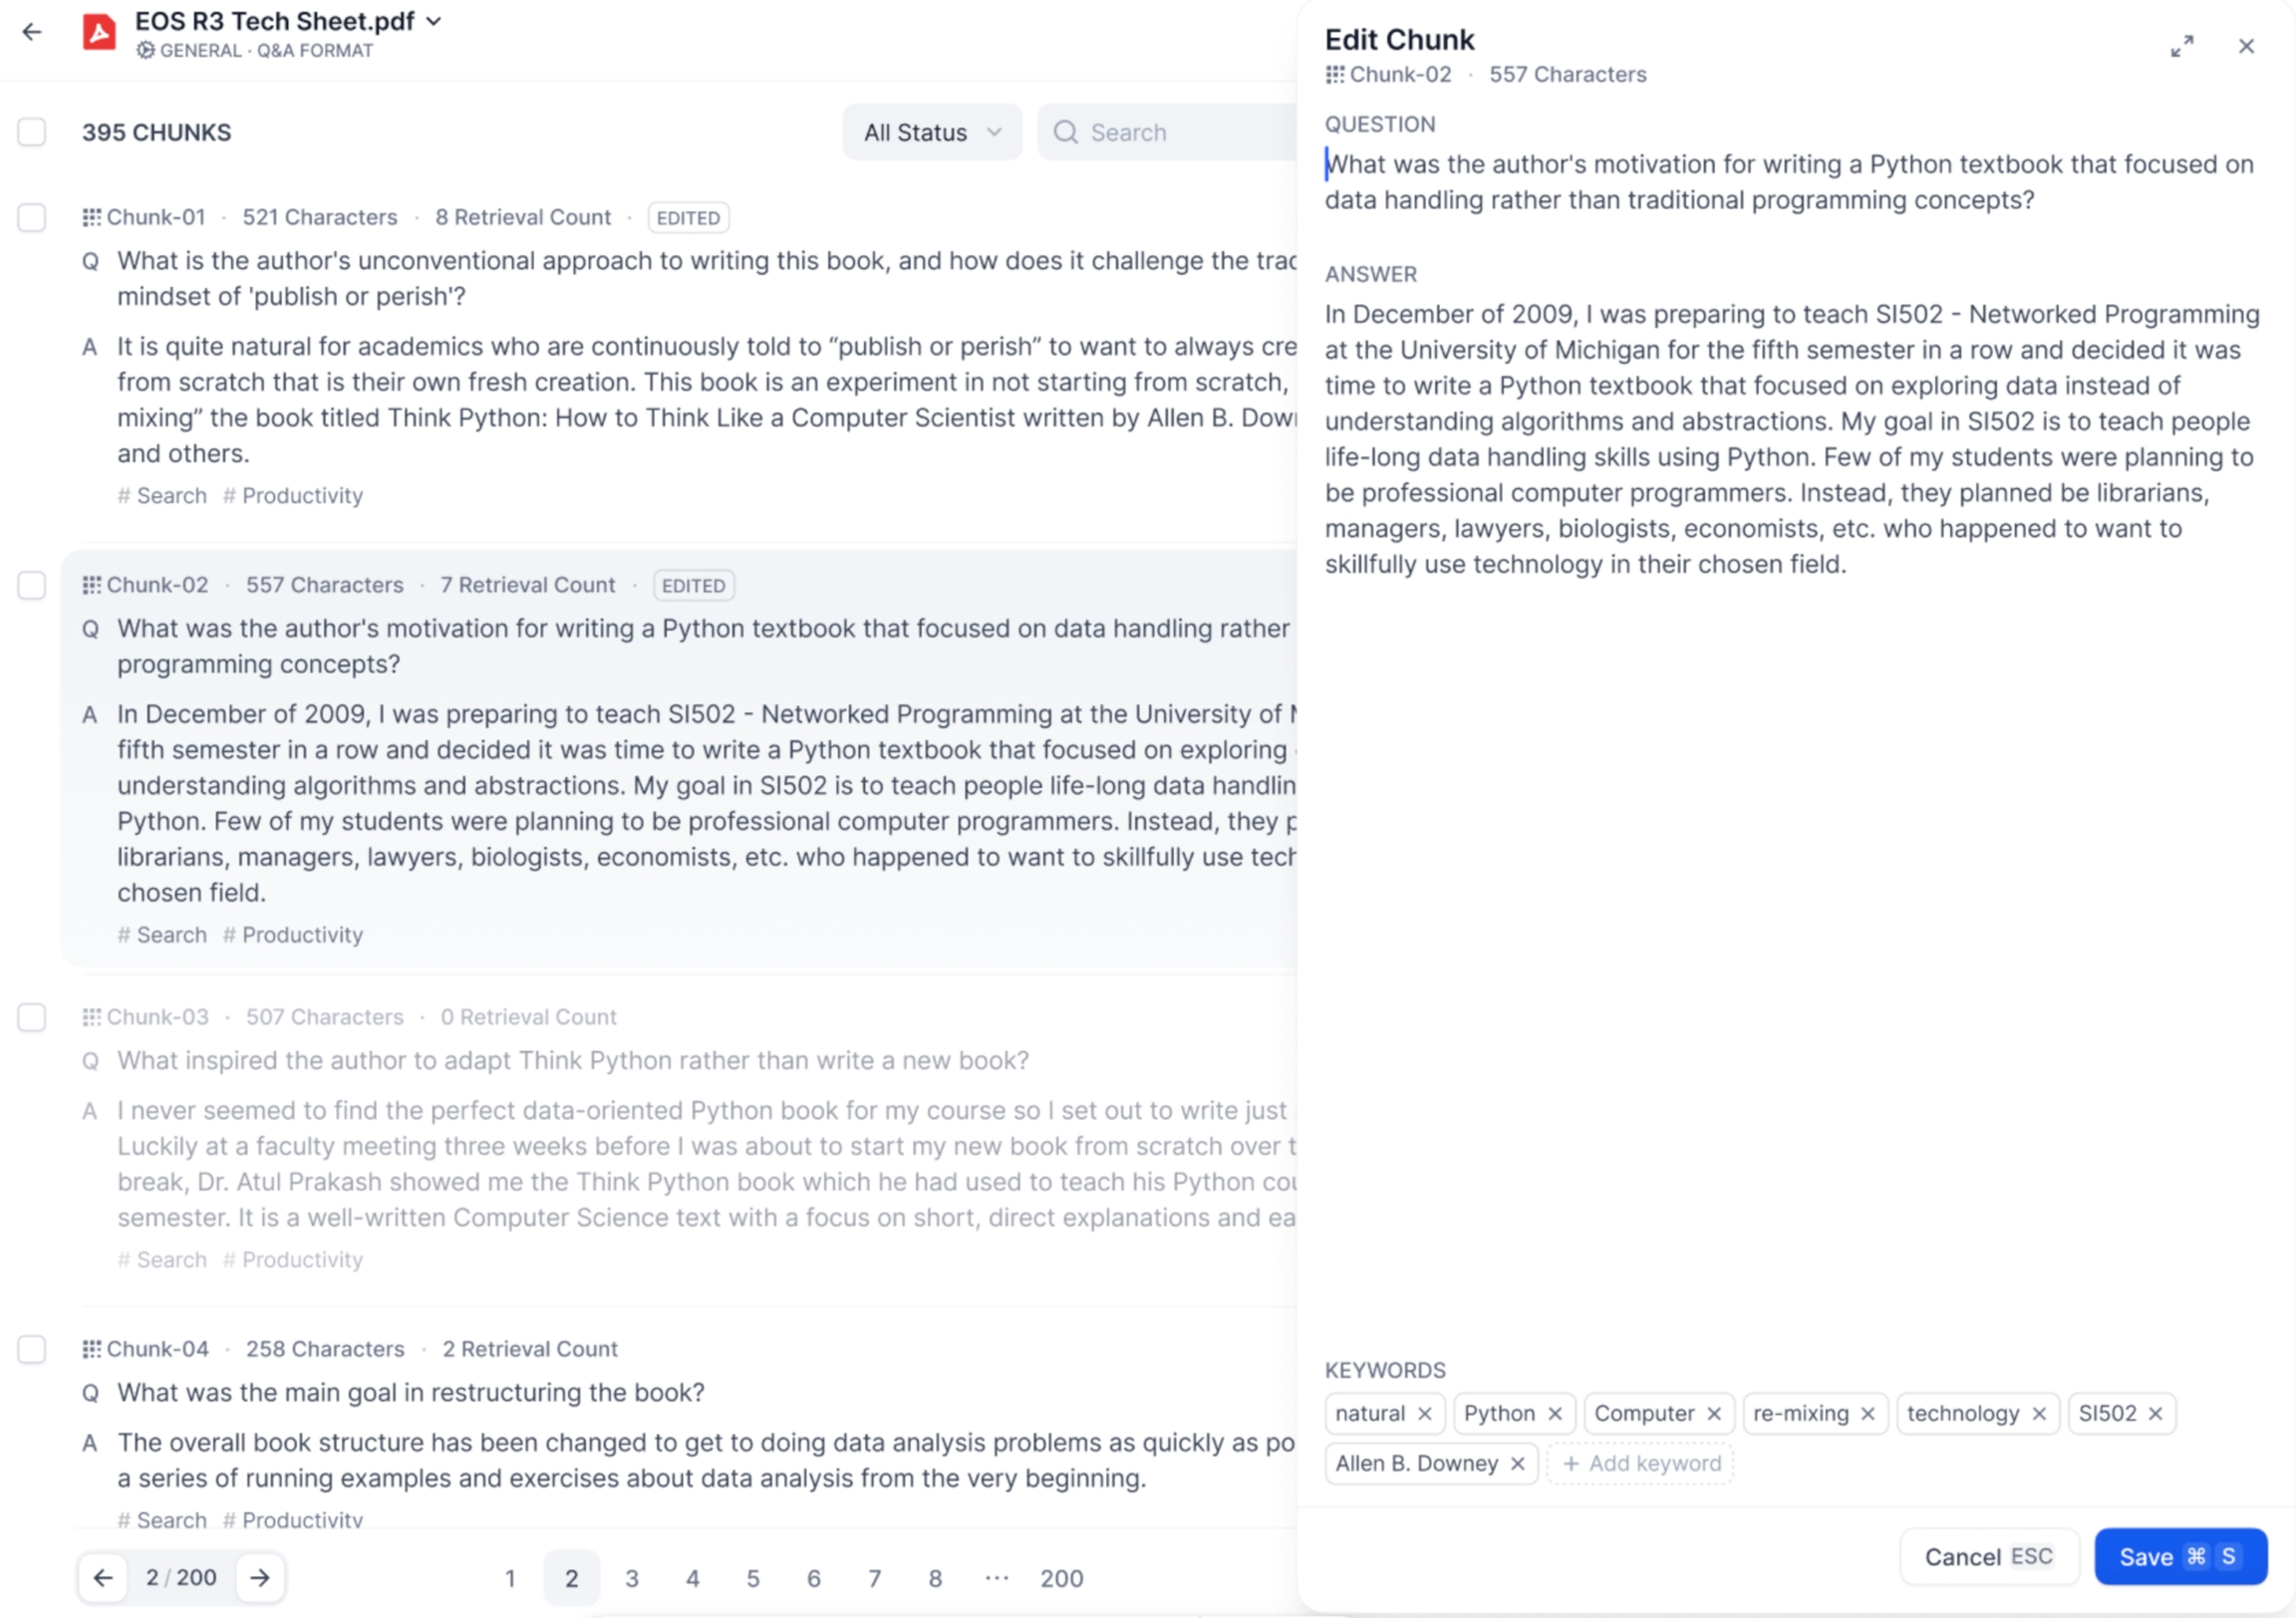
Q&A Mode
In Q&A chunking mode, each content chunk consists of a question and an answer. Click on the text chunk you wish to edit to modify the question and answer individually. Additionally, you can edit the keywords for the current chunk.
Modify Text Chunks for Uploaded Documents
Knowledge Base supports reconfiguring document segmentation.
Larger Chunks
Retain more context within each chunk, ideal for tasks requiring a broader understanding of the text.
Reduce the total number of chunks, lowering processing time and storage overhead.
Smaller Chunks
Provide finer granularity, improving accuracy for tasks like extraction or summarization.
Reduce the risk of exceeding model token limits, making it safer for models with stricter constraints.
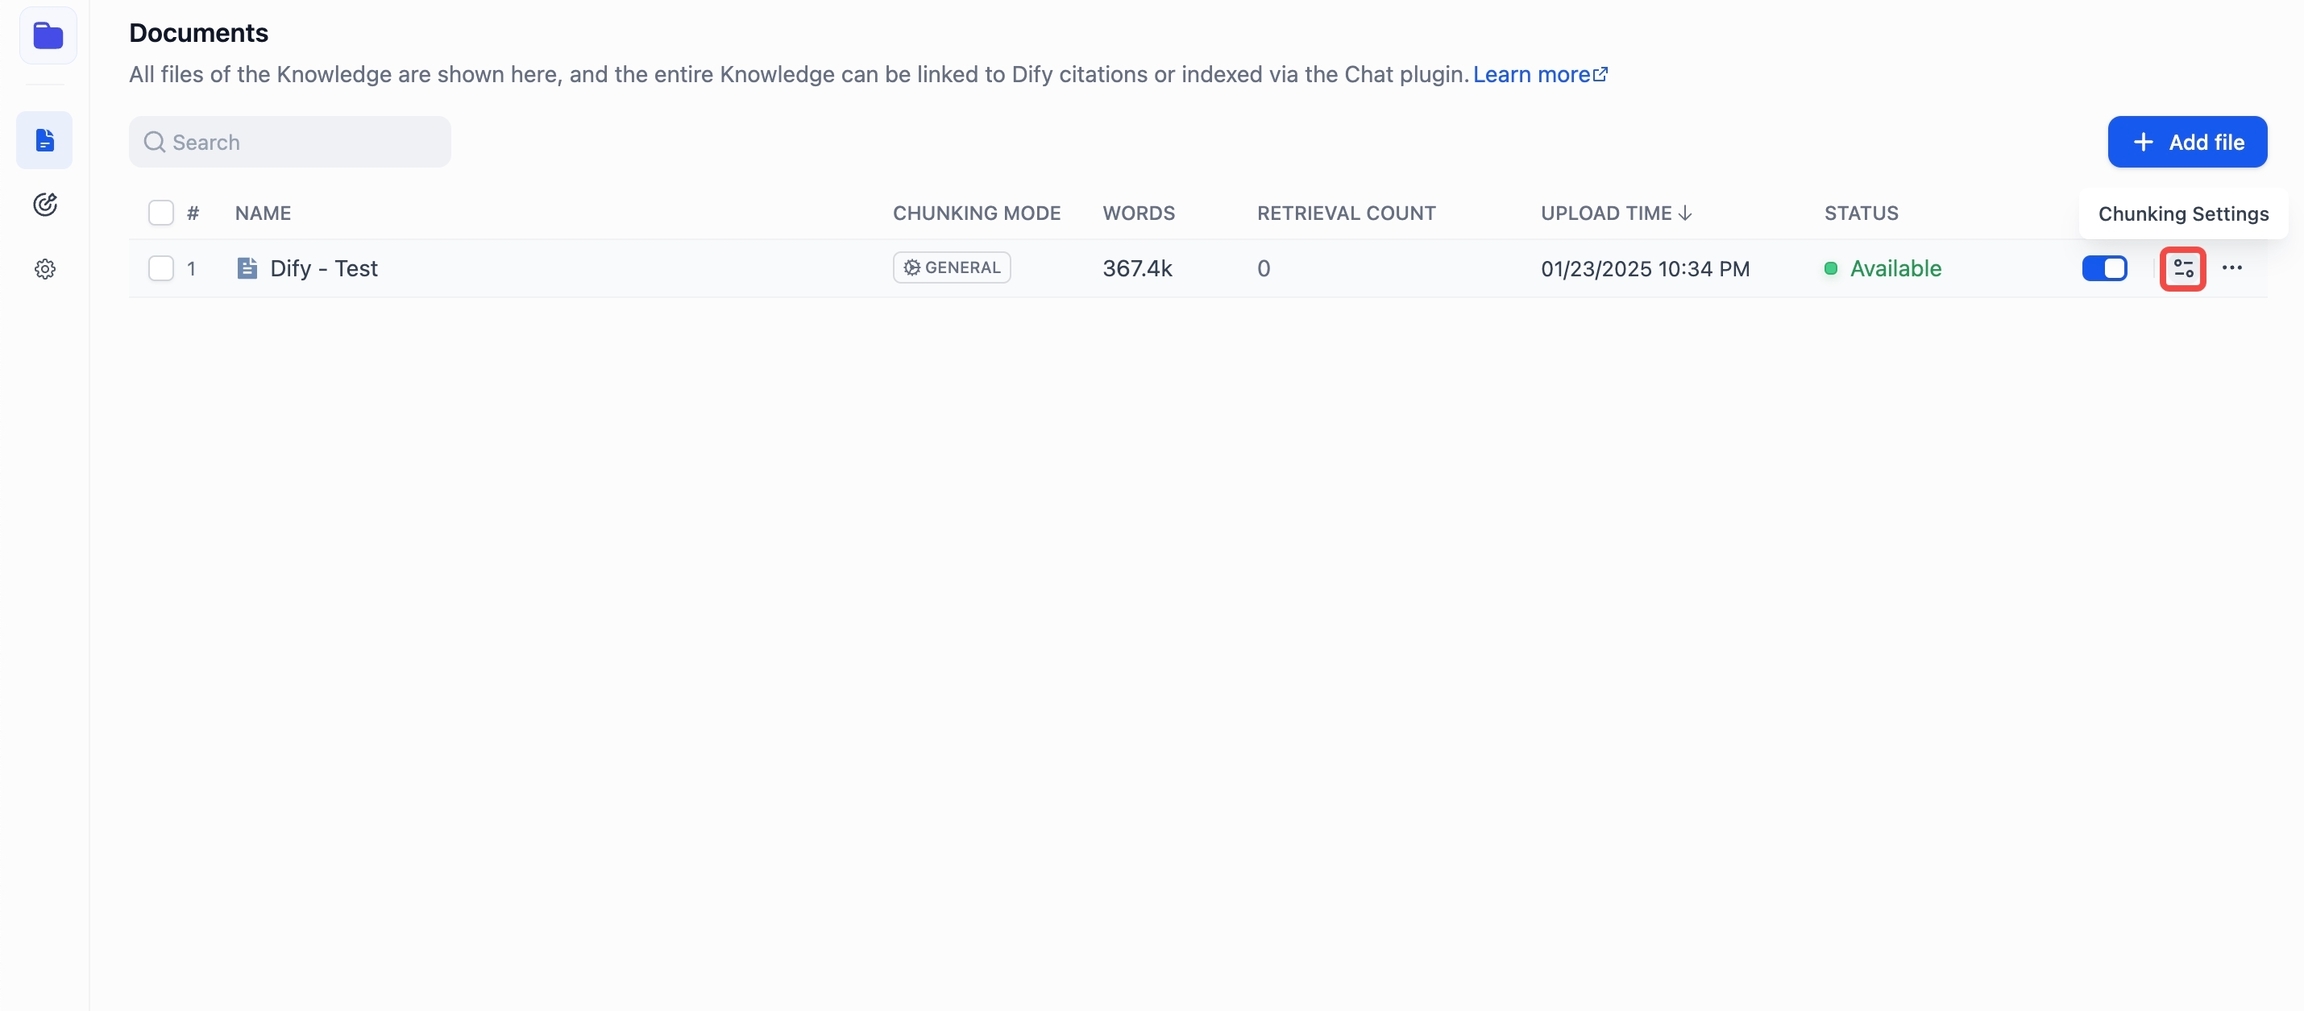
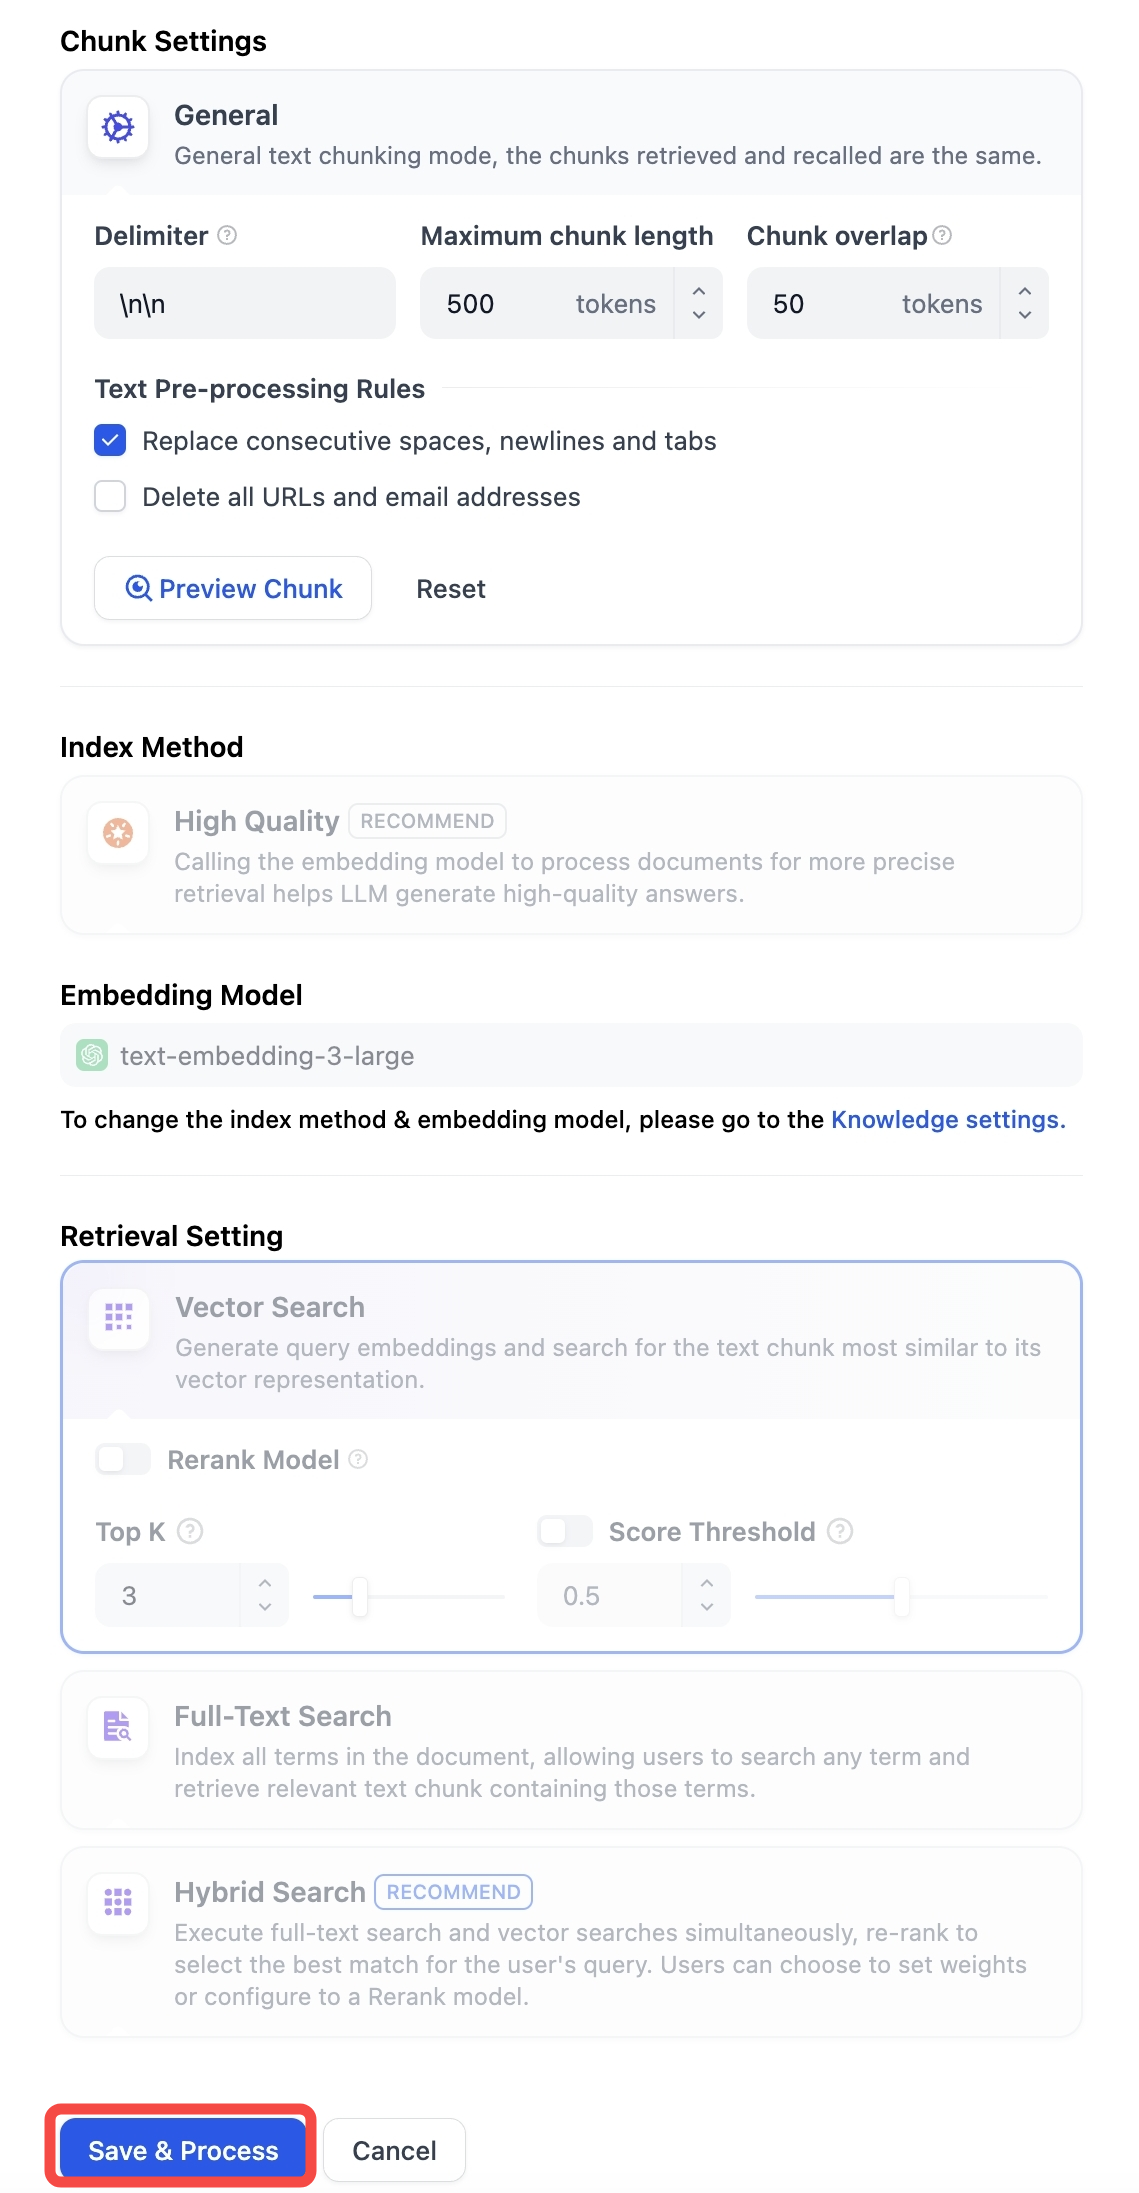
Go to Chunk Settings, adjust the settings, and click Save & Process to save changes and reprocess the document. The chunk list will update automatically once processing is complete—no page refresh needed.
Metadata
For more details on metadata, see Metadata.
Last updated