
Building an AI Thesis Slack Bot on Dify
Author:Alec Lee. 2025/03/11
1. Overview
With the rapid growth of academic research in the information age, researchers require more efficient ways to access the latest findings. The AI Thesis Slack Bot streamlines this process by leveraging AI-driven automated workflows, enabling users to quickly retrieve arXiv paper summaries within Slack.
This tool can be used in various real estate-related contexts, such as:
Research teams tracking the latest AI advancements in real estate technology
Internal synchronization of information for AI research departments in real estate firms
Academic collaborations between university faculty and students on real estate innovation
This guide will walk you through setting up the AI Thesis Slack Bot, its core operating principles, and how to maximize its efficiency to enhance productivity in the real estate sector.
2. Preparation
2.1 Configuring the OpenAI API
Set up OpenAI in your account’s model settings and install the API key.

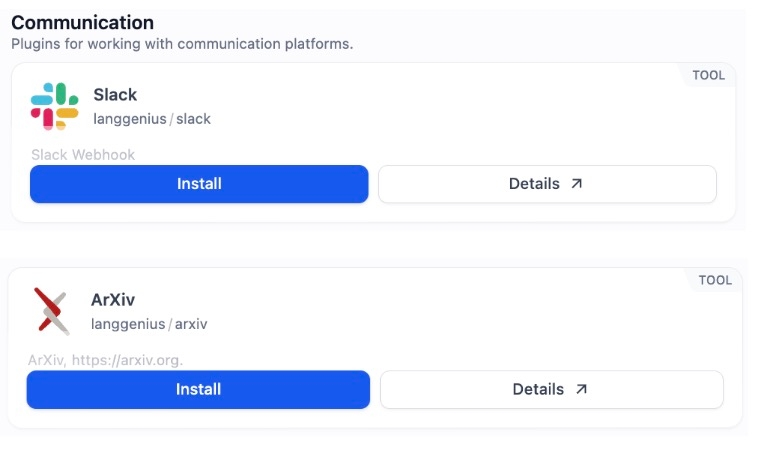
2.2 Installing ArXiv and Slack Plugins
Install the ArXiv and Slack tools within the Dify platform.
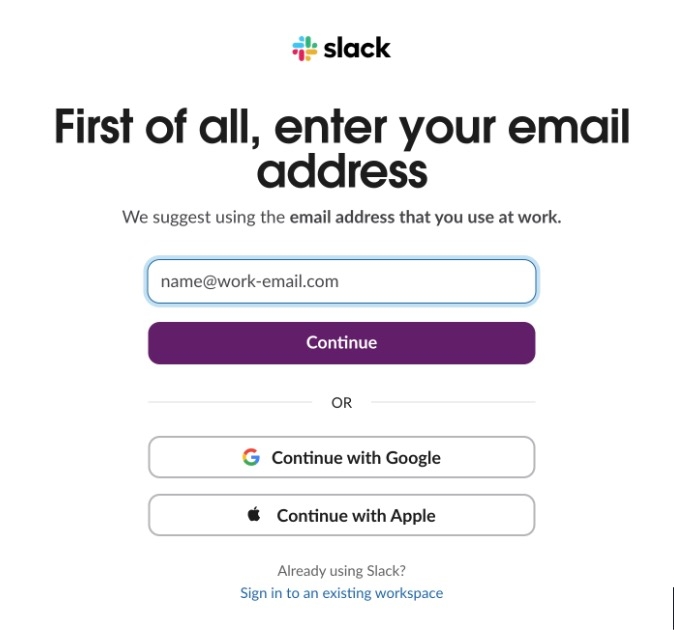
2.3 Creating a Slack Account
Sign up for a free Slack account on the official Slack website.
3. Setting Up the AI Thesis Slack Bot Workflow
The AI Thesis Slack Bot operates through the following automated process:
a. User Input: The user enters a keyword (e.g., "Large Language Model") in the Dify AI Thesis Slack Bot. b.Paper Retrieval: The bot queries arXiv for relevant research papers, filtering for the most recent publications (e.g., papers published after January 1, 2024).
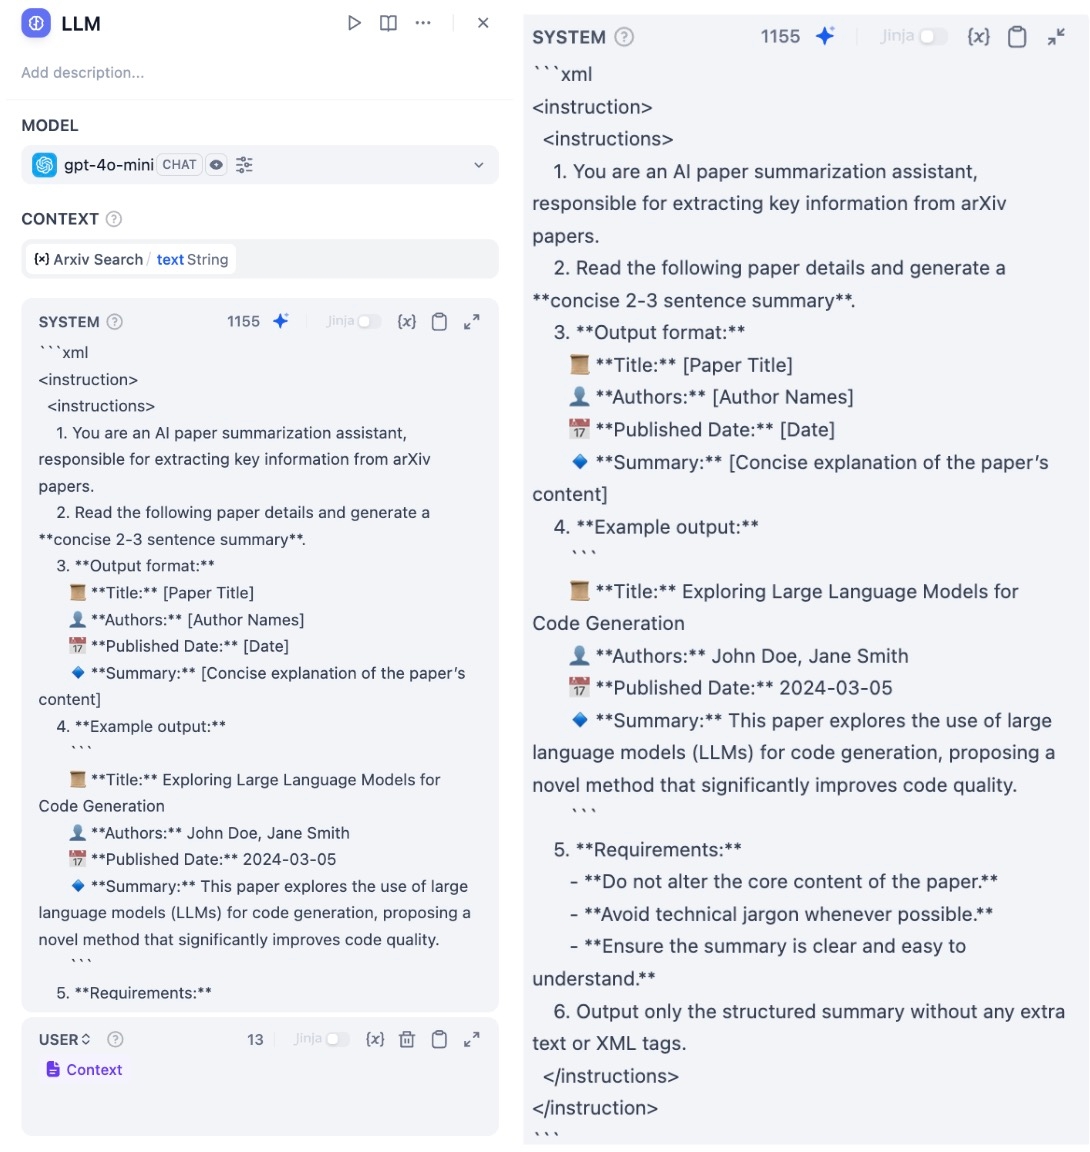
c.AI-Powered Summarization: Using GPT-4o, the bot processes and summarizes the papers, then formats the summary for Slack in the following structure:
📄 Title: [Paper Title] 👤 Author(s): [Author Names] 📆 Publication Date: [Date] 📌 Summary: [Key takeaways from the paper]
d.Automated Slack Push: The bot automatically posts the summary to a designated Slack channel, ensuring that team members can quickly access the latest research updates—whether in a public channel or private messages.
4. Implementation Steps
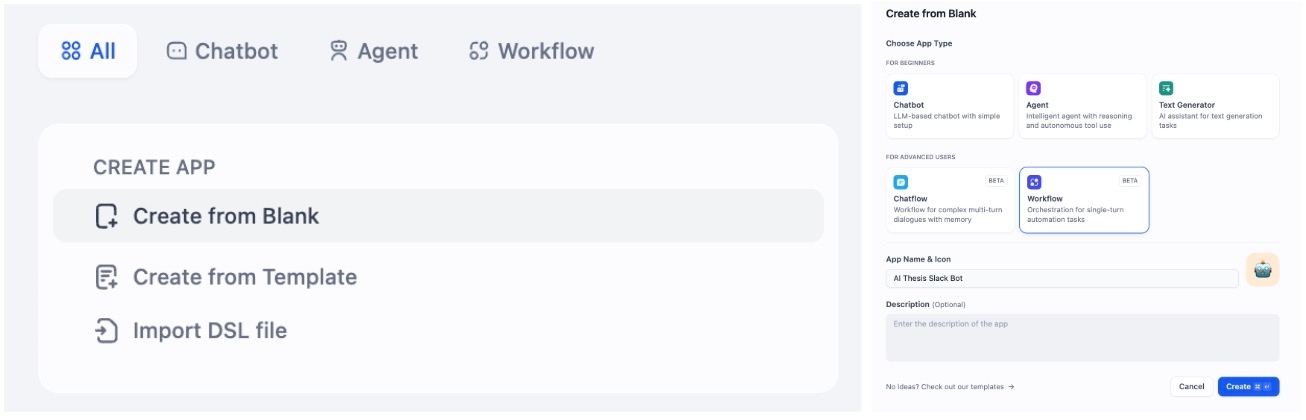
4.1 Creating the Workflow
a. On the Dify homepage, select Create from Blank, then choose Workflow and enter a name (e.g., AI Thesis Slack Bot).
Let me know if you need further refinements! 🚀
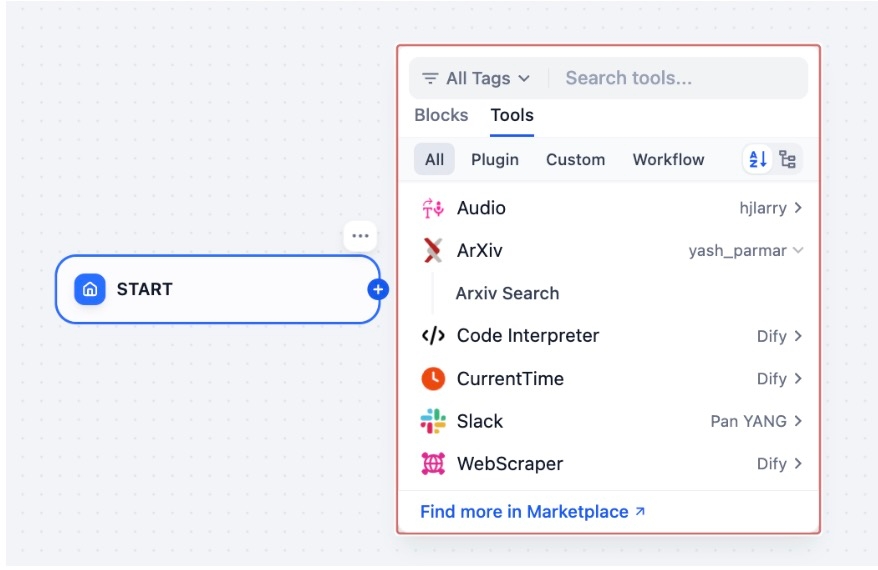
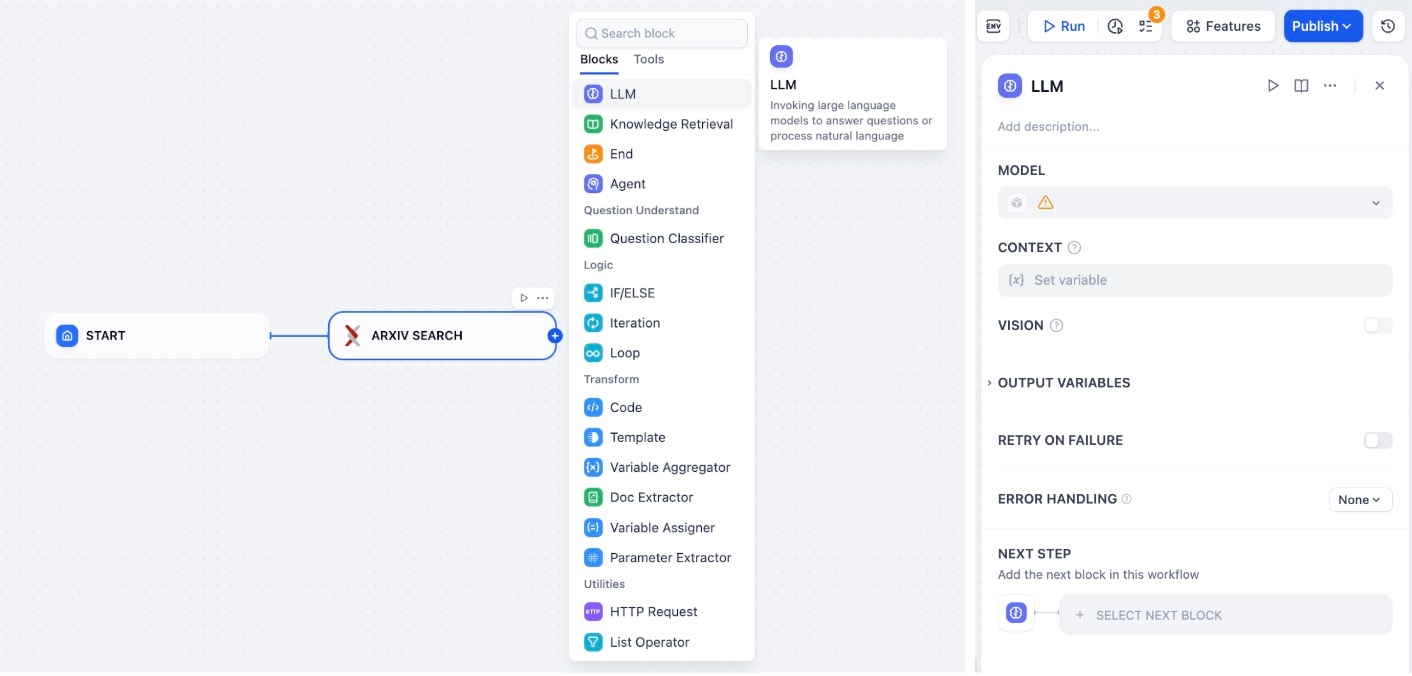
b. In the Tools section, select the ArXiv Search tool that has already been installed.
c. In the Nodes section, choose LLM, and configure it to use the pre-set OpenAI model.
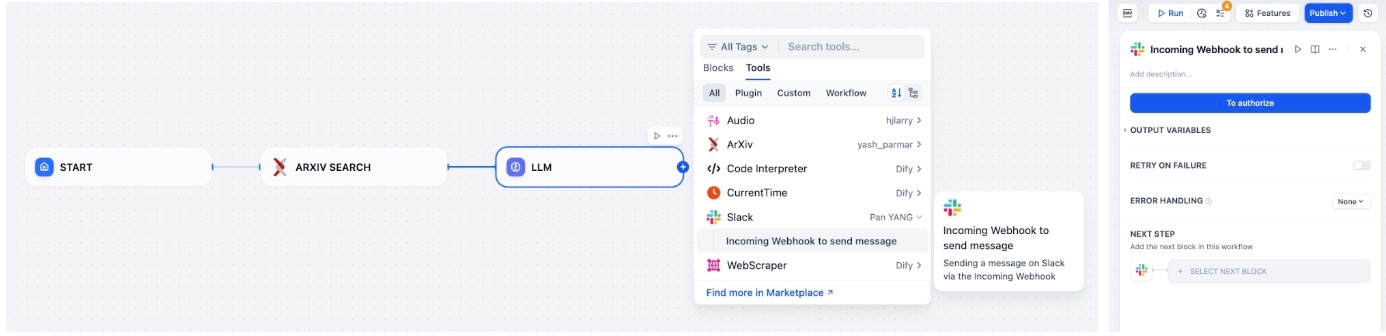
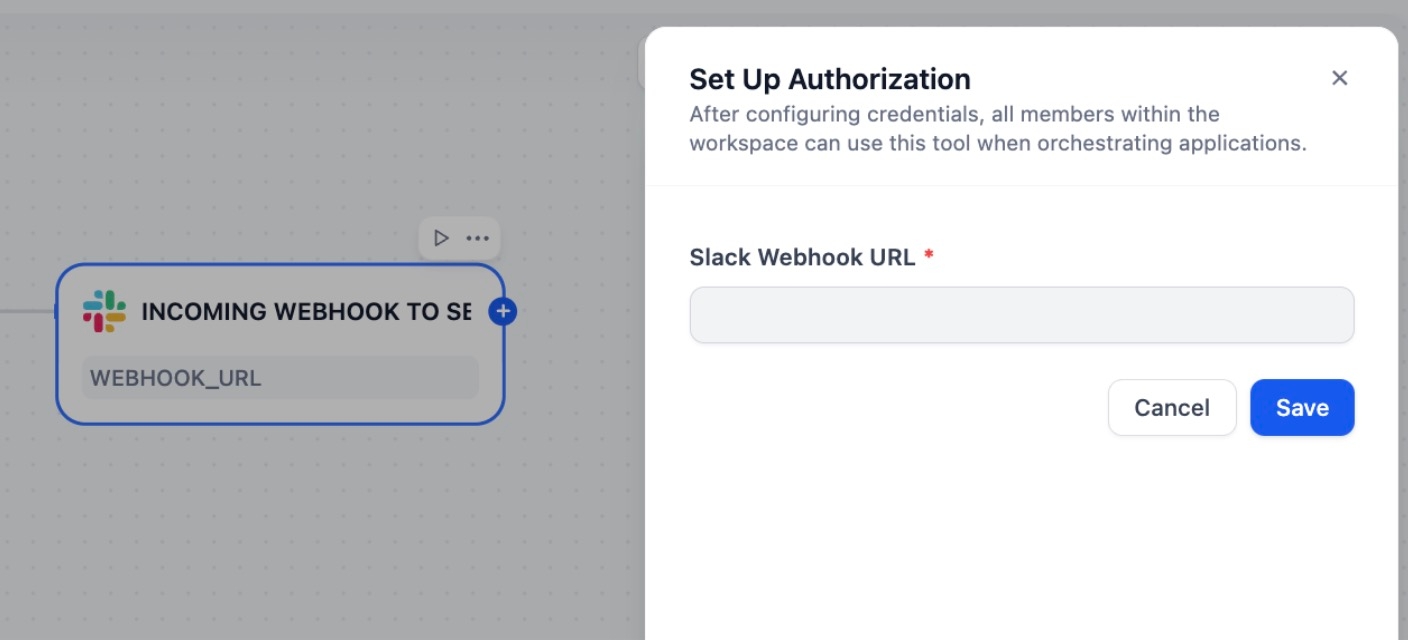
d. In the Tools section, select the installed Slack Incoming Webhook, click Authorize, and add the Slack Webhook URL.
4.2 Adding the Slack Webhook URL
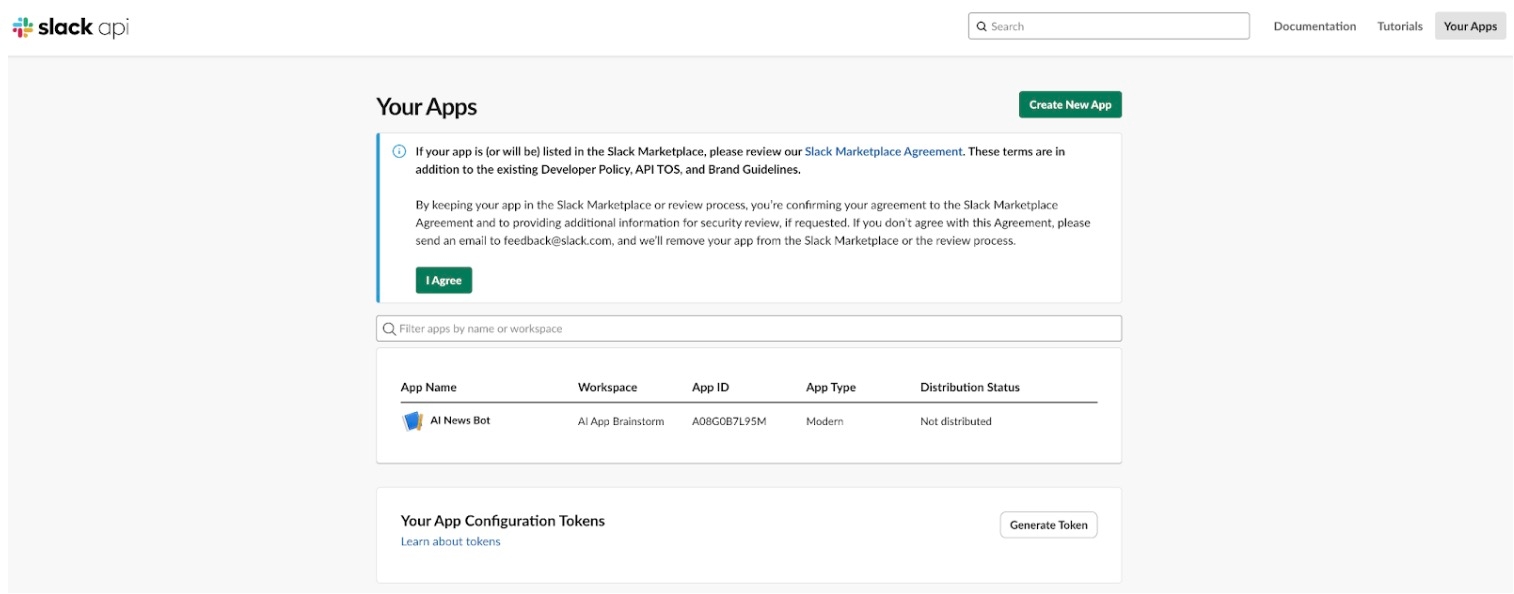
a. Go to the Slack API Management Page and click Create New App.
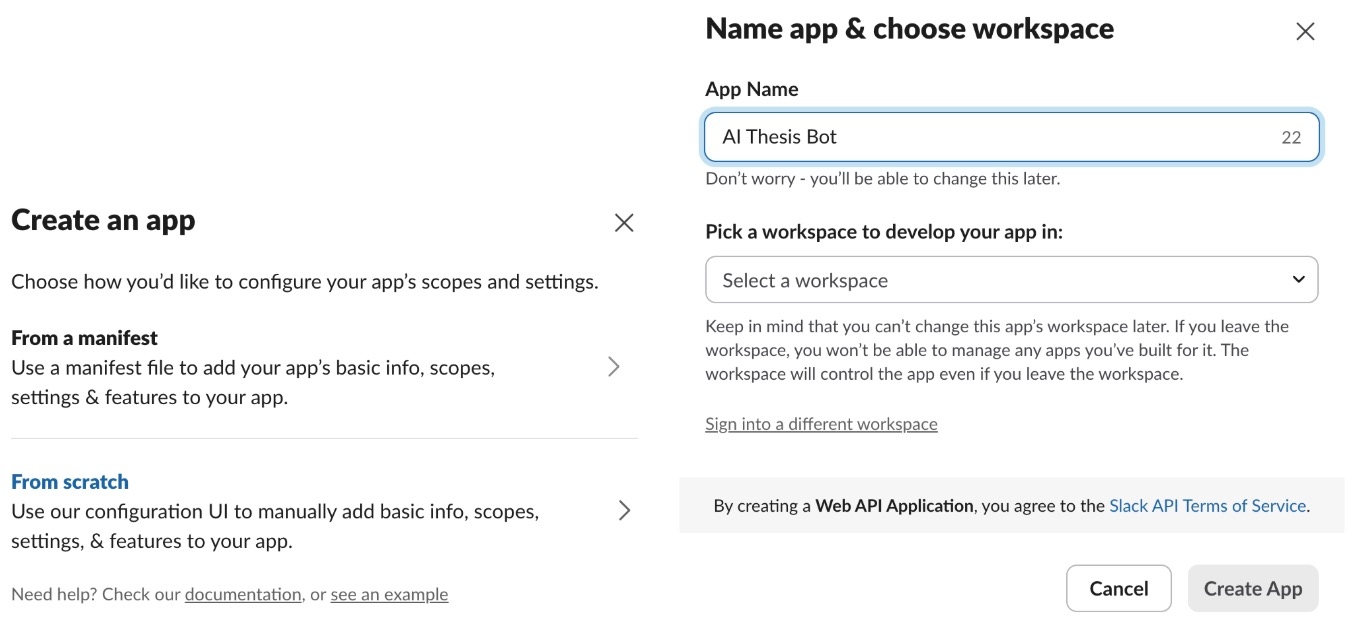
b. Select "From scratch", enter the app name (e.g., AI Thesis Bot), and choose the Slack channel where messages will be sent.
c. Navigate to Incoming Webhooks, enable Activate Incoming Webhooks, then click Add New Webhook to Workspace. Select the Slack channel, then copy the generated Webhook URL.
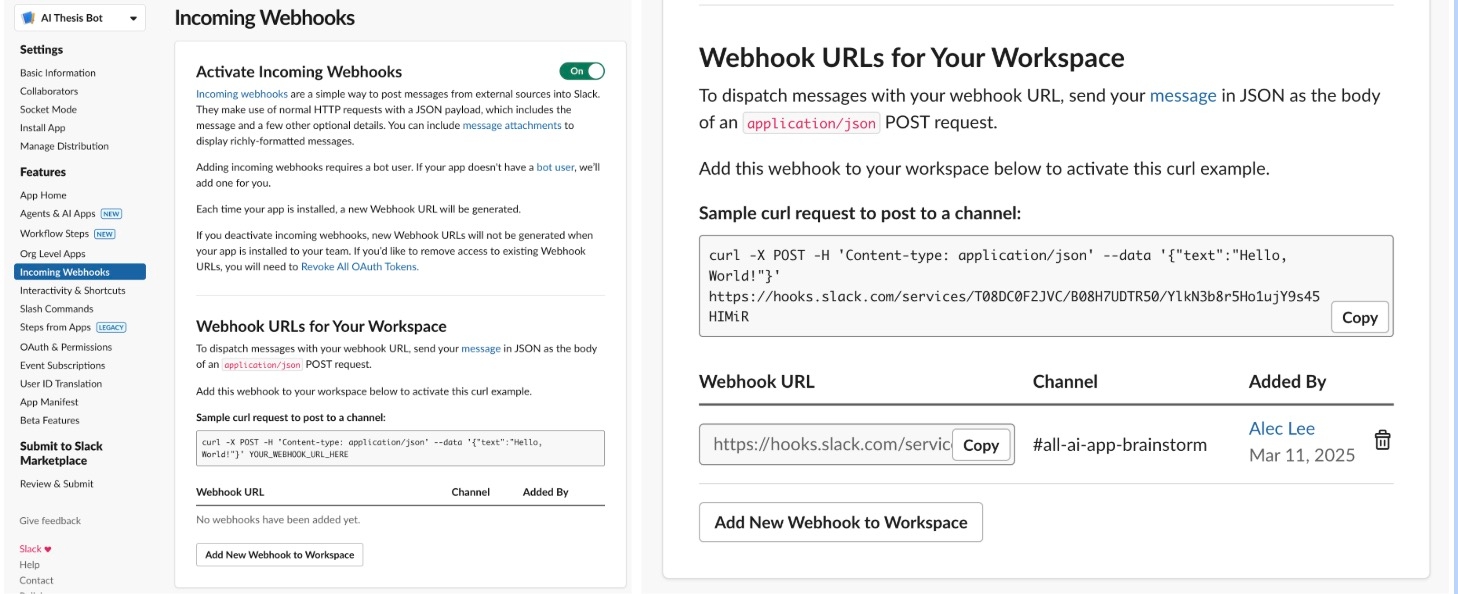
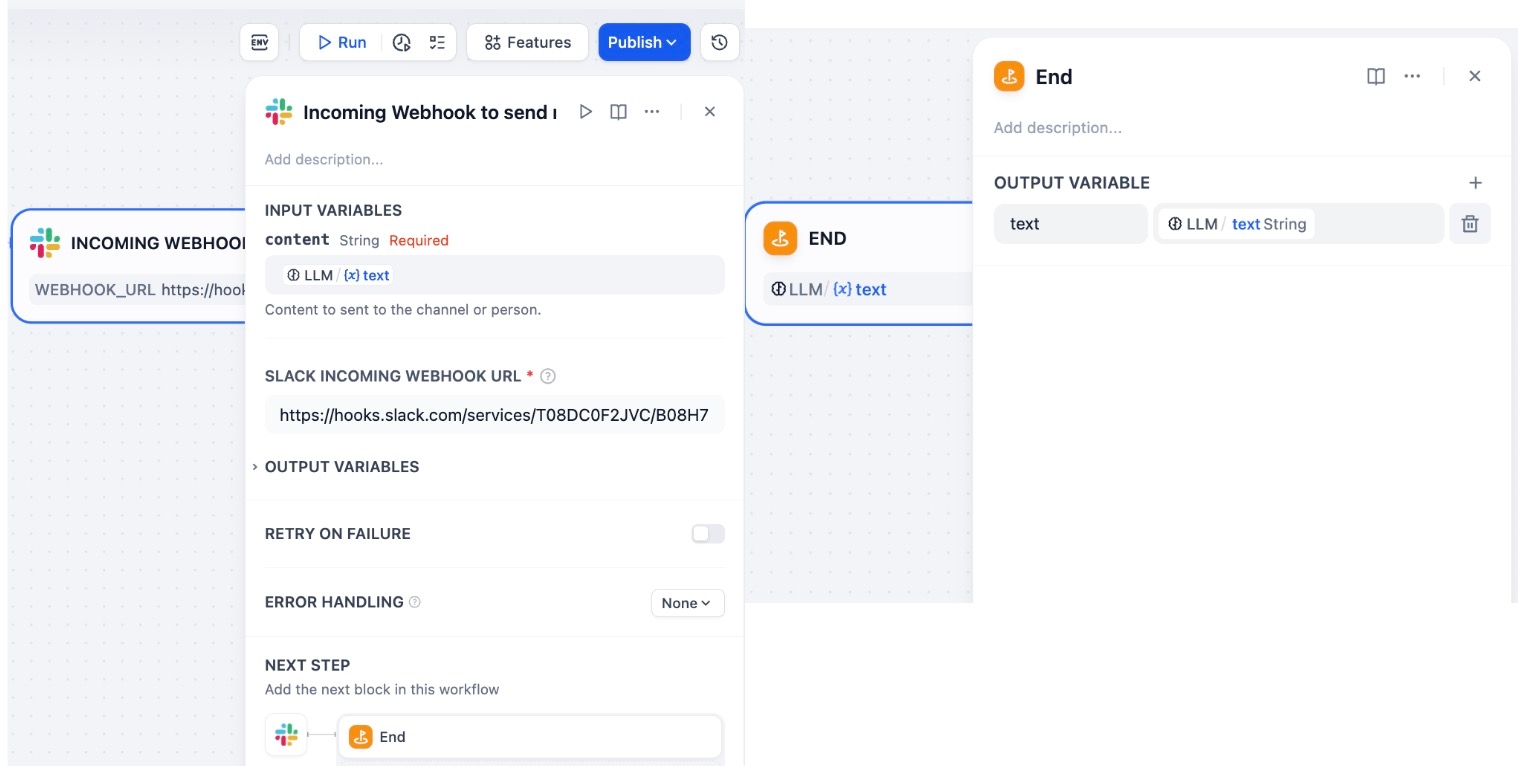
d. Paste the Webhook URL into the Slack Webhook URL field in the Slack node.
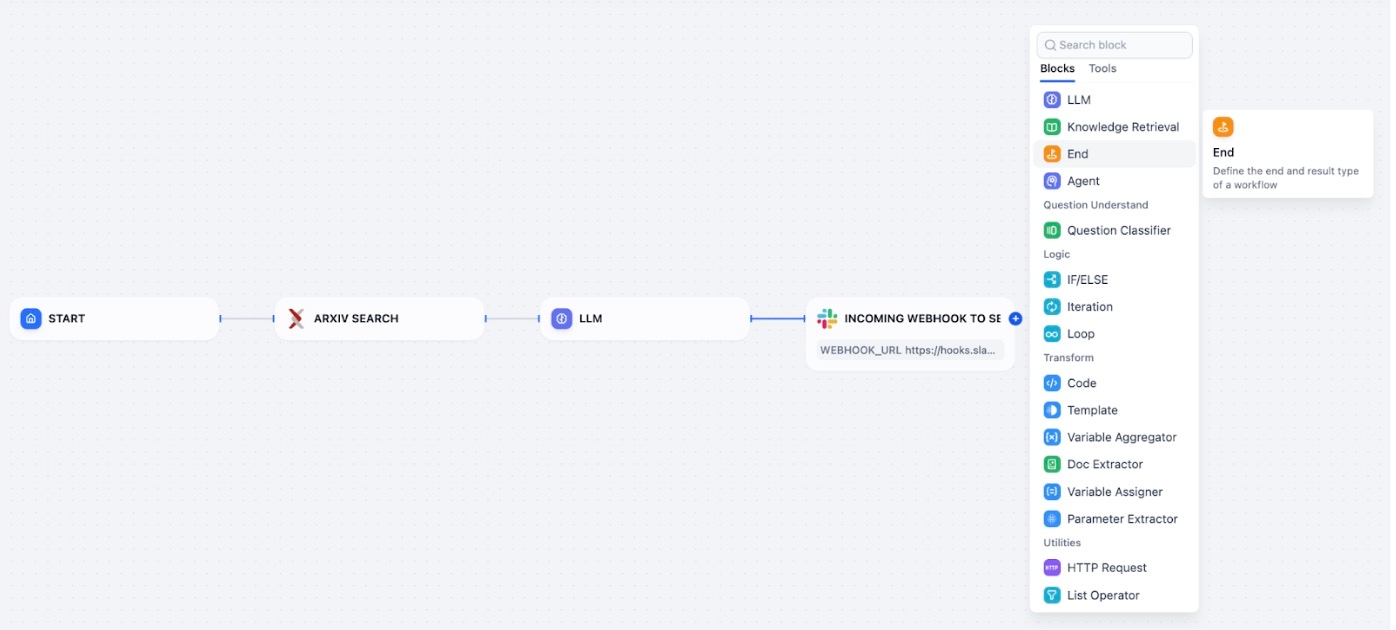
e. After selecting End as the final node in the workflow, ensure that all workflow nodes are properly connected. Next, proceed to configure the parameters for each node.
4.3 Configuring Node Parameters
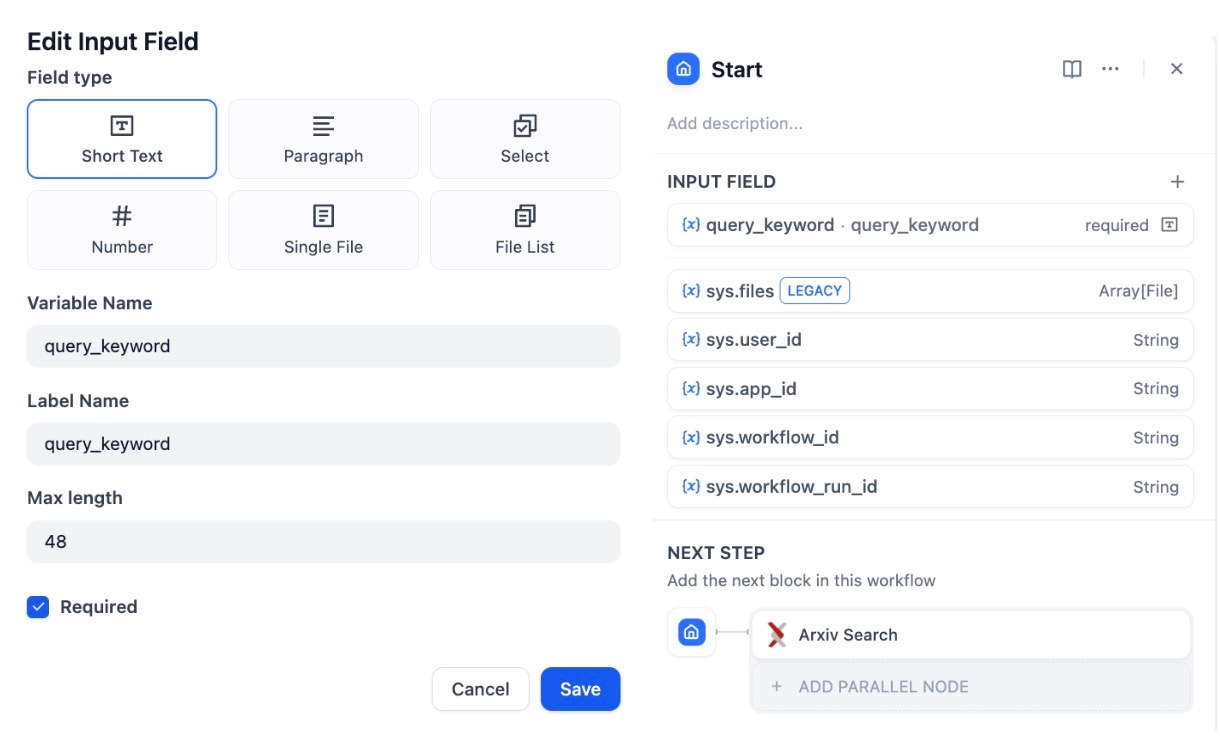
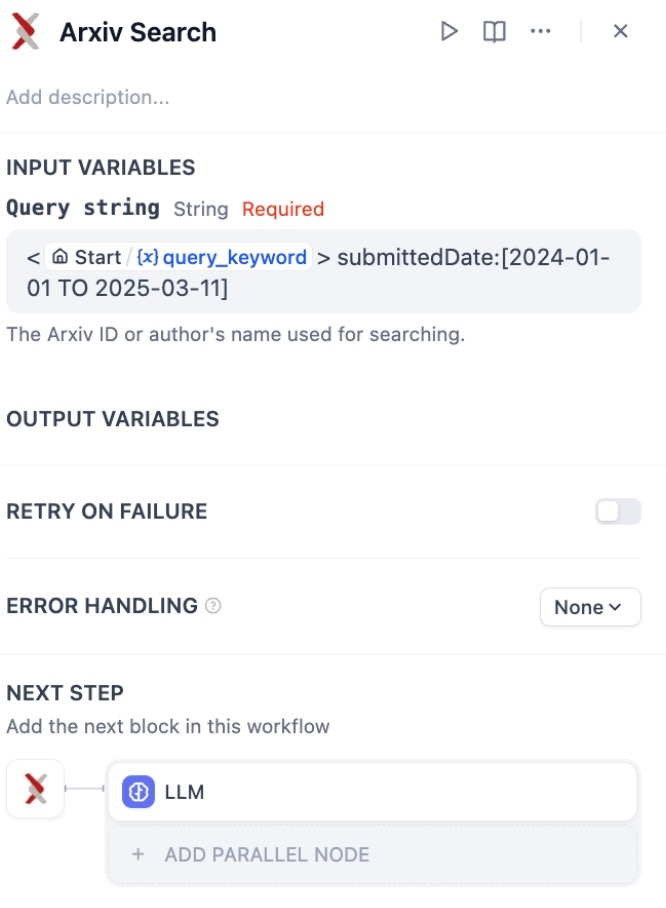
a. Start Node: Set the keyword query parameters.
b. ArXiv Search Node: Add the Query String content (adjustable based on requirements).
c. LLM Node: Select the AI model, add CONTEXT, customize Prompt Engineering in the SYSTEM section (modifiable as needed), and set Context in the USER section.
d. Slack Node: In the Content field, select LLM/Text String.
4.4 Testing and Deployment
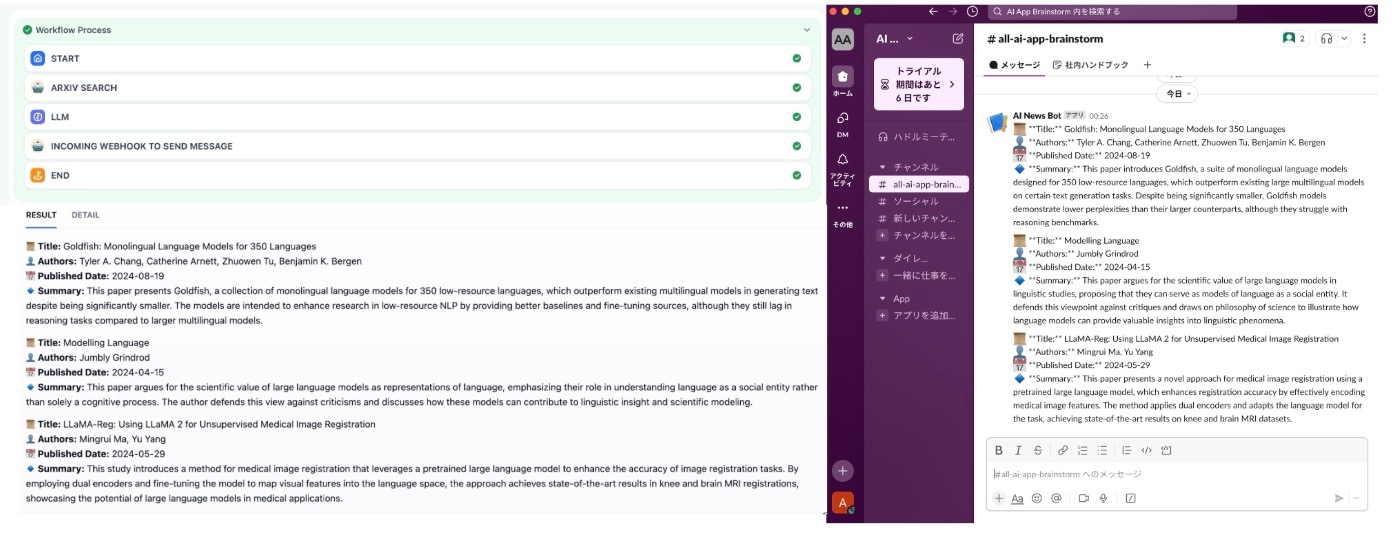
a. Run a test before deployment to ensure the workflow functions correctly. Once verified, click Deploy.

b. If the Dify search results match the Slack notifications, congratulations! Your workflow is successfully running. 🎉
5. Future Optimization Directions
Currently, the AI Thesis Slack Bot primarily focuses on ArXiv paper retrieval and summary delivery. Future improvements could include:
✅ Enhancing Summary Quality: Refining LLM prompts for greater accuracy and relevance. ✅ Building a Searchable Archive: Creating a database to store historical research papers. ✅ Expanding Data Sources: Supporting IEEE, Springer, ACL, and other academic repositories. ✅ Personalized Recommendations: Suggesting relevant papers based on user interests. ✅ Multi-Platform Support: Enabling compatibility with WhatsApp, Teams, WeChat, and more.
6. Conclusion
With the AI Thesis Slack Bot, you can automate academic information retrieval, improving research team productivity. If you're interested in further unlocking its potential, consider integrating Dify with a Realtime API to develop advanced applications, such as real-time paper discussions and AI-powered Q&A, allowing AI to play a greater role in academic collaboration and AI-driven research. 🚀
Last updated