
Extension Plugin
This guide will help you quickly develop an Extension type plugin and understand the basic plugin development process.
Prerequisites
Dify plugin scaffolding tool
Python environment, version ≥ 3.12
For detailed instructions on preparing the plugin development scaffolding tool, please refer to Initializing Development Tools.
Create New Project
In the current path, run the CLI tool to create a new dify plugin project:
./dify-plugin-darwin-arm64 plugin initIf you have renamed the binary file to dify and copied it to the /usr/local/bin path, you can run the following command to create a new plugin project:
dify plugin initFill Plugin Information
Follow the prompts to configure the plugin name, author information, and plugin description. If you're working in a team, you can also enter an organization name as the author.
The plugin name must be 1-128 characters long and can only contain letters, numbers, hyphens, and underscores.

Once filled out, select Python in the Plugin Development Language section.

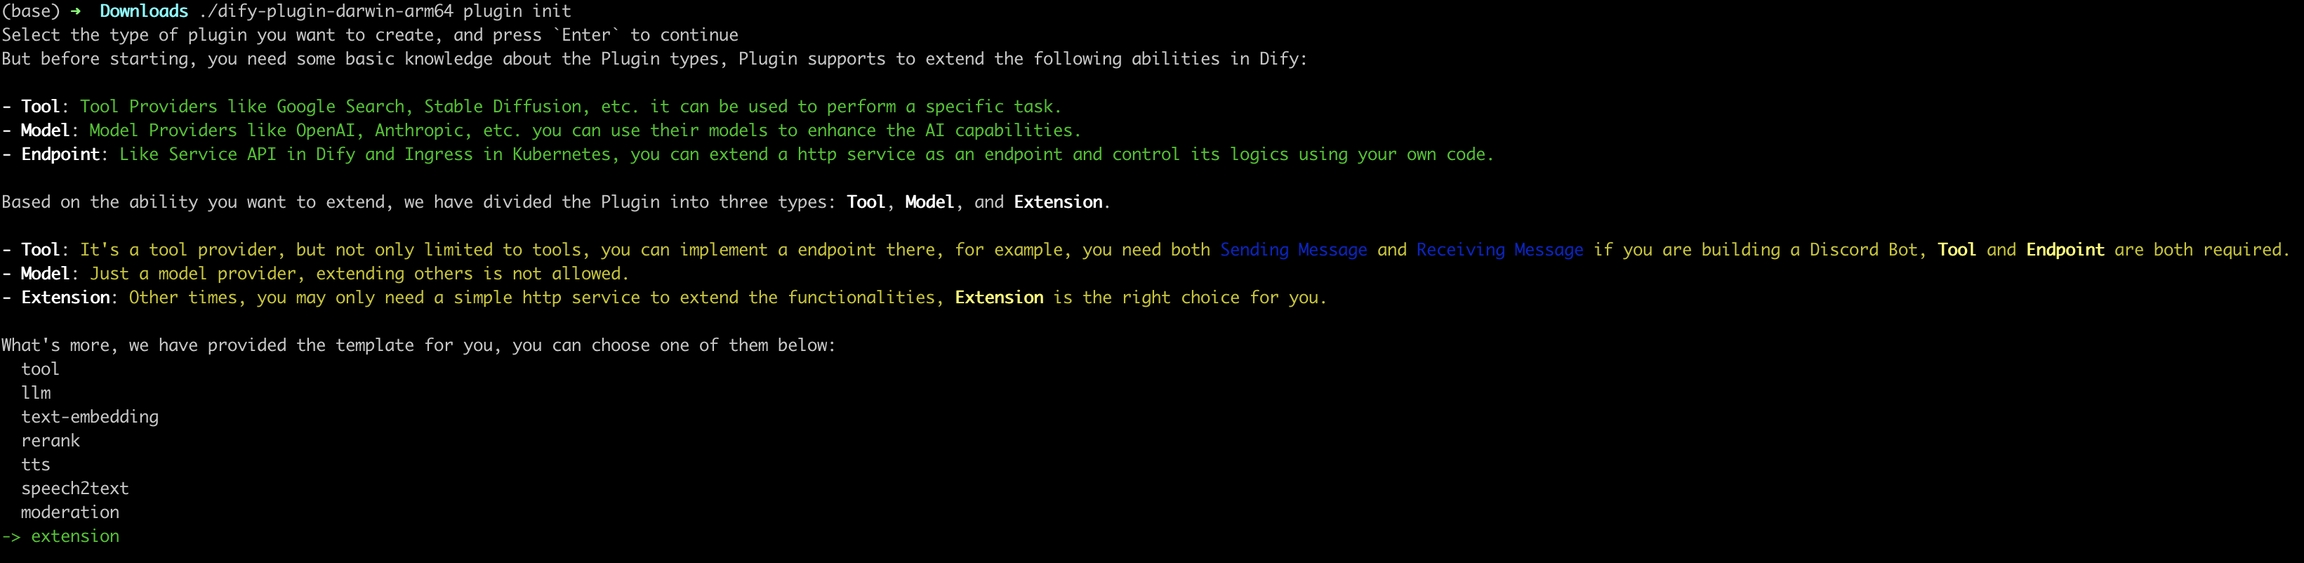
3. Select Plugin Type and Initialize Project Template
All templates in the scaffolding tool provide complete code projects. For demonstration purposes, this guide will use the Extension type plugin template as an example. For developers already familiar with plugin development, templates are not necessary, and you can refer to the interface documentation to complete different types of plugin development.
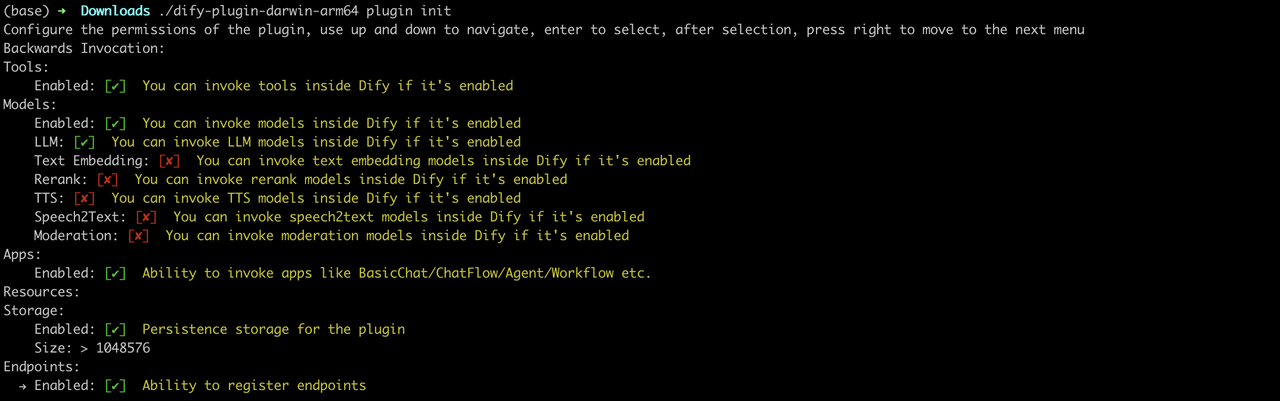
Configure Plugin Permissions
The plugin needs permissions to access the Dify main platform for proper connection. The following permissions need to be granted for this example plugin:
Tools
LLMs
Apps
Enable persistent Storage with default size allocation
Allow Endpoint registration
Use arrow keys in the terminal to select permissions, and use the "Tab" key to grant permissions.
After checking all permission items, press Enter to complete the plugin creation. The system will automatically generate the plugin project code.
The base file structure of the plugin contains the following:
GUIDE.md: A brief tutorial guide that leads you through the plugin writing process.README.md: Basic introduction about the current plugin. You need to fill this file with information about the plugin and its usage instructions._assets: Stores all multimedia files related to the current plugin.endpoints: AnExtensiontype plugin template created following the CLI guidance, this directory contains all implementation code for Endpoint functionality.group: Specifies key types, multilingual settings, and API definition file paths.main.py: The entry file for the entire project.manifest.yaml: The basic configuration file for the entire plugin, containing information such as required permissions and extension type.requirements.txt: Contains Python environment dependencies.
Developing Plugins
1. Define Plugin's Request Endpoint
Edit endpoints/test_plugin.yaml, modifying it according to the following code:
This code defines the plugin's entry path as /neko, with a GET request method. The plugin's functionality implementation code is in the endpoints/test_plugin.py file.
2. Write Plugin Functionality
Plugin functionality: Request the plugin service to output a cat.
Write the plugin's implementation code in the endpoints/test_plugin.py file, referring to the following example code:
The following Python dependencies need to be installed first to run this code:
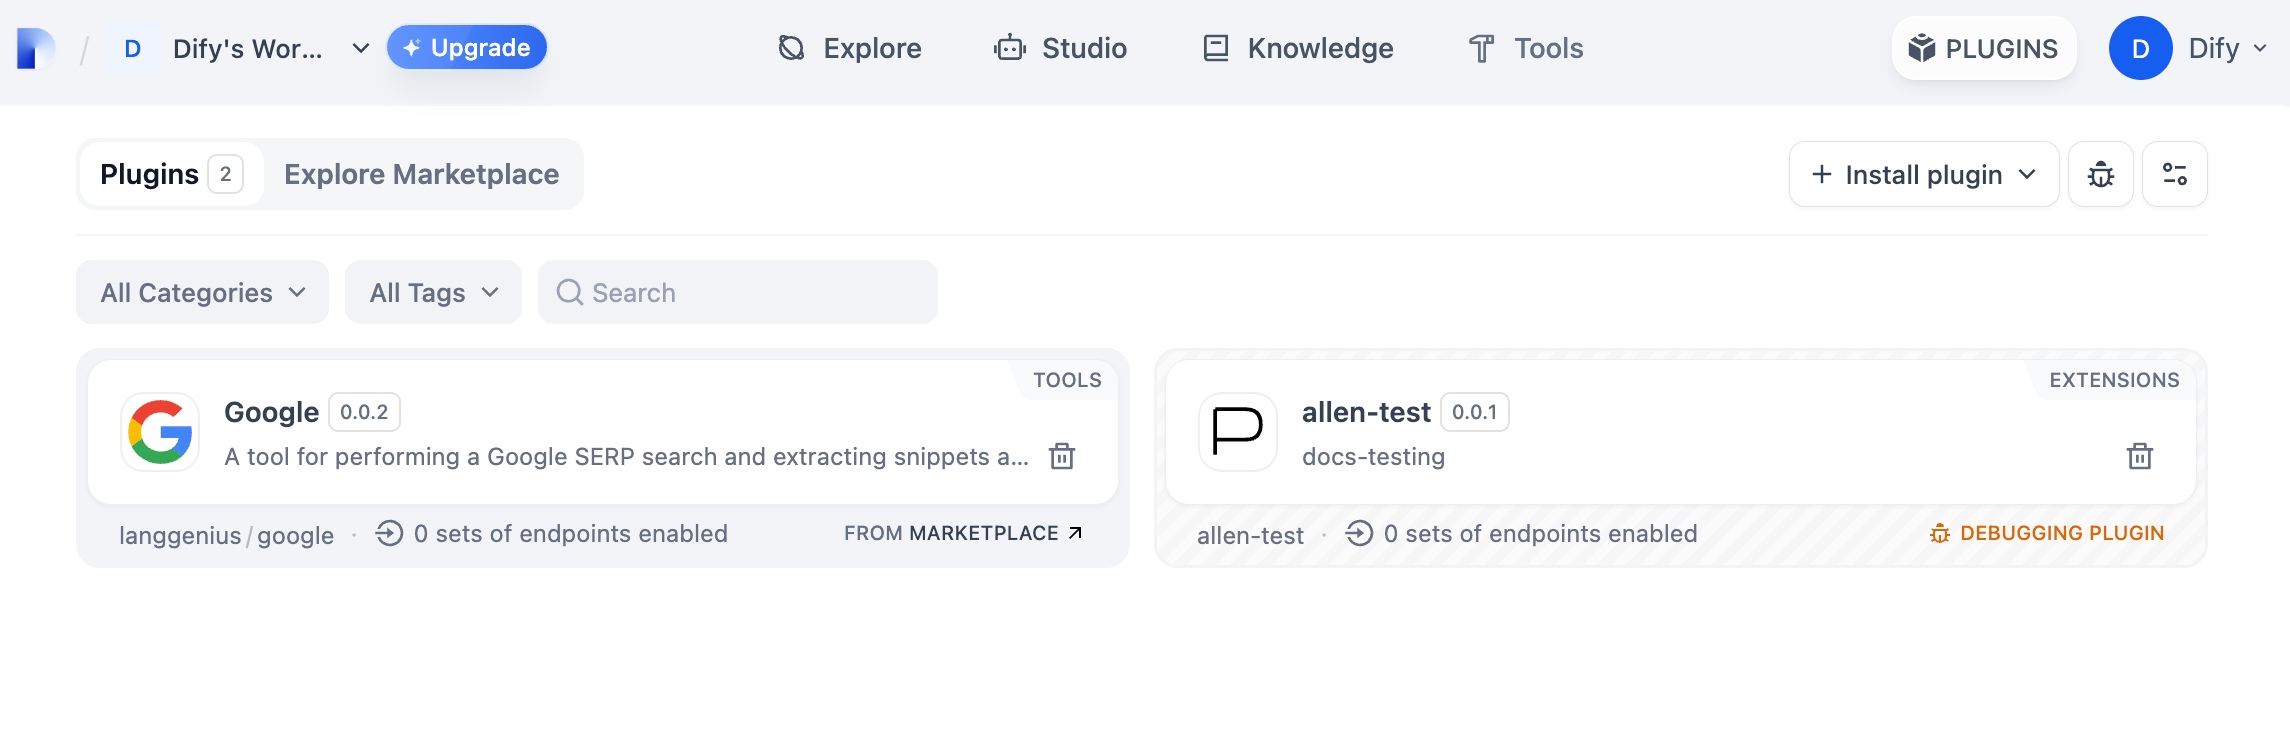
Debugging Plugins
Dify provides remote debugging method, go to "Plugin Management" page to get the debugging key and remote server address.

Go back to the plugin project, copy the .env.example file and rename it to .env. Fill it with the remote server address and debugging key.
The .env file:
Run the python -m main command to launch the plugin. You can see on the plugin page that the plugin has been installed into Workspace. Other team members can also access the plugin.
Packing Plugin
After confirming that the plugin works properly, you can package and name the plugin with the following command line tool. After running it you can find the neko.difypkg file in the current folder, which is the final plugin package.
Congratulations, you have completed the complete development, debugging and packaging process of a tool type plugin!
Publishing Plugins
You can now publish your plugin by uploading it to the Dify Plugins code repository! Before uploading, make sure your plugin follows the plugin release guide. Once approved, the code will be merged into the master branch and automatically live in the Dify Marketplace.
Exploring More
Quick Start:
Plugins Specification Definition Documentaiton:
Best Practices:
Last updated